9.14.2. Create Software RAID
Redundant arrays of independent disks (RAIDs) are constructed from multiple storage devices that are arranged to provide increased performance and — in some configurations — greater fault tolerance.
In earlier versions of Fedora, RAID partitions and devices were created in separate steps. Now, the RAID device is created in one step and disks are added or removed as necessary. One RAID partition is allowed per disk for each device, so the number of disks available to the installer will determine which levels of RAID device are available to you.
To create a RAID device:
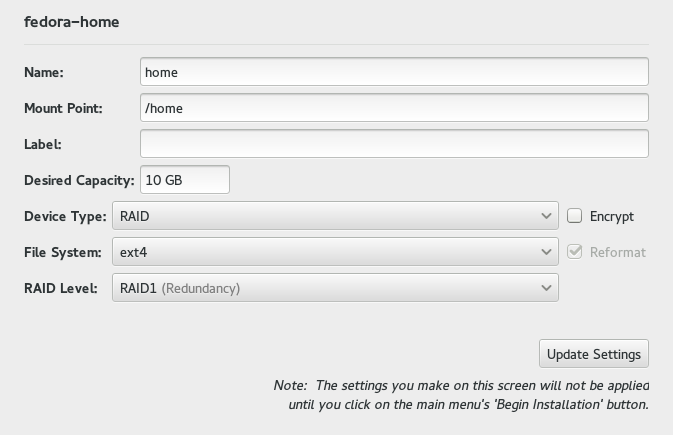
Click the Device Type dropdown menu and select RAID.
Click the RAID Level dropdown menu and select your preferred RAID level:
- RAID0 (Performance)
Distributes data across multiple storage devices. Level 0 RAIDs offer increased performance over standard partitions, and can be used to pool the storage of multiple devices into one large virtual device. Note that Level 0 RAIDS offer no redundancy and that the failure of one device in the array destroys the entire array. RAID 0 requires at least two RAID partitions.
- RAID1 (Redundancy)
Mirrors the data on one storage device onto one or more other storage devices. Additional devices in the array provide increasing levels of redundancy. RAID 1 requires at least two RAID partitions.
- RAID4 (Error Checking)
Distributes data across multiple storage devices, but uses one device in the array to store parity information that safeguards the array in case any device within the array fails. Because all parity information is stored on the one device, access to this device creates a bottleneck in the performance of the array. RAID 4 requires at least three RAID partitions.
- RAID5 (Distributed Error Checking)
Distributes data and parity information across multiple storage devices. Level 5 RAIDs therefore offer the performance advantages of distributing data across multiple devices, but do not share the performance bottleneck of level 4 RAIDs because the parity information is also distributed through the array. RAID 5 requires at least three RAID partitions.
- RAID6 (Redundant Error Checking)
Level 6 RAIDs are similar to level 5 RAIDs, but instead of storing only one set of parity data, they store two sets. RAID 6 requires at least four RAID partitions.
- RAID10 (Performance, Redundancy)
Level 10 RAIDs are nested RAIDs or hybrid RAIDs. Level 10 RAIDs are constructed by distributing data over mirrored sets of storage devices. For example, a level 10 RAID constructed from four RAID partitions consists of two pairs of partitions in which one partition mirrors the other. Data is then distributed across both pairs of storage devices, as in a level 0 RAID. RAID 10 requires at least four RAID partitions.
Keeping the partition selected in the left-hand pane, select the configuration button below the pane to open the Configure Mount Point dialog. Select which disks will be included in the RAID device and click Select.
If fewer disks are included than the specified RAID level needs, a yellow notification bar at the bottom of the screen will inform you that Device reconfiguration failed. Clicking this warning prompts a dialog informing you how many disks are required.
Click Update Settings to save your changes, and either continue with another partition or click Done to return to the Installation Summary Menu.