Installing the samba-client package
root:
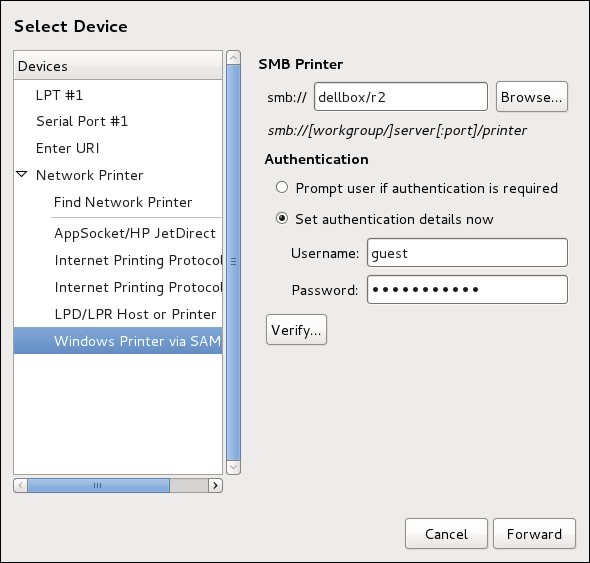
yum install samba-clientNew Printer dialog (refer to Section 12.3.2, “Starting Printer Setup”).
dellbox and the printer share is r2.
guest for Windows servers, or nobody for Samba servers.
Be careful when choosing a password