2.2.2. Configuring New and Editing Existing Connections
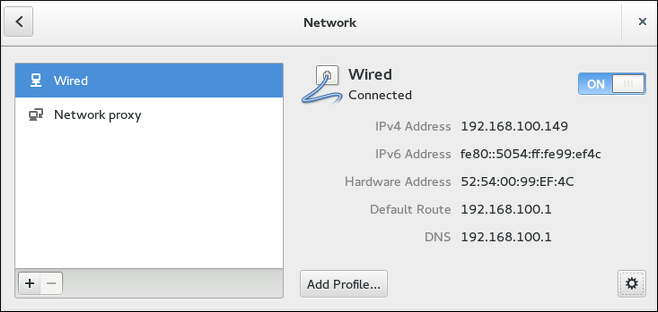
The Network settings window shows the connection status, its type and interface, its IP address and routing details, and so on.
The
Network settings window has a menu on the left-hand side showing the available network devices or interfaces. This includes software interfaces such as for VLANs, bridges, bonds, and teams. On the right-hand side, the
connection profiles are shown for the selected network device or interface. A profile is a named collection of settings that can be applied to an interface. Below that is a plus and a minus button for adding and deleting new network connections, and on the right a gear wheel icon will appear for editing the connection details of the selected network device or VPN connection. To add a new connection, click the plus symbol to open the
Add Network Connection window and proceed to
Section 2.2.2, “Configuring a New Connection”.
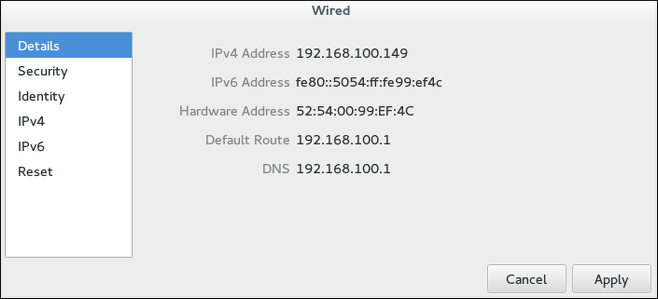
Editing an Existing Connection
Clicking on the gear wheel icon of an existing connection profile in the Network settings window opens the Network details window, from where you can perform most network configuration tasks such as IP addressing, DNS, and routing configuration.
Configuring a New Connection
In the Network settings window, click the plus sign below the menu to open the Add Network Connection window. This displays a list of connection types that can be added.
Then, to configure: