Product SiteDocumentation Site

Publican 4.0

Users' Guide

Publishing books, articles, papers and multi-volume sets with DocBook XML

Team Publican

Don Domingo

Red Hat Engineering Content Services

Zac Dover

Red Hat Engineering Content Services

Sven Dowdeit

Debian and Docker installation instructions 

Norman Dunbar

OpenSUSE installation instructions 

Brian Forté

Red Hat Engineering Content Services

Rüdiger Landmann

Red Hat Engineering Content Services

Rebecca Newton

Red Hat Engineering Content Services

Joshua Oakes

Red Hat Engineering Content Services

Joshua Wulf

Red Hat Engineering Content Services

Jeff Fearn

Extensive review, rough drafts, persistent annoyances. 
Red Hat, Engineering Operations Logo

Josef Hruška

Checking the Czech examples in Entities and translation 
Fedora Localization Project

Legal Notice

Copyright © 2013 Red Hat, Inc This material may only be distributed subject to the terms and conditions set forth in the GNU Free Documentation License (GFDL), V1.2 or later (the latest version is presently available at http://www.gnu.org/licenses/fdl.txt).

Abstract

This book will help you install Publican. It also provides instructions for using Publican to create and publish DocBook XML-based books, articles and book sets. This guide assumes that you are already familiar with DocBook XML.
Preface
1. Document Conventions
1.1. Typographic Conventions
1.2. Pull-quote Conventions
1.3. Notes and Warnings
2. We Need Feedback!
Introduction
1. Installing Publican
1.1. Linux operating systems
1.1.1. Fedora
1.1.2. Red Hat Enterprise Linux 5
1.1.3. Ubuntu
1.1.4. Debian
1.1.5. OpenSuse 12
1.1.6. Docker container
1.2. Windows operating systems
1.3. OSX Lion
2. Publican defaults
2.1. Publican default examples
3. Publican commands
3.1. Command options
3.2. Actions
4. Creating a document
4.1. Files in the book directory
4.1.1. The publican.cfg file
4.1.2. Book_Info.xml
4.1.3. Author_Group.xml
4.1.4. Chapter.xml
4.1.5. Doc_Name.xml
4.1.6. Doc_Name.ent
4.1.7. Revision_History.xml
4.2. Adding images
4.3. Adding code samples
4.4. Adding files
4.5. Renaming a document
4.6. Translating a document
4.6.1. Translation Author Group
4.6.2. Translating Indexes and Glossaries
4.7. Building a document
4.7.1. Building a document without validation
4.8. Packaging a document
4.8.1. Types of RPM packages
4.8.2. The $ publican package command
4.9. Conditional tagging
4.9.1. Conditional tagging and translation
4.10. Pre-release software and draft documentation
4.10.1. Denoting pre-release software
4.10.2. Denoting draft documentation
4.10.3. Denoting draft documentation of pre-release software
5. Branding
5.1. Installing a brand
5.2. Creating a brand
5.3. Files in the brand directory
5.3.1. The publican.cfg file
5.3.2. The defaults.cfg file and overrides.cfg file
5.3.3. publican-brand.spec file
5.3.4. README
5.3.5. COPYING
5.3.6. Common Content for the brand
5.3.7. The css subdirectory
5.3.8. The images subdirectory
5.3.9. The brand_dir option
5.4. Packaging a brand
6. Using sets
6.1. Stand-alone sets
6.2. Distributed sets
7. Building a website with Publican
7.1. Building a website manually
7.1.1. Creating the website structure
7.1.2. Creating, installing, and updating the home page
7.1.3. Creating, installing, and updating product pages and version pages
7.1.4. Installing, updating, and removing documents
7.2. Building a website using RPM packages
7.2.1. Creating the website structure
7.2.2. Creating, installing, and updating the home page
7.2.3. Creating, installing, and updating product pages and version pages
7.2.4. Installing, updating and removing documents
7.3. Submitting Your Sitemap to Search Engines
7.3.1. Submitting Your Sitemap to Google.
7.3.2. Submitting Your Sitemap to Bing.
8. Import book into Drupal
8.1. How to build a CSV file for Drupal import
8.2. The publican.cfg file
8.3. Drupal Import Guide
8.3.1. How to add a menu block
8.3.2. Setting up Node import
8.3.3. How to import book
8.3.4. How to update book
9. Frequently Asked Questions
A. Disallowed elements and attributes
A.1. Disallowed elements
A.2. Disallowed attributes
B. Command summary
B.1. Internal commands
C. publican.cfg parameters
D. Alphabetical index of publican.cfg parameters
E. Contents of the website dump file
E.1. Computing URLs from the dump file
F. Sample spec file for desktop menu package
G. Language codes
H. Revision History

Preface

1. Document Conventions

This manual uses several conventions to highlight certain words and phrases and draw attention to specific pieces of information.

1.1. Typographic Conventions

Four typographic conventions are used to call attention to specific words and phrases. These conventions, and the circumstances they apply to, are as follows.
Mono-spaced Bold
Used to highlight system input, including shell commands, file names and paths. Also used to highlight keys and key combinations. For example:
To see the contents of the file my_next_bestselling_novel in your current working directory, enter the cat my_next_bestselling_novel command at the shell prompt and press Enter to execute the command.
The above includes a file name, a shell command and a key, all presented in mono-spaced bold and all distinguishable thanks to context.
Key combinations can be distinguished from an individual key by the plus sign that connects each part of a key combination. For example:
Press Enter to execute the command.
Press Ctrl+Alt+F2 to switch to a virtual terminal.
The first example highlights a particular key to press. The second example highlights a key combination: a set of three keys pressed simultaneously.
If source code is discussed, class names, methods, functions, variable names and returned values mentioned within a paragraph will be presented as above, in mono-spaced bold. For example:
File-related classes include filesystem for file systems, file for files, and dir for directories. Each class has its own associated set of permissions.
Proportional Bold
This denotes words or phrases encountered on a system, including application names; dialog-box text; labeled buttons; check-box and radio-button labels; menu titles and submenu titles. For example:
Choose SystemPreferencesMouse from the main menu bar to launch Mouse Preferences. In the Buttons tab, select the Left-handed mouse check box and click Close to switch the primary mouse button from the left to the right (making the mouse suitable for use in the left hand).
To insert a special character into a gedit file, choose ApplicationsAccessoriesCharacter Map from the main menu bar. Next, choose SearchFind… from the Character Map menu bar, type the name of the character in the Search field and click Next. The character you sought will be highlighted in the Character Table. Double-click this highlighted character to place it in the Text to copy field and then click the Copy button. Now switch back to your document and choose EditPaste from the gedit menu bar.
The above text includes application names; system-wide menu names and items; application-specific menu names; and buttons and text found within a GUI interface, all presented in proportional bold and all distinguishable by context.
Mono-spaced Bold Italic or Proportional Bold Italic
Whether mono-spaced bold or proportional bold, the addition of italics indicates replaceable or variable text. Italics denotes text you do not input literally or displayed text that changes depending on circumstance. For example:
To connect to a remote machine using ssh, type ssh username@domain.name at a shell prompt. If the remote machine is example.com and your username on that machine is john, type ssh john@example.com.
The mount -o remount file-system command remounts the named file system. For example, to remount the /home file system, the command is mount -o remount /home.
To see the version of a currently installed package, use the rpm -q package command. It will return a result as follows: package-version-release.
Note the words in bold italics above: username, domain.name, file-system, package, version and release. Each word is a placeholder, either for text you enter when issuing a command or for text displayed by the system.
Aside from standard usage for presenting the title of a work, italics denotes the first use of a new and important term. For example:
Publican is a DocBook publishing system.

1.2. Pull-quote Conventions

Terminal output and source code listings are set off visually from the surrounding text.
Output sent to a terminal is set in mono-spaced roman and presented thus:
books        Desktop   documentation  drafts  mss    photos   stuff  svn
books_tests  Desktop1  downloads      images  notes  scripts  svgs
Source-code listings are also set in mono-spaced roman but add syntax highlighting as follows:
package org.jboss.book.jca.ex1;

import javax.naming.InitialContext;

public class ExClient
{
   public static void main(String args[]) 
       throws Exception
   {
      InitialContext iniCtx = new InitialContext();
      Object         ref    = iniCtx.lookup("EchoBean");
      EchoHome       home   = (EchoHome) ref;
      Echo           echo   = home.create();

      System.out.println("Created Echo");

      System.out.println("Echo.echo('Hello') = " + echo.echo("Hello"));
   }
}

1.3. Notes and Warnings

Finally, we use three visual styles to draw attention to information that might otherwise be overlooked.

Note

Notes are tips, shortcuts or alternative approaches to the task at hand. Ignoring a note should have no negative consequences, but you might miss out on a trick that makes your life easier.

Important

Important boxes detail things that are easily missed: configuration changes that only apply to the current session, or services that need restarting before an update will apply. Ignoring a box labeled “Important” will not cause data loss but may cause irritation and frustration.

Warning

Warnings should not be ignored. Ignoring warnings will most likely cause data loss.

2. We Need Feedback!

If you find a typographical error in this manual, or if you have thought of a way to make this manual better, we would love to hear from you! Please submit a report in Bugzilla: https://bugzilla.redhat.com/enter_bug.cgi?product=Publican&component=Publican20Users20Guide.
If you have a suggestion for improving the documentation, try to be as specific as possible when describing it. If you have found an error, please include the section number and some of the surrounding text so we can find it easily.

Introduction

Publican is a tool for publishing material authored in DocBook XML. This guide explains how to create and build books and articles using Publican. It is not a general DocBook XML tutorial; refer to DocBook: The Definitive Guide by Norman Walsh and Leonard Muellner, available at http://www.docbook.org/tdg/en/html/docbook.html for more general help with DocBook XML.
Publican began life as an internal tool used by Red Hat's Documentation Group (now known as Engineering Content Services). On occasion, this legacy is visible.
Design
Publican is a publication system, not just a DocBook processing tool. As well as ensuring your DocBook XML is valid, Publican works to ensure your XML is up to publishable standard.
The branding functionality allows you to create your own presentation rules and look, overriding many parts of the default style to meet your publishing needs. Choices executed in code, however, are not changeable.
Entities, for example, can be validly defined in any XML file. However, to ensure the DTD declaration is present, valid and standardized, Publican rewrites the declaration in every XML file before it builds a book or article. Consequently, all entities declared in all XML files are lost. Publican, therefore, requires you define entities in the Doc_Name.ent file (refer to Section 4.1.6, “Doc_Name.ent”).
As publishing workflows grow, unrestrained entity definition leads to entity duplication and other practices that cause maintenance difficulties. Consolidating entity definitions in a single, predictable place alleviates these maintenance issues and helps the automation of the build process stay robust.
Entities also present an essentially insurmountable obstacle to quality translation (refer to Section 4.1.6.1, “Entities and translation”). Consequently, while we are not reducing the Doc_Name.ent file's functionality, we are no longer considering requests to add functionality or features associated with entity use.

Chapter 1. Installing Publican

1.1. Linux operating systems

Important — Availability in repositories

The procedures documented in this section assume that Publican and its various dependencies are available in repositories to which your system has access.

1.1.1. Fedora

  1. Open a terminal.
  2. Change to the root user: su -
  3. Run the following command to install the publican package and the publican-doc documentation package:
    $  yum install publican publican-doc
Several brand packages are available for use with Publican. Run the following command as the root user to install packages for building branded books:
$  yum install publican-brand
Replace brand with, for example, redhat, fedora, jboss, ovirt, or gimp. Refer to Chapter 5, Branding for more information on branding.

1.1.2. Red Hat Enterprise Linux 5

Important — Unsupported software

Publican is not part of the Red Hat Enterprise Linux distribution. Therefore, Red Hat does not offer support for Publican.

Important — Dependencies available only internally to Red Hat

Installing Publican on Red Hat Enterprise Linux 5 requires a number of dependencies that are presently available only in yum repositories that are internal to Red Hat.
  1. Open a terminal.
  2. Change to the root user: su -
  3. Run the following command to install the publican package and the publican-doc documentation package:
    $  yum install publican publican-doc
Several brand packages are available for use with Publican. Run the following command as the root user to install packages for building branded books:
$  yum install publican-brand
Replace brand with, for example, redhat, fedora, jboss, ovirt, or gimp. Refer to Chapter 5, Branding for more information on branding.

1.1.3. Ubuntu

  1. Open a terminal.
  2. Run the following command to install the publican package:
    $ sudo apt-get install publican

1.1.4. Debian

This procedure will install the publican version that is in your default Debian repository. It will also install a large number of packages that publican depends on, like Java, XML and image processing libraries and many ancillary Perl modules.
  1. Open a terminal.
  2. Change to the root user: su -
  3. Run the following command to install the publican package:
    $ apt-get install publican
  4. Run the following command to determine what version of publican is installed:
    $ publican -v
    version=2.8

Important — Installing more recent packages using Apt-Pinning

If you need a more recent release of publican than installed by the procedure above, you can query if there other versions available: http://packages.debian.org/publican.
To date, there has not been any backport (http://backports.debian.org/Instructions/) available for publican, so we need to use Apt Pinning https://wiki.debian.org/AptPreferences
Alternatively, you could run Debian testing or unstable in a virtual machine, chroot or linux container.
Assuming there is a more recent version of publican available in the testing repository, and that you are running the current stable, then you can upgrade by:
  1. Open a terminal.
  2. Change to the root user: su -
  3. Open your /etc/apt/sources.list file in a text editor. For example, to edit the file in gedit run:
    $ gedit /etc/apt/sources.list
  4. Add the following line to the end of the file:
    #### testing  #########
    deb http://ftp.us.debian.org/debian testing main contrib non-free
  5. Save the file and close the text editor.
  6. Open (or create) your /etc/apt/preferences file in a text editor. For example, to edit the file in gedit run:
    $ gedit /etc/apt/preferences
  7. Add the following line to the end of the file:
    Package: *
    Pin: release a=stable
    Pin-Priority: 900
    
    Package: *
    Pin: release a=testing
    Pin-Priority: 400
    
    Package: *
    Pin: release o=Debian
    Pin-Priority: -10
  8. Save the file and close the text editor.
  9. Run the following command to update the list of packages available to your computer:
    $ apt-get update
  10. Run the following command to try to install the testing version of publican package, and any updated dependancies:
    $ apt-get -t testing install publican
Because Apt Pinning mixes 2 different debian streams in an un-tested way, incompatibilities may happen. For example, you may get a warning like:
$ publican
Warning: program compiled against libxml 209 using older 208
Warning: XML::LibXML compiled against libxml2 20901, but runtime libxml2 is older 20800
Warning: program compiled against libxml 209 using older 208
Warning: XML::LibXSLT compiled against libxslt 10128, but runtime libxslt is older 10126
Can't open publican: No such file or directory at /usr/bin/publican line 430.
Which indicates that you might need to upgrade libxml2 and libxslt to the testing repository version too. This can be done by searching to find the likely library:
  1. $ apt-get search libxslt
    gambas3-gb-xml-xslt - Gambas XSLT component
    libidzebra-2.0-mod-alvis - IDZebra filter alvis (XSLT filter for XML)
    libidzebra-2.0-mod-dom - IDZebra filter 'dom' (XML DOM internal document model with XSLT)
    libical-parser-html-perl - generates HTML calendars from iCalendars
    libxsltc-java - XSL Transformations (XSLT) compiler from Xalan-Java
    libxml-filter-xslt-perl - Perl module for XSLT as a SAX Filter
    libxml-libxslt-perl - Perl interface to the GNOME libxslt library
    libxslt1-dbg - XSLT 1.0 processing library - debugging symbols
    libxslt1-dev - XSLT 1.0 processing library - development kit
    libxslt1.1 - XSLT 1.0 processing library - runtime library
    python-libxslt1 - Python bindings for libxslt1
    python-libxslt1-dbg - Python bindings for libxslt1 (debug extension)
    python-lxml - pythonic binding for the libxml2 and libxslt libraries
    python-lxml-dbg - pythonic binding for the libxml2 and libxslt libraries (debug extension)
    python-lxml-doc - pythonic binding for the libxml2 and libxslt libraries (documentation)
    python3-lxml - pythonic binding for the libxml2 and libxslt libraries
    python3-lxml-dbg - pythonic binding for the libxml2 and libxslt libraries (debug extension)
    php5-xsl - XSL module for php5
    libsp-gxmlcpp-dev - S+P C++ wrapper for Gnome libxml2/libxslt
    libsp-gxmlcpp1 - S+P C++ wrapper for Gnome libxml2/libxslt
    swfmill - xml2swf and swf2xml processor
    libxslthl-java - XSLT syntax highlighting
    (and the same again for libxml2)
  2. And then upgrading those packages to testing.
    $ apt-get -t testing upgrade libxml2 libxslt1.1

1.1.5. OpenSuse 12

Publican has not been usable on OpenSuse up until release 12.1. Certain dependencies were missing and could not be found in any known OpenSuse repository. This is not the case with OpenSuse 12.1 as all dependencies can now be found and installed.
The following instructions describe installing Publican from source because, as yet, there is no Publican RPM for OpenSuse 12.1. The version of Publican is 2.9 taken directly from the source repository - previous versions have not been tested but may work.
At the time of writing, Publican 2.8 was the release version and work on 2.9 was still ongoing. For this reason the following instructions are subject to change.
The OpenSuse install was a default one with the following software categories added at install time:
  • Technical Writing - for the Docbook tools etc.
  • Perl Development
  • Web and LAMP Server
The system used had KDE installed which shouldn't make a difference. The following KDE specific categories were also installed:
  • KDE Development
  • Desktop Effects
Finally, the entire Games category was removed.
After OpenSuse had completed installing, and all current updates had been applied, the following steps were followed to install Publican.
  1. Open a terminal session.
  2. Install the dependencies that are available from various online repositories - many of these are not present in the installation DVD repository.
    $ sudo zypper install perl-Config-Simple perl-DateTime \ perl-DateTime-Format-DateParse perl-DBD-SQLite perl-DBI \ perl-File-Find-Rule perl-File-Which perl-HTML-Format \ perl-Locale-MakeText-Gettext perl-Template-Toolkit \ perl-Test-Deep perl-Test-Pod perl-XML-LibXSLT \ perl-YAML liberation-fonts

    Note

    Liberation-fonts is most likely already installed, but it is required. Zypper will not reinstall it if it is already present.
  3. Use cpan to install the remaining dependencies which cannot be installed by zypper:
    $ sudo sh cpan File::pushd File::Copy::Recursive Locale::PO pp \ Syntax::Highlight::Engine::Kate XML::TreeBuilder exit 
  4. Download the source code:
    $ cd ~ mkdir -p SourceCode/publican cd SourceCode/publican svn checkout http://svn.fedorahosted.org/svn/publican/branches/publican-2x ./ 
  5. Build the Publican build script:
    $ perl Build.PL 
    If all the dependencies are installed, you should see the following:
    WARNING: the following files are missing in your kit:
     META.yml
     Please inform the author.
    
    Created MYMETA.yml and MYMETA.json
    Creating new 'Build' script for 'Publican' version '2.9'
    If not, then use cpan (as root) to install the missing modules and run the build again. Replace any forward slashes '/' by a double colon '::' and make sure you use exactly the same letter case, for example: If File/pushd.pm is reported as missing, you would use this to install it:
    $ sudo sh cpan File::pushd exit 
    Assuming all went well, the Build.PL script will have created a new script named Build which we will use to create, test and install Publican 2.9.
    $ ./Build 
    There will be lots of text scrolling up the screen for a few minutes, you should eventually see the following:
    DEBUG: Publican::Builder: end of build
  6. Test the build:
    $ ./Build test 
    Again, lots of scrolling text at the end of which you may see the following:
    Test Summary Report
    -------------------
    t/910.publican.Users_Guide.t (Wstat: 256 Tests: 5 Failed: 1)
     Failed test: 5
     Non-zero exit status: 1
    t/pod-coverage.t (Wstat: 256 Tests: 9 Failed: 1)
     Failed test: 7
     Non-zero exit status: 1
    Files=10, Tests=68, 420 wallclock secs ( 0.31 usr 0.17 sys + 246.87 cusr 18.73 csys = 266.08 CPU)
    Result: FAIL
    Failed 2/10 test programs. 2/68 subtests failed.
    Don't worry. This is because of a missing wkhtmltopdf utility which is undergoing tests to be added to Publican in the future to replace Apache FOP as the pdf generation tool of choice. If Publican finds wkhtmltopdf it will use it, otherwise it uses FOP.
    Unfortunately, at the time of writing, because OpenSuse names one of the dependencies of wkhtmltopdf differently (ghostscript-fonts-std as opposed to ghostscript-fonts) wkhtmltopdf will not run even if force installed with no dependency checks.
  7. Install wkhtmltopdf.
    This step is optional. At the time of writing wkhtmltopdf did not work on OpenSuse 12.1 However, as the problems which prevent it working correctly from Publican may have been resolved, the following instructions give details on installing wkhtmltopdf.

    Note

    If you intend to create indices in your generated pdf documents, you are advised to use Apache FOP rather than wkhtmltopdf. With FOP you get actual page numbers which is better in a printed document.
    $ JFEARN=http://jfearn.fedorapeople.org/wkhtmltopdf/f15 MYSYSTEM=i686 ## For 64bit system use MYSYSTEM=x86_64 instead. wget $JFEARN/$MYSYSTEM/wkhtmltopdf-qt-4.7.1-1.git20110804.fc15.i686.rpm wget $JFEARN/$MYSYSTEM/wkhtmltopdf-0.10.0_rc2-1.fc15.i686.rpm 

    Note

    If you use a 64 bit system, make sure to set MYSYSTEM appropriately.
    Once downloaded, install both rpms as follows:
    $ sudo sh rpm -ivh wkhtmltopdf-qt* rpm -ivh --nodeps wkhtmltopdf-0* exit 
    You have to use the option to ignore dependencies on the latter rpm due to the ghostscript-fonts problem described above.
  8. Install Publican.
    The final stage is to install Publican, even though the testing stage had a couple of sub-tests which failed.
    $ sudo sh ./Build test exit 
    The following steps are optional but it's a good idea to test that everything is working before you spend time on your own documents.
  9. Test the installed Publican build:
    $ publican create --type=book --product=testing --version=1.2.3 --name=TestPublican
      Processing file en-US/Author_Group.xml -> en-US/Author_Group.xml
      Processing file en-US/Book_Info.xml -> en-US/Book_Info.xml
      Processing file en-US/Chapter.xml -> en-US/Chapter.xml
      Processing file en-US/Preface.xml -> en-US/Preface.xml
      Processing file en-US/Revision_History.xml -> en-US/Revision_History.xml
      Processing file en-US/TestPublican.xml -> en-US/TestPublican.xml
    
    $ cd TestPublican/ publican build --lang=all --formats=html,html-single,html-desktop,txt,pdf,epub

    Note

    At the time of writing, creating epubs with Publican 2.9 on OpenSuse gave the following error:
    runtime error: file /usr/share/publican/xsl/epub.xsl element choose
    Variable 'epub.embedded.fonts' has not been declared.
     at /usr/lib/perl5/site_perl/5.14.2/Publican/Builder.pm line 915
    No epub file was created. The individual working files were however, and can be built into an epub book using Sigil, if desired.
    Using the Dolphin file manager, you can browse to SourceCode/TestPublican/tmp/en-US/ and view the various output formats that you find there.

1.1.6. Docker container

Note

This installation procedure assumes you have already installed a working docker (see http://docker.io) environment.
Docker is a lightweight Jail (currently using LXC) that allows you to install and run publican without installing your main Linux installation with all its dependencies.
  1. Open a terminal.
  2. Download and install the svendowideit/publican container from https://index.docker.io/u/svendowideit/publican/:
    $ docker pull svendowideit/publican
    This will take some time, as it downloads a fedora based container, and then the dependencies needed for publican
  3. Add a publican bash alias to simplify your usage:
    $ echo 'alias publican="docker run -t -i -v $(pwd):/mnt svendowideit/publican"' >> ~/.bashrc
    This alias assumes that you are running publican in the documentation root directory (the one with the publican.cfg file in it.
  4. now you can use publican as per the documentation:
    $ publican --version 
    version=3.2.1

1.2. Windows operating systems

  1. Download the Publican installer from https://fedorahosted.org/releases/p/u/publican/.
  2. Browse to the folder to which you downloaded Publican-Installer-version.exe.
  3. Double-click the Publican-Installer-version.exe file.
  4. The installer presents you with a series of license agreements. All of the files that constitute a Publican installation are available under a free license. However, because different licenses are more suitable for certain parts of Publican than others, the Publican files are not all available under the same free license. Each license grants you a different set of rights and responsibilities when you copy or modify the files in your Publican installation. We chose this combination of licenses to allow you to use Publican as freely as possible and to allow you to choose whatever license you prefer for the documents that you publish with Publican.
    Read the terms of the various license agreements. If you agree to their terms, click I Agree on each of them, otherwise, click Cancel.
  5. The installer offers to install several components: Publican itself (labeled Main in the installer window), a number of brands (including RedHat, JBoss, and fedora), and two DocBook components (the DocBook Data Type Definition (DTD) and DocBook Extensible Stylesheet Language (XSL) stylesheets). The three brands are grouped under the collapsible heading Brands and the DocBook components are grouped under the collapsible heading DocBook in the installer window. Refer to Chapter 5, Branding for an explanation of brands in Publican. Publican uses the DTD and the XSL stylesheets to render XML documents in other presentation formats (such as HTML and PDF). If you do not install these components, Publican must download this data from the Internet every time it processes a document, which creates lengthy delays.
    All components are selected by default. Click the checkboxes to deselect any components that you do not require and click Next to continue.
  6. By default, the installer software creates a folder named Publican within the %ProgramFiles% folder of your computer — typically C:\Program Files\Publican. You can manually edit the path displayed in the Destination Folder box to select a different folder.
  7. When you are satisfied with the destination folder, click Install.
    The installer displays a progress bar as it installs Publican. To see more detailed information about the progress of the installation, click Show details.
  8. When the process finishes, the installer notifies you with the message Completed.
    Click Close to close the installer.

1.3. OSX Lion

  1. Install Xcode from Mac App store.

    Note

    Xcode is about 4GB. Be prepared to wait. It has things you need, though.
  2. Install Macports from http://guide.macports.org/chunked/installing.macports.html. Everything you install with it goes into /opt/local, away from your normal OS files.
  3. Open a terminal.
  4. Install dependencies for publican, which are available as ports:
    $sudo port install docbook-xml docbook-xsl docbook-sgml-4.2 perl5 bash-completion p5-file-pushd p5-config-simple p5-file-find-rule p5-file-slurp p5-class-trigger p5-time-hires p5-list-moreutils p5-ipc-run3 p5-class-accessor p5-test-perl-critic p5-xml-libxslt p5-locale-gettext p5-image-size p5-file-copy-recursive p5-datetime p5-archive-zip p5-timedate p5-html-format p5-dbd-sqlite p5-xml-simple p5-devel-cover p5-test-pod p5-test-pod-coverage p5-template-toolkit
  5. Install CPAN modules for dependencies which can't be satisfied with ports. Note: this step will generate lots of messages, including warnings. Don't worry about them.
    $sudo cpanLocale::Maketext::Gettext Locale::PO DateTime::Format::DateParse Syntax::Highlight::Engine::Kate XML::TreeBuilder File::Inplace String::Similarity HTML::FormatText::WithLinks::AndTables
  6. Install FOP if you want PDFs to work:
    $ sudo port install fop
    $ echo "FOP_OPTS='-Xms50m -Xmx700m'" > ~/.foprc
  7. Check out Publican Main branch. This command should be run from your user home directory, for instance /Users/yourusername
    $ git clone git://git.fedorahosted.org/publican.git
  8. Change directories:
    $ cd publican/publican
  9. This directory should contain a file named Build.pl. Verify that you are in the correct directory, then run the following command. Ignore all the messages you get.
    $ perl ./Build.PL
    $ ./Build
  10. Run the following command to install Publican and put all of its bits into /opt/local:
    $ sudo ./Build install

Procedure 1.1. Create and build a book

  1. $ publican create --name=testbook
  2. $ cd testbook
  3. $ publican build --formats=html --langs=en-US
  4. Open the tmp/en-US/html/index.html file in a browser to prove that it built correctly.

Procedure 1.2. Install a brand

  1. Fix the permissions of the Commons Brand. You have to do this only once. This is a bug that will be addressed eventually.
    $ find /opt/local/share/publican -type f |xargs sudo chmod 644
  2. Either check out the SVN for your brand, or get a pre-built brand from a friend.
    1. The SVN location for the brands supplied by Red Hat is http://svn.fedorahosted.org/svn/publican
    2. If you use a pre-built brand, extract it as necessary.
  3. If you got the brand from SVN, build it.
    $ cd publican/publican-jboss
    $ publican build --formats=xml --langs=all --publish
  4. Install the brand.
    $ sudo publican install_brand --path=/opt/local/share/publican/Common_Content
    You can now use the brand in your books by editing your book's publican.cfg file or specifying the --brand option when creating your book.

Chapter 2. Publican defaults

Users can set their own default values for Publican in ~/.publican.cfg. Currently, Publican supports the following values:
  • firstname
  • surname
  • email
  • formats
  • lang
  • langs

Note

This file is completely different to publican.cfg that is used to build a book. It does not accept the same parameters.

2.1. Publican default examples

Users can set formats, lang, and langs to their standard build parameters.

Example 2.1. Setting formats and lang

$ echo 'formats: "html,html-single,pdf,txt"' >> ~/.publican.cfg
$ echo 'langs: "en-US"' >> ~/.publican.cfg
$ publican build
Setting up en-US
[...]
 Finished txt
Publican 3.0 allows you to add a revision history entry from the command line. You can set your user details in ~/.publican.cfg.

Example 2.2. Setting user details

$ echo 'firstname: "Dude"' >> ~/.publican.cfg 
$ echo 'surname: "McPants"' >> ~/.publican.cfg 
$ echo 'email: "dude.mcpants@awesome.com"' >> ~/.publican.cfg 
$ publican add_revision --member "Updated examples in chapter 2." \
--member "Removed obsolete example in sect 4.1"

Chapter 3. Publican commands

Publican is a command-line tool. To use Publican on a computer with a Linux operating system, you must either start a terminal emulator program (such as GNOME Terminal or Konsole) or switch to a virtual console. To use Publican on a computer with a Windows operating system, run the cmd command from the Start menu to open a command prompt.
Publican commands take one of the following formats:
$ publican command_option
The command_option is any of several options for the $ publican command itself.
$ publican action action_options
The action is an action for Publican to perform, such as creating the XML files for a new document or building a HTML document from a document's XML files. The action_options apply to the action, such as specifying the language of a document.
$ publican command_option action action_options
Some command_options affect the output of actions, for example, whether Publican should use ANSI colors in its output.

3.1. Command options

The options for the publican command are:
--help
This option displays a help message, a condensed version of the contents of this chapter.
--man
This option displays the man page for Publican, which includes the same information as the --help option supplies, in addition to information about licensing and dependencies.
--help_actions
This option displays a list of valid Publican actions.
-v
This option displays the version number of your Publican installation.
--config file
This option allows you to specify a config file for a document, in place of the default publican.cfg.
--nocolours
This option disables ANSI colors in Publican logging.
--quiet
This option disables all logging.

3.2. Actions

Publican can perform the following actions:
add_revision
adds an entry in Revision_History.xml.
build
transforms XML to other formats (for example: PDF, single-page HTML, or multiple-page HTML). Refer to Section 4.7, “Building a document” for more details and a description of the available options.
clean
removes all files and folders in the tmp/ subdirectory. The tmp/ subdirectory is created after running the $ publican build command to build a document, such as publican build --formats=html --langs=en-US.
clean_ids
changes all IDs to a standard format. This format is Book_Name-title. For example, a section with a title of First Section in a book named Test_Book will have the following ID after you run $ publican clean_ids: <section id="Test_Book-First_Section">

Warning — $ publican clean_ids

To make translation easier, $ publican clean_ids uses the first four characters of the tag as a prefix for the ID. Consequently, you must check out the latest versions of the XML source and translations before running this command.
If you do not have the current versions of the PO files checked out before running $ publican clean_ids, the XML and PO files will no longer be in synchrony with each other. In this case, all links in the PO files must be manually updated.

Important — ID conflicts can occur

The $ publican clean_ids command is intended to facilitate building a DocBook structure around documents ported from other formats such as HTML. However, publican clean_ids is file-based and and only has access to information in the XML file that it is currently processing and to the document name. Therefore, nodes of the same type that have the same title receive the same IDs. These duplicate IDs will prevent the document from building.
Use the $ publican clean_ids command to assist you in laying out your document, but expect that some manual adjustment to IDs might be necessary. We recommend that you do not run publican clean_ids on an already well established document.
clean_set
removes local copies of remote books in a distributed set. Refer to Section 6.2, “Distributed sets” for details of using distributed sets.
create
creates a new book, article, or set. Refer to Chapter 4, Creating a document for details of creating a book or article, and to Chapter 6, Using sets for details of using sets.
create_brand
creates a new brand. Refer to Section 5.2, “Creating a brand” for details of creating a brand.
create_site
creates a documentation website. Refer to Chapter 7, Building a website with Publican for details.
help_config
displays help text for the configuration file contained in each book or brand, publican.cfg. Refer to Section 4.1.1, “The publican.cfg file” for more detail.
install_book
installs a document on a documentation website. Refer to Chapter 7, Building a website with Publican for details.
install_brand
configures a brand for installation. Refer to Section 5.1, “Installing a brand” for details of installing a brand.
copy_web_brand
copy a brand's installed web content to another site.
lang_stats --lang=language_code
generates a translation report for the language specified by language_code. For every PO file generated by Publican, a table displays the number of untranslated strings in all msgids; the number of fuzzy strings (counts the strings contained in msgids whose content changed since the last POT generation) and the number of translated strings, coinciding after translation, with the the number of strings contained in the msgid.
migrate_site
migrates a website database from Publican 2.x to Publican 3.
package
packages a book, article, set, or brand for shipping as an RPM package. Refer to Section 4.8, “Packaging a document” and Section 5.4, “Packaging a brand” for more detail.
print_banned
prints a list of DocBook tags banned by Publican. Refer to Appendix A, Disallowed elements and attributes for a discussion of banned tags.
print_known
prints a list of DocBook tags supported by Publican. Supported are those tags whose output has undergone at least cursory verification for quality when used in Publican — refer to Appendix A, Disallowed elements and attributes.
print_tree
prints a tree of the XML files included with the <xi:include> tag in a book, article, or set.
print_unused
prints a list of the XML files not included with the <xi:include> tag in a book, article, or set.
publican print_unused_images
prints a list of the image files not referenced by an <imagedata> tag in a book, article, or set.
remove_book
removes a document from a documentation website. Refer to Chapter 7, Building a website with Publican for details.
rename
renames a Publican book.
site_stats
generates a site report for a documentation website.
update_po
updates the portable object (PO) files. Refer to Section 4.6, “Translating a document” for more detail.
update_pot
updates the portable object template (POT) files. Refer to Section 4.6, “Translating a document” for more detail.
update_site
updates the templated content of the documentation website. Refer to Chapter 7, Building a website with Publican for details.

Chapter 4. Creating a document

This chapter describes creating books and articles: the main configuration files, example document files, and how to build a document.
Use the $ publican create command to create a new document, including all the necessary files for the document.
The $ publican create command accepts several options, detailed in this chapter. When an option can accept a value, separate the option from the value with a space or an equals sign; for example, publican create --name New_Book or publican create --name=New_Book.
--help
print a list of all $ publican create command options.
--name Doc_Name
set Doc_Name as the name of the book or article. This variable must not contain any spaces. For example, the command $ create_book --name Test_Book creates a book named Test_Book with all the necessary files to build the book, and sets the BOOKID in the Test_Book.ent file.
--lang Language_Code
set Language_Code as the language code of the language in which the book or article will be authored. If you do not specify a language code, Publican defaults to en-US (American English). The --lang option sets the xml_lang in the publican.cfg file and creates a directory with this name in the document directory. When initially created, this directory contains some boilerplate XML files. Refer to Section 4.1.1, “The publican.cfg file” for more information on publican.cfg parameters and Appendix G, Language codes for more detail on language codes.
--version version
set version as the version number of the product that the book describes. For example, for Red Hat Enterprise Linux 5.1 you would use 5.1. The default version is 0.1. The --version option sets the <productnumber> tag in the Book_Info.xml or Article_Info.xml file. For more information refer to Section 4.1.2, “Book_Info.xml”.
--edition edition
set edition as the edition number of the book. This number indicates to users when a new edition of the book is released. The initial general availability (GA) release of the book should be edition 1.0. The default value is 0. The --edition option sets the <edition> tag in the Book_Info.xml or Article_Info.xml file. For more information refer to Section 4.1.2, “Book_Info.xml”.
--product Product_Name
set Product_Name as the name of the product that the book describes. This variable must not contain any spaces. For example, set this to Fedora for core Fedora documentation, and the name of the product for other products, for example, Fedora_Directory_Server. The default value is Documentation. The --product option sets the <product name> tag in the Book_Info.xml file or Article_Info.xml file and the PRODUCT entity in the Doc_Name.ent file.
--type Article --name Article_Name
create an article instead of a book. Replace Article_Name with the article name. This variable must not contain any spaces. The --type option sets the type in the publican.cfg file. Refer to Section 4.1.1, “The publican.cfg file” for more information on publican.cfg parameters.
--type Set --name Set_Name
create a set of documents instead of a book. Replace Set_Name with the set name. This variable must not contain any spaces. The --type option sets the type in the publican.cfg file. Refer to Section 4.1.1, “The publican.cfg file” for more information on publican.cfg parameters and to Chapter 6, Using sets for details on using sets.
--brand brand
set brand as the brand to use to style the output of this document, for example, RedHat, fedora, JBoss, oVirt, or GIMP. The default value is common, a default brand shipped with Publican. The --brand option sets the brand parameter in the publican.cfg file. Refer to Section 4.1.1, “The publican.cfg file” for more information on publican.cfg parameters. This option requires the appropriate Publican brand package to be installed. For example, to build Red Hat branded books, you must install the publican-redhat package. Refer to Section 5.1, “Installing a brand” for instructions on installing brand packages for Publican. If you do not specify a brand, Publican uses its built-in, default brand. Refer to Chapter 5, Branding for more information.
Before running the $ publican create command, use the $ cd command to change into the directory where you want the book to be created. For example, to create a book named Test_Book in the my_books/ directory, run the following commands:
$ cd my_books/ 
$ publican create --name Test_Book
To see the results of this command on a computer with a Linux operating system, run the following:
$ ls
The output should be similar to the following:
Test_Book/
To see the contents of the new Test_Book/ directory on a computer with a Linux operating system, run the following:
$ cd Test_Book/
$ ls
The output should be similar to the following:
en-US/ publican.cfg

4.1. Files in the book directory

If you run the command $ publican create --name Test_Book --lang en-US, Publican creates a directory structure and required files, similar to the following:
  • publican.cfg
  • en-US (directory)
    • Test_Book.xml
    • Test_Book.ent
    • Revision_History.xml
    • Preface.xml
    • Chapter.xml
    • Book_Info.xml
    • Author_Group.xml
    • images (directory)
      • icon.svg

4.1.1. The publican.cfg file

Note — Customizing output

If you maintain multiple versions of a document, you can create a configuration file for each version. When building or packaging the document, you can use the --config to specify a configuration file other than the publican.cfg file and therefore a different set of parameters to use in a particular build. For example:
$ publican build --formats html,pdf --langs en-US,de-DE,hu-HU --config community.cfg
The publican.cfg file configures build options, and is located in the root of the book directory. The following is an example publican.cfg file, with a description of publican.cfg parameters following afterwards:
# Config::Simple 4.59
# Wed Jul 18 13:00:40 2012

xml_lang: "en-US"
type: Book
brand: common


Default parameters

xml_lang
specifies the language of the source XML files, for example, en-US, as set by the --lang option for $ publican create.
type
specifies the type of document — a DocBook <article>, DocBook <book>, or DocBook <set>, as set by the --type option for $ publican create.
brand
sets the brand of the document, for example, RedHat, fedora, JBoss, oVirt or GIMP , as set by the --brand option for $ publican create. If you do not specify a brand, Publican uses its default brand. Refer to Chapter 5, Branding for more information.

Advanced parameters

arch
filters output by computer architecture. For example, if you set arch: x86_64 in the publican.cfg file, Publican will only include XML elements tagged with the equivalent attribute, such as <para arch="x86_64">.

Use with caution

As with conditional tagging more generally, arch can cause great difficulties when translating documents. Refer to Section 4.9.1, “Conditional tagging and translation” for an explanation of the issues.

arch set for root nodes

If the root node of an XML file is excluded by the arch attribute, your document will not build, because empty files are not valid XML. For example, if Installation_and_configuration-PPC.xml contains a single chapter:
<?xml version='1.0' encoding='utf-8' ?>
<!DOCTYPE chapter PUBLIC "-//OASIS//DTD DocBook XML V4.5//EN" "http://www.oasis-open.org/docbook/xml/4.5/docbookx.dtd" [
]>
<chapter id="chap-Installation_and_configuration_on_PowerPC" arch="PowerPC">
<title>Installation and configuration on PowerPC</title>

[text of chapter]

</chapter>

and this chapter is included in User_Guide.xml with an <xi:include> tag, the document will not build with $ condition: x86 set in the publican.cfg file.
To exclude this chapter, add the arch attribute to the <xi:include> tag in User_Guide.xml, not to the <chapter> tag in Installation_and_configuration-PPC.xml.

xrefs and the arch attribute

If an <xref> points to content not included in the build due to the arch attribute, the build will fail. For example, with arch: x86 set in the publican.cfg file, $ publican build --formats=pdf --langs=en-US will fail if the book has the tag <xref linkend="Itanium_installation"> pointing to <section id="Itanium_installation" arch="IA64">.
books
specifies a space-separated list of books used in a remote set. Refer to Section 6.2, “Distributed sets” for more information on distributed sets.
brew_dist
specifies the build target to use for building the desktop RPM package in Brew, Red Hat's internal build system. This parameter defaults to docs-5E. Refer to Section 4.8.2, “The $ publican package command” and Section 5.4, “Packaging a brand” for more information on building RPM packages.
bridgehead_in_toc
specifies whether the contents of <bridgehead> elements (free-floating titles) should be included among other titles (such as section titles and chapter titles) in tables of contents. To enable this feature, set bridgehead_in_toc: 1. Otherwise, the parameter defaults to 0, and <bridgehead>s are not included in tables of contents.
chunk_first
controls whether the first section should appear on a new page when rendered in HTML. To make the first section appear on a new HTML page, set this parameter to chunk_first: 1. Otherwise, the parameter defaults to 0, and the first section appears on the same page of its chapter.
chunk_section_depth
controls the section depth at which Publican no longer splits sub-subsections onto a new page when rendering HTML. By default, this value is set to 4.

Example 4.1. Controlling the section depth with chunk_section_depth

chunk_section_depth: 0
no section split. All sections with their sub-sections appear on the same page of the chapter they belong. The page succession is chapter 1, chapter 2, chapter 3, …
chunk_section_depth: 1
the split is at "level 1" section. Each level section one with its sub-sections, appear on a new page. The page succession is chapter 1, 1.2, 1.3, 1.4 … chapter 2, 2.1, 2.2, 2.3 …
chunk_section_depth: 2
the split is at "level 2" section. The page succession is chapter 1, 1.2, 1.2.2, 1.2.3, 1.2.4 … 1.3, 1.3.2, 1.3.3 …
chunk_section_depth: 3
the split is at "level 3" section. The page succession is chapter 1, 1.2, 1.2.2, 1.2.2.2, 1.2.2.3, 1.2.2.4 … 1.3, 1.3.2, 1.3.2.2, 1.3.2.3 …
chunk_section_depth: 4 (default)
the split is at "level 4" section. The page succession is chapter 1, 1.2, 1.2.2, 1.2.2.2, 1.2.2.2.2, 1.2.2.2.3, 1.2.2.2.4 … 1.2.3, 1.2.3.2, 1.2.3.2.2, 1.2.3.2.3 …
classpath
sets the path to the Java archive (jar) files for FOP. Publican relies on Apache FOP — a Java application — to render documents as PDF files. The default path for FOP's jar files on a computer with a Linux operating system is: /usr/share/java/ant/ant-trax-1.7.0.jar:/usr/share/java/xmlgraphics-commons.jar:/usr/share/java/batik-all.jar:/usr/share/java/xml-commons-apis.jar:/usr/share/java/xml-commons-apis-ext.jar
common_config
sets the path to the Publican installation. The default location on a computer with a Linux operating system is /usr/share/publican. On a computer with a Windows operating system, the default location is %SystemDrive%/%ProgramFiles%/publican — most usually C:/Program Files/publican.
common_content
sets the path to the Publican common content files. These files provide default formatting, plus some boilerplate text and generic graphics. The default location on a computer with a Linux operating system is /usr/share/publican/Common_Content. On a computer with a Windows operating system, the default location is %SystemDrive%/%ProgramFiles%/publican/Common_Content — most usually C:/Program Files/publican/Common_Content.
condition
specifies conditions on which to prune XML before transformation. Refer to Section 4.9, “Conditional tagging” for more information.

Root nodes and conditional tagging

If the root node of an XML file is excluded with a conditional, your document will not build, because empty files are not valid XML. For example, if Installation_and_configuration_on_Fedora.xml contains a single chapter:

<?xml version='1.0' encoding='utf-8' ?>
<!DOCTYPE chapter PUBLIC "-//OASIS//DTD DocBook XML V4.5//EN" "http://www.oasis-open.org/docbook/xml/4.5/docbookx.dtd" [
]>
<chapter id="chap-Installation_and_configuration_on_Fedora" condition="Fedora">
<title>Installation and configuration on Fedora</title>

[text of chapter]

</chapter>

and this chapter is included in User_Guide.xml with an <xi:include> tag, the document will not build with $ condition: Ubuntu set in the publican.cfg file.
To exclude this chapter, add a condition to the <xi:include> tag in User_Guide.xml, not to the <chapter> tag in Installation_and_configuration_on_Fedora.xml.

xrefs and conditional tagging

If an <xref> points to content not included in the build due to conditional tagging, the build will fail. For example, with $ condition: upstream set in the publican.cfg file, $ publican build --formats=pdf --langs=en-US will fail if the book has the tag <xref linkend="betasection"> pointing to <section id="betasection" condition="beta">.
confidential
marks a document as confidential. When this parameter is set to 1, Publican adds the text specified by the confidential_text parameter (by default, CONFIDENTIAL) to the foot of each HTML page and the head of every page in a PDF document. The default value is 0 (no header or footer).
confidential_text
specifies the text to use when the confidential parameter is set to 1. The default text is CONFIDENTIAL.
debug
controls whether Publican should display debugging messages as it works. When set to its default of 0, Publican does not display debugging messages. Change this value to 1 to view these messages.
def_lang
sets the default language for a Publican-managed website. Tables of contents for languages other than the default language will link to documents in the default language when translations are not available. Refer to Section 4.8, “Packaging a document”.
doc_url
provides a URL for the documentation team for this package. In HTML output, Publican links to this URL at the top right of each page, through the image_right.png image in the Common_Content/images directory for the brand. This parameter defaults to https://fedorahosted.org/publican
docname
specifies the document name. If set, this value overrides the content of the <title> tag in the Book_Info.xml file when you package a document. This value must contain only upper- and lower-case un-accented letters, digits, and the underscore and space characters (‘a–z’, ‘A–Z’, ‘0’–‘9’, and ‘_’ and ‘ ’).
dt_obsoletes
a package that a desktop package obsoletes.
dt_requires
a package that the desktop package requires, for example, a documentation menu package. Refer to Section 4.8.1.3, “Desktop menu entries for documents”.
dtdver
specifies the version of the DocBook XML Document Type Definition (DTD) on which this project is based. Publican defaults to version 4.5. The specification for DocBook XML DTD version 4.5 is available from http://www.docbook.org/specs/docbook-4.5-spec.html.

A different DTD might slow your build

When you install Publican, you also install a local copy of the DocBook XML DTD version 4.5 and accompanying Extensible Stylesheet Language (XSL). If you set a version of the DTD for which there is no local support, Publican must download the appropriate DTD and XSL from an online source every time that it builds the document. Building your document is delayed while this download takes place. The combined size of the required files is around 70 MB.
dtd_type
Override Type for DocType. Must be a complete string.

Note

This parameter is only permitted in a brand.
dtd_uri
Override URI for DocType. Must be a complete string.

Note

This parameter is only permitted in a brand.
ec_id
sets the ID for an Eclipse help plugin. Every Eclipse help plugin must have a unique ID, and these generally follow Java package naming conventions — refer to http://java.sun.com/docs/codeconv/html/CodeConventions.doc8.html. By default, Publican sets the ID to org.product.docname. The ID that you set here also determines the directory name for this plugin in the plugin directory.
ec_name
sets the name of an Eclipse help plugin. This is the human-readable name visible in the help list in Eclipse. This name does not need to be unique or to follow a special convention. By default, Publican sets the name to product docname.
ec_provider
sets the provider name for an Eclipse help plugin. This should be your name, or the name of your project or organization. This name is presented to users and does not need to be unique or follow a special convention. By default, Publican sets the provider name to Publican-Publican version.
edition
specifies the edition number for this document.

Note

The <edition> tag was required by versions of Publican prior to 2.0, which used it to generate the version of a documentation package. This tag is now completely optional and does not affect packaging in any way.
extras_dir
the directory Publican will process extra files from. (Default: extras)
footer
specifies content that will be injected into the bottom of every page on the site.
generate_section_toc_level
controls the section depth at which Publican will generate a table of contents. At the default value of 0, Publican will generate tables of contents at the start of the document and in parts, chapters, and appendixes, but not in sections. If (for example) the value is set to 1, tables of contents also appear in each "level 1" section, such as sections 1.1, 1.2, 2.1, and 2.2. If set to 2, tables of contents also appear in "level 2" sections, such as sections 1.1.1, 1.1.2, and 1.2.1.

Example 4.2. Setting the section depth at which tables of contents appear

generate_section_toc_level: 0 (default)
Publican will generate tables of contents at the start of the document and in parts, chapters, and appendixes, but not in sections.
generate_section_toc_level: 1
Publican will generate tables of contents also at the start of each "level 1" section, such as sections 1.1, 1.2 … 2.1, 2.2 …
generate_section_toc_level: 2
Publican will generate tables of contents also at the start of each "level 2" section, such as as sections 1.1.1, 1.1.2. 1.1.3 … 1.2.1., 1.2.2, 1.2.3 …
ignored_translations
specifies translations to ignore as comma-separated XML language codes; for example, es-ES,it-IT. If you build or package a book for a language filtered by this parameter, Publican ignores any translations that exist for this language, and builds or packages the book in the language of the original XML instead. Refer to Section 4.6, “Translating a document”, and to Appendix G, Language codes.
img_dir
the directory Publican will process images from. (Default: images)
info_file
overrides the default Info file. Specifies where Publican looks for info fields. Use the full filename without the path.
license
specifies the license this package uses. By default, Publican selects the GNU Free Documentation License (GFDL). Refer to Section 4.8, “Packaging a document”.
max_image_width
specifies the maximum width allowable for images in the document in pixels. By default, Publican scales down any images wider than 444 pixels so that they fit within this limit. Keeping images no wider than 444 pixels ensures that they present no wider than the right-hand margin of the text in HTML output and that they fit within the pages of PDF output. Refer to Section 4.2, “Adding images” for more information on using images.

Important — 444 pixels is the maximum safe width

Do not use the max_image_width parameter if your images contain important information. Images wider than 444 pixels presented at their full size might lead to poorly presented HTML and to PDF output that it is unusable because the images have run off the page and are incomplete.
Conversely, images wider than 444 pixels that are scaled down in a web browser to fit the HTML container or in a PDF viewer to for a page lose quality.
To safeguard the quality of your images, crop them or scale them so that they are no wider than 444 pixels before you include them in a document.
mainfile
specifies the name of the XML file in your document that contains the root XML node <article>, <book>, or <set>, and the name of the corresponding .ent file that contains the document's entities. For example, if you set mainfile: master, Publican looks for the root XML node in master.xml and the document entities in master.ent.
If mainfile is not set, Publican looks for the root XML node in a file that matches the <title> of the document set in the Article_Info.xml, Book_Info.xml, or Set_Info.xml file, and looks for the document entities in a file with a corresponding name.
menu_category
the desktop menu category (as defined by a corresponding .menu file) in which a document should appear when installed from a desktop RPM package. Refer to Section 4.8.1.3, “Desktop menu entries for documents”.
os_ver
specifies the operating system for which to build packages. Publican appends the value that you provide here to the RPM packages that it builds. For example, .fc15 for Fedora 15. The default value is .el5, which signifies Red Hat Enterprise Linux 5 and operating systems derived from it. Refer to Section 4.8, “Packaging a document” and Section 5.4, “Packaging a brand”.
prod_url
provides a URL for the product to which this document applies. In HTML output, Publican links to this URL at the top left of each page, through the image_left.png image in the Common_Content/images directory for the brand. This parameter defaults to https://fedorahosted.org/publican.
product
specifies the product to which this documentation applies. If set, this value overrides the content of the <productname> tag in the Book_Info.xml file when you package a document. This value must include only contain upper- and lower-case un-accented letters, digits, and the underscore and space characters (‘a–z’, ‘A–Z’, ‘0’–‘9’, and ‘_’ and ‘ ’).
release
specifies the release number of this package. If set, this value overrides the value of <pubsnumber> in the Book_Info.xml file when you package a document. This value must include only digits (‘0’–‘9’).
repo
specifies the repository from which to fetch remote books that form part of a distributed set. Refer to Section 6.2, “Distributed sets”.
rev_dir
override the default Revision History file direction. By default Publican assumes the Revision History is sorted in descending order, newest versions at teh top, if you wish to change this and have the oldest revisions at the top, then set this parameter to asc or ascending.
rev_file
override the default Revision History file. Specifies where Publican looks for revision fields. Use the full filename without the path. When combined with the Publican action add_revision, it enables you to build a book without a Revision_History.xml.
scm
specifies the version control (or source code management) system used in the repository in that stores the remote books in a distributed set. At present, Publican can use only Subversion (SVN), and therefore uses SVN as its default setting. Refer to Section 6.2, “Distributed sets”.
show_remarks
controls whether to display DocBook <remark>s in transformed output. By default, this value is set to 0, which causes Publican to hide remarks. Set this value to 1 to display remarks. In Publican's common brand, displayed remarks are highlighted in magenta.
sort_order
override the default sort weighting for books in a Publican website. Books are displayed on the website in descending sort order. For example, a book with sort order 10 appears before a book with sort order 5. By default, this value is set to 50.
src_url
specifies the URL at which to find tarballs of source files. This parameter provides the Source: field in the header of an RPM spec file. Refer to Section 4.8, “Packaging a document”.
tmp_dir
specifies the directory for Publican output. By default, this is set to tmp, which creates a directory named tmp inside the directory that holds your article or book.
tmpl_path
specifies the path to Publican templates. By default, this is set to /usr/share/publican/templates.
toc_js
allows a site to override the template used when building the embedded toc using in web_style=1 sites. The template must be in the same directory that toc.tmpl is in. The template name must be must be of the form toc_type+.tmpl
toc_type
specifies the name of a custom TOC template. By default, Publican looks for toc-$toc_type.tmpl in /usr/share/publican/templates. You can override this by setting an alternative path with tmpl_path.
toc_section_depth
controls the depth of sections that Publican includes in the main table of contents. By default, this value is set to 2. With the default setting, sections 1.1 and 1.1.1 will appear in the main table of contents, but section 1.1.1.1 will not. (Note that the first digit in these examples represents a chapter, not a section).

Example 4.3. Controlling the depth of sections in the main table of contents

toc_section_depth: 0
Publican will generate a main table of contents only for chapters.
toc_section_depth: 1
Publican will generate a main table of contents only for chapters and "level 1" sections, such as 1, 1.1, 1.2, 1.3 … 9, 9.1, 9.2 … but not for sections 1.1.1, 1.1.2 …
toc_section_depth: 2 (default)
Publican will generate tables of contents for chapters and "level 1 and "level 2" sections, such as 1, 1.1, 1.1.1, … 1,2, 1.2.1, 1.2.2 … but not for deeper sections x.x.x.x .
version
specifies the version number of that product to which this document applies. If set, this value overrides the content of the <productnumber> tag in the Book_Info.xml file when you package a document. This value must include only digits and the period (‘0’–‘9’ and ‘.’).
web_brew_dist
specifies the brew build target to use for building the web RPM packages. Brew is the internal build system used by Red Hat. By default, this value is set to docs-5E, representing documentation packages for Red Hat Enterprise Linux 5. Refer to Section 4.8, “Packaging a document”.
web_formats
a comma-separated list of formats to include in the web RPM package. Refer to Section 4.8.2, “The $ publican package command”.
web_home
specifies that the document is the home page of a documentation website, not a standard document. Refer to Chapter 7, Building a website with Publican.

Important — web_home is deprecated

In Publican 2.2, web_home is replaced by web_type: home. Support for web_home will be removed in a future version of Publican.
web_name_label
overrides the book name as it appears on the menu of a Publican-managed website. Refer to Chapter 7, Building a website with Publican.
web_obsoletes
specifies packages that the web RPM obsoletes. Refer to Section 4.8, “Packaging a document”.
web_product_label
overrides the product name as it appears on the menu of a Publican-managed website. Refer to Chapter 7, Building a website with Publican.
web_style
sets the web style, which determines the layout and presentation of the website. Valid values are 1 and 2. Style 1 features a navigation pane at the left side of the screen that provides access to all of the documents on the site. Style 2 offers a breadcrumb-like navigation system.
web_type
specifies that the document is descriptive content for a Publican-managed website rather than product documentation. This content includes the home page of the website (web_type: home), product description pages (web_type: product), and version description pages (web_type: version). Refer to Chapter 7, Building a website with Publican.
web_version_label
overrides the version number as it appears on the menu of a Publican-managed website. Set this value to UNUSED for general documentation that does not apply to any particular version of a product. Refer to Chapter 7, Building a website with Publican.
wkhtmltopdf_opts
Extra options to pass to wkhtmltopdf. e.g. wkhtmltopdf_opts: "-O landscape -s A3"

Help from the command line

Run the $ publican help_config command in the root directory of a book for a summary of these parameters.

4.1.2. Book_Info.xml

Article_Info.xml and Set_Info.xml

This description of the Book_Info.xml file applies to Article_Info.xml and Set_Info.xml files too. However, for the sake of simplicity, the file is referred to as Book_Info.xml throughout this section.

Packages other than RPM packages

This section discusses packaging documents for distribution through the RPM Package Manager. However, when you use the $ publican package command, Publican generates a tarball that you can use to build a package to distribute through different package manager software. If you run publican package on a computer on which rpmbuild is not installed, Publican still generates the tarball, even though it cannot then generate an RPM package from that tarball.
The Book_Info.xml file contains the key metadata concerning a book: the book's ID; title; subtitle; author and edition number. It also contains the name and version of the product that is documented, and an abstract.
Aside from constituting much of a book's front matter, this metadata is also used when building books as RPM packages. Usually, if you distribute a book as an RPM package, several of the tags included by default in Book_Info.xml must have appropriate data within them, and that data must conform to the requirements of the RPM format. You can override the data in these tags by using equivalent fields in the publican.cfg file, as discussed in this section.
Unless overridden in the publican.cfg file, data from seven of the default tags in Book_Info.xml is required to build books as RPMs. Most immediately, the file name of a book built as an RPM package is constructed as follows:
productname-title-productnumber-language-edition-pubsnumber.src.rpm
Everything but language above is pulled from Book_Info.xml — you specify language when you build the book. As well, the <subtitle> and <abstract> are used in the RPM spec file, to provide the Summary: field in the header and the %description field, respectively.
An example Book_Info.xml file, for the Test_Book book, is presented below. Details regarding this file, and what the RPM format requirements are for each tag, follow.

<?xml version='1.0' encoding='utf-8' ?>
<!DOCTYPE bookinfo PUBLIC "-//OASIS//DTD DocBook XML V4.5//EN" "http://www.oasis-open.org/docbook/xml/4.5/docbookx.dtd" [
<!ENTITY % BOOK_ENTITIES SYSTEM "Users_Guide.ent">
%BOOK_ENTITIES;
]>
<bookinfo conformance="121" id="book-Publican-Users_Guide-Users_Guide" lang="en-US">
	<title>Users' Guide</title>
	 <subtitle>Publishing books, articles, papers and multi-volume sets with DocBook XML</subtitle>
	 <productname>&PRODUCT;</productname>
	 <productnumber>&PRODUCTNUM;</productnumber>
	 <abstract>
		<para>
			This book will help you install <application>&PRODUCT;</application>. It also provides instructions for using Publican to create and publish DocBook XML-based books, articles and book sets. This guide assumes that you are already familiar with DocBook XML.
		</para>

	</abstract>
	 <keywordset>
		<keyword>publican</keyword>
		 <keyword>docbook</keyword>
		 <keyword>publishing</keyword>

	</keywordset>
	 <subjectset scheme="libraryofcongress">
		<subject>
			<subjectterm>Electronic Publishing</subjectterm>

		</subject>
		 <subject>
			<subjectterm>XML (Computer program language)</subjectterm>

		</subject>

	</subjectset>
	 <corpauthor>
		<inlinemediaobject>
			<imageobject>
				<imagedata fileref="Common_Content/images/title_logo.svg" format="SVG" />
			</imageobject>
			 <textobject>
				<phrase>Team &PRODUCT;</phrase>
			</textobject>

		</inlinemediaobject>

	</corpauthor>
	 <mediaobject role="cover">
		<imageobject remap="lrg" role="front-large">
			<imagedata fileref="images/cover_thumbnail.png" format="PNG" />
		</imageobject>
		 <imageobject remap="s" role="front">
			<imagedata fileref="images/cover_thumbnail.png" format="PNG" />
		</imageobject>
		 <imageobject remap="xs" role="front-small">
			<imagedata fileref="images/cover_thumbnail.png" format="PNG" />
		</imageobject>
		 <imageobject remap="cs" role="thumbnail">
			<imagedata fileref="images/cover_thumbnail.png" format="PNG" />
		</imageobject>

	</mediaobject>
	 <xi:include href="Common_Content/Legal_Notice.xml" xmlns:xi="http://www.w3.org/2001/XInclude" />
	 <xi:include href="Author_Group.xml" xmlns:xi="http://www.w3.org/2001/XInclude" />
</bookinfo>


<bookinfo id="book_id">, <articleinfo id="article_id">, <setinfo id="set_id">
The document ID is used internally and is not displayed to readers when the book is built. If you run the $ publican clean_ids command, any manually entered ID, including this one, changes to a Doc_Name-Title format, where Title is the title of the associated book, article, section, or chapter.
<productname>productname</productname>
The name of the product or product stream to which the book, article, or set applies, for example: Red Hat Enterprise Linux or JBoss Enterprise Application Platform. When building a book as an RPM package, data in the <productname> tag is used as part of the file name of the package.
Override this tag with the product variable in the publican.cfg file if the name of your product contains non-Latin characters, accented Latin characters, or punctuation marks other than the underscore.

Permitted characters

Publican uses data in this tag to generate part of the file name for RPM packages, unless overridden by data in the publican.cfg file. If you do not override this tag in the publican.cfg file, this tag must only contain upper- and lower-case un-accented letters, digits, and the hyphen-minus, period, underscore, and plus characters (‘a–z’, ‘A–Z’, ‘0’–‘9’, and ‘-’, ‘.’, ‘_’, and ‘+’) if you plan to build packages with Publican.
<title>title</title>
The title of the document (for example, <title>Server Configuration Guide</title>). The title appears under the product name in both HTML and PDF editions. A title is required to build an RPM package. When building a book as an RPM package the title is used as the part of the file name of the package.
The names of RPM packages can only contain certain basic ASCII characters. If the title of your document contains non-Latin characters, accented Latin characters, or punctuation marks other than the underscore, use the docname parameter in the publican.cfg file to set a name for the document in ASCII characters. When you build the document, the title appears as you set it with the <title> tag, but when you package the document, the value that you used in the docname parameter is used in the file name of the RPM package.

Permitted characters

Publican uses data in this tag to generate part of the file name for RPM packages, unless overridden by data in the publican.cfg file. If you do not override this tag in the publican.cfg file, this tag must only contain upper- and lower-case un-accented letters, digits, and the hyphen-minus, period, underscore, and plus characters (‘a–z’, ‘A–Z’, ‘0’–‘9’, and ‘-’, ‘.’, ‘_’, and ‘+’) if you plan to build packages with Publican.
By default, Publican also uses the contents of the <title> tag to find the file that contains the root XML node: <article>, <book>, or <set>. For example, if you set the title to <title>Server Configuration Guide</title>, Publican expects the root XML node to be in a file named Server_Configuration_Guide.xml and the document entities to be in a file named Server_Configuration_Guide.ent. To use a different name for these files, set the mainfile parameter in the document configuration file (by default, publican.cfg). Refer to Section 4.1.1, “The publican.cfg file”.
<subtitle>subtitle</subtitle>
The book's subtitle: an alternative, and commonly explanatory title for the book (for example: Server Configuration Guide: Preparing Red Hat Enterprise Linux for Production Use). The subtitle appears under the title in both HTML and PDF editions. A subtitle is also required to make a book available as an RPM package. When building a book as an RPM package, the subtitle is used as the Summary in the RPM spec file. The rpm -qi command returns the contents of several spec file fields, including the Summary field.
<productnumber>productnumber</productnumber>
The version number of the product the book covers, for example ‘5.2’ for Red Hat Enterprise Linux 5.2 and ‘4.3’ for JBoss EAP 4.3.
Running the $ publican create --name Doc_Name --version version command correctly configures the product number.
Override this tag with the version variable in the publican.cfg file if the product version is anything other than a number.

Permitted characters

Publican uses data in this tag to generate part of the file name for RPM packages, unless overridden by data in the publican.cfg file. If you do not override this tag in the publican.cfg file, this tag must only contain numbers and the period (‘0–9’ and ‘.’) if you plan to build packages with Publican.
<edition>edition</edition>
This is the edition number of the book. The first edition of the book should be 1.0 (unless you use 0.x for pre-release versions of a book). Subsequent editions should increment the 1.x to indicate to readers that the book is a new edition. The edition changes the version number in the file name when building a book with the $ publican package command.
For example, setting the edition to 1.2 and building the book using the $ publican package --binary --lang=en-US command creates an RPM file named productname-title-productnumber-en-US-1.2-0.src.rpm.
Running the $ publican create --name Doc_Name --edition x.y command correctly configures the edition.
Override this tag with the edition variable in the publican.cfg file if the edition of your document is identified by anything other than a number.

Permitted characters

Publican uses data in this tag to generate part of the file name for RPM packages, unless overridden by data in the publican.cfg file. If you do not override this tag in the publican.cfg file, this tag must only contain numbers and the period (‘0–9’ and ‘.’) if you plan to build packages with Publican.
<pubsnumber>pubsnumber</pubsnumber>
The pubsnumber sets the release number (the last digit in the file name) when building a book with the $ publican package command. For example, setting the pubsnumber to 1 and building the book using the publican package --binary --lang=en-US command creates an RPM file named productname-title-productnumber-en-US-edition-1.src.rpm.
Override this tag with the release variable in the publican.cfg file if the release number of your document contains anything other than whole numbers.

Permitted characters

Publican uses data in this tag to generate part of the file name for RPM packages, unless overridden by data in the publican.cfg file. If you do not override this tag in the publican.cfg file, this tag must only contain numbers (‘0–9’) if you plan to build packages with Publican.
<abstract><para>abstract</para></abstract>
A short overview and summary of the book's subject and purpose, traditionally no more than a paragraph long. The abstract appears before the table of contents in HTML editions and on the second page of PDF editions. When a book is built as an RPM package, the abstract sets the Description field of the RPM's spec file. This makes the abstract for a package available via the rpm -qi command.
You can add extra metadata to the Book_Info.xml file of a document, to support specific features in various output formats:
<keywordset>, <keyword>
Terms tagged with <keyword> and placed within a <keywordset> are added to a <meta name="keywords"> entry in the head of HTML files and to the Keywords field of the properties of a PDF document.
<subjectset>, <subject>
Terms tagged with <subject> and placed within a <subjectset> are added to the Subject field of the properties of a PDF document and in the metadata of an ebook in EPUB format.
Consider using a controlled vocabulary when defining the subject of your document, for example, the Library of Congress Subject Headings (LCSH). Identify the chosen vocabulary with the scheme attibute in the <subjectset> tag, for example, <subjectset scheme="libraryofcongress">. You can search for LCSH subject headings through the Library of Congress Authorities & Vocabularies page: http://id.loc.gov/authorities/search/.
<mediaobject role="cover" id="epub_cover">
Use a <mediaobject> tag with the role="cover" and id="epub_cover" attributes to set cover art for an ebook in EPUB format. For example:
<mediaobject role="cover" id="epub_cover">
	<imageobject role="front-large" remap="lrg">
		<imagedata width="600px" format="PNG" fileref="images/front_cover.png"/>
	</imageobject>
	<imageobject role="front" remap="s">
		<imagedata format="PNG" fileref="images/front_cover.png"/>
	</imageobject>
	<imageobject role="front-small" remap="xs">
		<imagedata format="PNG" fileref="images/front_cover.png"/>
	</imageobject>
	<imageobject role="thumbnail" remap="cs">
		<imagedata format="PNG" fileref="images/front_cover_thumbnail.png"/>
	</imageobject>
</mediaobject>

As with all the other images in your document, place the cover images in the images subdirectory.

4.1.2.1. RPM packages, editions, impressions and versions

As noted above, the default Book_Info.xml used by Publican includes an <edition> tag.
If you distribute a book as an RPM package, the data placed within this tag sets the first two digits of the version number in the RPM file name.
So, an edition of '1.0' becomes a version of '1.0'.
Book_Info.xml also includes the <pubsnumber> tag. Any data placed within this tag changes the release number of RPM-packaged books.
A book with an edition of 1.0 and a pubsnumber of 5, would be version 1.0, release 5 (1.0-5).
The edition and pubsnumber are not tied to the <productnumber> tag also found in Book_Info.xml: <productnumber> denotes the version number of the product being documented or otherwise written about.
It is entirely possible to have a 2nd edition of a book pertaining to a particular version of a product.
In bibliography, two copies of a book are the same edition if they are printed using substantially the same type-set master plates or pages. ('Substantially' offers some allowance for typo corrections and other inconsequential changes.)
Book collectors routinely conflate 'first edition' with 'first print run', while bibliographers pay attention to the text commonly placed in the front matter of a book, which calls a 2nd print run off the same (or substantially the same) plates a '1st edition, 2nd impression' or '1st edition, 2nd printing'.
We recommend following bibliographic practice in this regard. When using Publican to re-publish a book from 'substantially the same XML', increment the <pubsnumber> tag, not the <edition> tag. It functions as a near-equivalent to the impression or printing number of traditional publishing.
As for changing the edition number, we recommend changing this in the same circumstances traditional publishers change the edition of a work: when it is revised and re-written significantly. What constitutes significant, and how much re-writing is needed to increment an edition number by a whole number and how much is needed to increment it by one-tenth of a whole number, is a matter of editorial discretion.

4.1.3. Author_Group.xml

Author_Group.xml is not required but is the standard place to record author, editor, artist and other credit details. The following is an example Author_Group.xml file:
<?xml version='1.0'?>
<!DOCTYPE authorgroup PUBLIC "-//OASIS//DTD DocBook XML V4.5//EN" "http://www.oasis-open.org/docbook/xml/4.5/docbookx.dtd" [
]>

<authorgroup>
	<corpauthor>FF0000 Headgear Documentation Group</corpauthor>
	<author>
		<firstname>Dude</firstname>
		<surname>McDude</surname>
		<affiliation>
			<orgname>My Org</orgname>
			<orgdiv>Best Div in the place</orgdiv>
		</affiliation>
		<email>dude.mcdude@myorg.org</email>
	</author>
</authorgroup>


Author_Group.xml does not have to contain all of the above information: include as much or as little as required.

4.1.4. Chapter.xml

Articles and chapters

DocBook articles cannot contain chapters. If you use the --type=article option with $ publican create, Publican does not create a Chapter.xml file. Use sections to organize content within articles.
Refer to DocBook: The Definitive Guide by Norman Walsh and Leonard Muellner available at http://www.docbook.org/tdg/en/html/docbook.html for details of the different ways that sets, books, articles, parts, chapters, and sections interact. In particular, note that articles can be stand-alone documents, or can be incorporated into books.
The Chapter.xml file is a template for creating chapter files. Chapter files contain the content that make up a book. The following is a chapter template (Chapter.xml) that is created by the $ publican create command. Note the DOCTYPE is set to chapter:
<?xml version='1.0'?>
<!DOCTYPE chapter PUBLIC "-//OASIS//DTD DocBook XML V4.5//EN" "http://www.oasis-open.org/docbook/xml/4.5/docbookx.dtd" [
]>

<chapter id="MYBOOK-Test">
	<title>Test</title>
	<para>
		This is a test paragraph
	</para>
	<section id="MYBOOK-Test-Section_1_Test">
		<title>Section 1 Test</title>
		<para>
			Test of a section
		</para>
	</section>
	
	<section id="MYBOOK-Test-Section_2_Test">
		<title>Section 2 Test</title>
		<para>
			Test of a section
		</para>
	</section>

</chapter>


This chapter has two sections, Section 1 Test and Section 2 Test. Refer to http://docbook.org/tdg/en/html/chapter.html for further information about chapters.

Note

The chapter file should be renamed to reflect the chapter subject. For example, a chapter on product installation could be named Installation.xml, whereas a chapter on setting up a piece of software would be better called Setup.xml or Configuration.xml.

4.1.5. Doc_Name.xml

The Doc_Name.xml file contains xi:include directives to include the other necessary XML files for the document, including chapters or sections contained in other XML files. For example, a book's Doc_Name.xml file brings together chapters that are contained in separate XML files.
The following is an example Doc_Name.xml file that describes a DocBook book — note the DOCTYPE is set to book.

Example 4.4. A DocBook book

<?xml version='1.0'?>
<!DOCTYPE book PUBLIC "-//OASIS//DTD DocBook XML V4.5//EN" "http://www.oasis-open.org/docbook/xml/4.5/docbookx.dtd" [
]>

<book>
	<xi:include href="Book_Info.xml" xmlns:xi="http://www.w3.org/2001/XInclude" />
	<xi:include href="Preface.xml" xmlns:xi="http://www.w3.org/2001/XInclude" />
	<xi:include href="Chapter.xml" xmlns:xi="http://www.w3.org/2001/XInclude" />
	<xi:include href="Revision_History.xml" xmlns:xi="http://www.w3.org/2001/XInclude" />
	<index />
</book>


This example loads the Book_Info.xml, Preface.xml, Chapter.xml, and Appendix.xml XML files.

Important

The order in which chapters are listed matters. When this example book is built, Book_Info.xml will precede Preface.xml which will precede Chapter.xml, and so on.
The Doc_Name.xml file is not limited to using xi:include directives. You can create documents with a single XML file. The following is an example of a book created using a single XML file:
<book>

<chapter>
<title>Chapter 1</title>
<para>
	A paragraph in Chapter 1.
</para>
<section id="section1">
<title>Chapter 1 Section 1</title>
	<para>
		A paragraph in Section 1.
	</para>
</section>
<section id="section2">
<title>Chapter 1 Section 2</title>
	<para>
		A paragraph in Section 2.
	</para>
</section>
</chapter>

<chapter>
<title>Chapter 2</title>
<para>
	A paragraph in Chapter 2.
</para>
</chapter>

</book>

This book contains two chapters. Chapter one contains two sections. Refer to http://docbook.org/tdg/en/html/section.html for further information about sections, and http://docbook.org/tdg/en/html/book.html for further information about books.

4.1.6. Doc_Name.ent

The Doc_Name.ent file is used to define local entities. The YEAR and HOLDER entities are used for copyright information. By default, Publican sets YEAR to the current year, and inserts a message into HOLDER to remind you to specify the copyright holder for the document. If the YEAR and HOLDER entities are missing altogether, the document will not build.
Other entities might be required by the brand applied to your document. For example, the Publican brand for Fedora documents uses the entity BOOKID to specify how readers should refer to a document when they submit feedback about it.
<!ENTITY PRODUCT "MYPRODUCT">
<!ENTITY BOOKID "MYBOOK">
<!ENTITY YEAR "2008">
<!ENTITY HOLDER "YOUR NAME GOES HERE">


4.1.6.1. Entities and translation

Use entities with extreme caution

Entities offer convenience but they should be used with extreme caution in documents that will be translated. Writing (for example) &FDS; instead of Fedora Directory Server saves the writer time but transformed entities do not appear in the portable object (PO) files that translators use. Complete translations of documents containing entities are, as a consequence, impossible.
Entities present special obstacles to translators and can preclude the production of high-quality translations. The very nature of an entity is that the word or phrase represented by the entity is rendered exactly the same way every time that it occurs in the document, in every language. This inflexibility means that the word or word group represented by the entity might be illegible or incomprehensible in the target language and that the word or word group represented by the entity cannot change when the grammatical rules of the target language require them to change. Furthermore, because entities are not transformed when XML is converted to PO, translators cannot select the correct words that surround the entity, as required by the grammatical rules of the target language.
If you define an entity — <!ENTITY LIFT "Liberty Installation and Formatting Tome"> — you can enter &LIFT; in your XML and it will appear as Liberty Installation and Formatting Tome every time the book is built as HTML, PDF or text.
Entities are not transformed when XML is converted to PO, however. Consequently, translators never see Liberty Installation and Formatting Tome. Instead they see &LIFT;, which they cannot translate.
Consider something as simple as the following English sentence fragment being translated into a related language: German.
As noted in the Liberty Installation and Formatting Tome, Chapter 3…
A translation of this might be as follows:
Wie in dem Wälzer für die Installation und Formatierung von Liberty, Kapitel 3, erwähnt…
Because there is no text missing, the title can be translated into elegant German. Also, note the use of ‘dem’, the correct form of the definite article ('the') when referring to a Wälzer ('tome') in this grammatical context.
By contrast, if entities are used, the entry in the PO file says:
#. Tag: para
#, no-c-format
msgid "As noted in the <citetitle>&LIFT;</citetitle>, Chapter 3…"
msgstr ""

The translation of this would probably run thus:
#. Tag: para
#, no-c-format
msgid "As noted in the <citetitle>&LIFT;</citetitle>, Chapter 3…"
msgstr "Wie in <citetitle>&LIFT;</citetitle>, Kapitel 3, erwähnt…"

And the presentation would be thus:
Wie in Liberty Installation and Formatting Tome, Kapitel 3, erwähnt…
This, of course, leaves the title in English, including words like 'Tome' and 'Formatting' that readers are unlikely to understand. Also, the translator is forced to omit the definite article ‘dem’, a more general construction that comes close to a hybrid of English and German that German speakers call Denglisch or Angleutsch. Many German speakers consider this approach incorrect and almost all consider it inelegant.
Equivalent problems emerge with a fragment such as this:
However, a careful reading of the Liberty Installation and Formatting Tome afterword shows that…
With no text hidden behind an entity, a German translation of this might be:
Jedoch ergibt ein sorgfältiges Lesen des Nachworts für den Wälzer für die Installation und Formatierung von Liberty, dass…
If an entity was used to save the writer time, the translator has to deal with this:
#. Tag: para
#, no-c-format
msgid "However, a careful reading of the <citetitle>&LIFT;</citetitle> afterword shows that…"
msgstr ""

And the translation would be subtly but importantly different:
#. Tag: para
#, no-c-format
msgid "However, a careful reading of the <citetitle>&LIFT;</citetitle> afterword shows that…"
msgstr "Jedoch ergibt ein sorgfältiges Lesen des Nachworts für <citetitle>&LIFT;</citetitle>, dass…"

When presented to a reader, this would appear as follows:
Jedoch ergibt ein sorgfältiges Lesen des Nachworts für Liberty Installation and Formatting Tome, dass…
Again, note the missing definite article (den in this grammatical context). This is inelegant but necessary since the translator can otherwise only guess which form of the definite article (den, die or das) to use, which would inevitably lead to error.
Finally, consider that although a particular word never changes its form in English, this is not necessarily true of other languages, even when the word is a proper noun such as the name of a product. In many languages, nouns change (inflect) their form according to their role in a sentence (their grammatical case). An XML entity set to represent an English noun or noun phrase therefore makes correct translation impossible in such languages.
For example, if you write a document that could apply to more than one product, you might be tempted to set an entity such as &PRODUCT;. The advantage of this approach is that by simply changing this value in the Doc_Name.ent file, you could easily adjust the book to document (for example) Red Hat Enterprise Linux, Fedora, or CentOS. However, while the proper noun Fedora never varies in English, it has multiple forms in other languages. For example, in Czech the name Fedora has six different forms, depending on one of seven ways in which you can use it in a sentence:

Table 4.1. 'Fedora' in Czech

Case Usage Form
Nominative the subject of a sentence Fedora
Genitive indicates possession Fedory
Accusative the direct object of a sentence Fedoru
Dative the indirect object of a sentence Fedoře
Vocative the subject of direct address Fedoro
Locative relates to a location Fedoře
Instrumental relates to a method Fedorou
For example:
  • Fedora je linuxová distribuce. — Fedora is a Linux distribution.
  • Inštalácia Fedory — Installation of Fedora
  • Stáhnout Fedoru — Get Fedora
  • Přispějte Fedoře — Contribute to Fedora
  • Ahoj, Fedoro! — Hello Fedora!
  • Ve Fedoře 10… — In Fedora 10…
  • S Fedorou získáváte nejnovější… — With Fedora, you get the latest…
A sentence that begins S Fedora získáváte nejnovější… remains comprehensible to Czech readers, but the result is not grammatically correct. The same effect can be simulated in English, because although English nouns lost their case endings during the Middle Ages, English pronouns are still inflected. The sentence, 'Me see she' is completely comprehensible to English speakers, but is not what they expect to read, because the form of the pronouns me and she is not correct. Me is the accusative form of the pronoun, but because it is the subject of the sentence, the pronoun should take the nominative form, I. Similarly, she is nominative case, but as the direct object of the sentence the pronoun should take its accusative form, her.
Nouns in most Slavic languages like Russian, Ukrainian, Czech, Polish, Serbian, and Croatian have seven different cases. Nouns in Finno–Ugaric languages such as Finnish, Hungarian, and Estonian have between fifteen and seventeen cases. Other languages alter nouns for other reasons. For example, Scandinavian languages inflect nouns to indicate definiteness — whether the noun refers to 'a thing' or 'the thing' — and some dialects of those languages inflect nouns both for definiteness and for grammatical case.
Now multiply such problems by the more than 40 languages that Publican currently supports. Other than the few non-translated strings that Publican specifies by default in the Doc_Name.ent file, entities might prove useful for version numbers of products. Beyond that, the use of entities is tantamount to a conscious effort to inhibit and reduce the quality of translations. Furthermore, readers of your document in a language that inflects nouns (whether for case, definiteness, or other reasons) will not know that the bad grammar is the result of XML entities that you set — they will probably assume that the translator is incompetent.

4.1.7. Revision_History.xml

The $ publican package command searches for the first XML file in the document's XML directory containing a <revhistory> tag. Publican then uses that file to build the RPM revision history.

4.2. Adding images

Store images in the images subdirectory in the directory that holds your XML files. Use ./images/image-name to insert images into a book. The following is an example that inserts the testimage.png image:
<mediaobject>
<imageobject>
	<imagedata fileref="./images/testimage.png" />
</imageobject>
<textobject><phrase>alternate text goes here</phrase></textobject>
</mediaobject>

Ensure that you supply a <textobject> so that your content remains accessible to people with visual impairments. In certain jurisdictions, you might have a legal responsibility to provide this accessibility — for example, if you or your organization must comply with Section 508 of the United States Rehabilitation Act of 1973.[1]
If your book contains images that need to be localized — for example, screenshots of a user interface in a language other than the original language of your book — place these images in the images subdirectories for each language directory. Make sure that the image file in the translated language has the same name as the image file in the original language. When you build the book in the translated language, Publican uses the file from the images/ subdirectory of the translated language instead of the file from the images/ subdirectory of the original language.
Large images present poorly in HTML because they often go beyond the right margin of the text. Similarly, images wider than 444 pixels often go beyond the right margin of PDF pages and are cropped so that only the left side of the image is visible. Therefore, by default, Publican creates HTML and PDF output that instructs web browsers and PDF viewers to scale down any images larger than 444 pixels wide. Note, however, that images lose quality significantly when scaled in this way. For best results, scale or crop your images in image editing software so that they are no more than 444 pixels wide before you place them in a document.
To override Publican limiting the image width to 444 px, specify an image width in the <imagedata> tag. For example, to set an image width to 670 pixels:
<imagedata fileref=".images/image.png" width="670px">
If you override the default maximum image width, take care to review your output to ensure that quality standards are met.

Image file locations

Publican only uses images in the images subdirectory of your XML directory and corresponding images in the images subdirectories of your translated languages. Images stored in other directories directories do not work.

PNG files in PDF documents

Publican depends on an external application, FOP, to render documents as PDF files. At present, some versions of FOP contain a bug that alters the colors in certain images in PNG format. Specifically, 32-bit PNG images are rendered correctly, while 24-bit PNG images are not.
If you notice that Publican produces a PDF file that contains images with incorrect colors, convert the original PNG files to 32-bit PNG format by adding an alpha channel to the image and rebuild the book. If your chosen image manipulation software does not include an option specifically labeled Add alpha channel, the option might be labeled Add transparency instead.

4.3. Adding code samples

If your book contains code samples, place them in a directory named extras/ in your source language directory and use an <xi:include> to pull the code file into the XML structure of your document. Publican does not parse any files that it finds in the extras/ directory as XML.
Certain characters are reserved in XML, in particular, & and <. If you insert code samples directly into the XML of your document, you must escape these characters, either by marking them as CDATA or by replacing them with entities (&amp; and &lt; respectively).[2] If you place these files in the extras/ directory, you do not need to escape these characters. This approach saves time, reduces the chances of introducing errors into either the document XML or the code itself, and makes future maintenance of the document and the code easier.
To include a code sample from the extras/ directory in your document, follow this procedure:
  1. Create the extras directory
    $ mkdir en-US/extras
  2. Copy the code file to the extras directory
    $ cp ~/samples/foo.c en-US/extras/.
  3. xi:include the sample file in your xml file
    <programlisting>
    <xi:include parse="text" href="extras/foo.c" xmlns:xi="http://www.w3.org/2001/XInclude" />
    </programlisting>
  4. You can now edit en-US/extras/foo.c in your favorite editor without having to be concerned about how it will affect the XML.
The same approach works when you want to annotate your code with callouts. For example:
<programlistingco>
	<areaspec>
		<area id="orbit-for-parameter" coords='4 75'/>
		<area id="orbit-for-magnitude" coords='12 75'/>
	</areaspec>
	<programlisting language="Fortran"><xi:include parse="text" href="extras/orbit.for"
	xmlns:xi="http://www.w3.org/2001/XInclude" /></programlisting>
	<calloutlist>
		<callout id="callout-for-parameter" arearefs="orbit-for-parameter">
			<para>
				The <firstterm>standard gravitational parameter</firstterm>
				(μ) is a derived value, the product of Newton's gravitational 
				constant (G) and the mass of the primary body.
			</para>
		</callout>
		<callout id="callout-for-magnitude" arearefs="orbit-for-magnitude">
			<para>
				Since the mass of the orbiting body is many orders of magnitude 
				smaller than the mass of the primary body, the mass of the 
				orbiting body is ignored in this calculation.
			</para>
		</callout>
	</calloutlist>
</programlistingco>
Note the <area> elements that define the position of the callouts that will appear on the code sample. The coords attributes specify a line number and a column number separated by a space. In this example, callouts are applied to lines 4 and 12 of the code, lined up with each other in column 75. Although this approach means that you might have to adjust coords attributes if you ever modify the code to which they apply, it avoids mixing XML <coords> tags into the code itself.

4.4. Adding files

Publican allows you to include arbitrary files together with your documents. These files are included in RPM packages that you build with Publican and are installed on users' systems alongside the document itself. For example, you might want to include multimedia files of tutorials that complement the document, or sample files of source code or other materials that allow users to work through the examples or tutorials in a document.
To ship arbitrary files with a document, create a directory named files in the language directory for the original language (e.g. en-US) of the book (e.g. My_Book).
In the directory My_Book:
$ mkdir en-US/files
Copy the files to the directory files:
$ cp arbitrary_files en-US/files

4.5. Renaming a document

The $ publican rename command makes it easy for you to rename a document to give it a new title, or to change the name or version of the product to which the document applies. The command accepts up to three options:
--name new_title
changes the title of the document. For example, to rename a document from Server Configuration Guide to Server Deployment Guide, change into the document's root directory and run:
$ publican rename --name "Server Deployment Guide"
Specifically, the command changes the content of the <title> tag in the Article_Info.xml, Book_Info.xml, or Set_Info.xml file, and sets a value for the mainfile parameter in the publican.cfg file so that Publican can still find the root XML node and the entities for the document.
Note that the $ publican rename command does not change any file names. Therefore, the root XML node and the document entities are still located in files named after the original title of the document — Server_Configuration_Guide in the previous example.
--product new_product
changes the name of the product to which the document applies. For example, if the product was previously named ForceRivet but is now called PendantFarm, change into the document's root directory and run:
$ publican rename --product PendantFarm
The command changes the content of the <productname> tag in the Article_Info.xml, Book_Info.xml, or Set_Info.xml file.
--version new_version
changes the product version to which the document applies. For example, if the product version was previously 1.0 but is now 2.0 , change into the document's root directory and run:
$ publican rename --version 2.0
The command changes the content of the <productnumber> tag in the Article_Info.xml, Book_Info.xml, or Set_Info.xml file.
You can combine any combination of these options into a single command. For example:
$ publican rename --name "Server Deployment Guide" --product PendantFarm --version 2.0

4.6. Translating a document

Support for localization of documents was a key consideration in the design of Publican. The general translation workflow for documents developed in Publican is as follows:
  1. Complete the XML of a document.
    The XML for this version of the document should now be considered ‘frozen’. If your document is stored in a version-controlled repository, you should now move this version into a separate directory or branch. This allows writers to begin work on subsequent versions of the document in one branch, while providing a stable base for translation in another branch.
  2. Optional but recommended: drop the document to translation. Run:
    $ publican trans_drop
    Publican creates a new subdirectory, named trans_drop/. The trans_drop/ subdirectory contains a snapshot of the source files of the document. When the trans_drop/ directory is present in a documentation project, Publican uses its content as the basis for the commands documented later in this procedure.
  3. Generate portable object template (POT) files from the XML files:
    $ publican update_pot
    If this is the first time that POT files have been created for this document, Publican creates a new subdirectory, named pot. The pot subdirectory holds a POT file for each XML file in the document. If Publican has created POT files for this document previously, Publican updates the existing POT files to reflect any changes in the XML since the POT files were last updated.

    Remove unused XML files

    Publican generates a POT file for every XML file in the XML directory, whether the XML file is used in the document or not. If you transform unused XML files into POT files, you waste the time and effort of volunteer translators, and waste money if you are paying for translations.
    Use the $ publican print_unused command to generate a list of XML files that are not used in your document.
  4. Generate portable object (PO) files from the POT files to begin translation into a particular language:
    $ publican update_po --langs=language_code
    where language_code is the code for the target language. Refer to Appendix G, Language codes for more information about language codes. You can provide multiple language codes, separated by commas, to generate PO files for more than one language at a time. For example:
    $ publican update_po --langs=hi-IN,pt-BR,ru-RU,zh-CN
    If this is the first time that PO files have been created for a particular language, Publican creates a new subdirectory, named with the language code that you specified with the --langs= option. This subdirectory holds a PO file for each POT file in pot subdirectory, plus a Revision_History.xml file that tracks the history of this particular translation. When created for the first time, the Revision_History.xml file records the date on which the PO files for this translation were created, and the version of the source language XML (taken from the source language's Revision_History.xml file) on which this translation is therefore based.
    If Publican has created PO files for this language previously, Publican updates the existing PO files to reflect any changes in the POT files since the PO files were last updated, and adds a new entry to the translation's Revision_History.xml file to record the date on which the PO files for this translation were refreshed, and the version of the source language XML on which the revision is based. You can update existing PO files in every subdirectory with the --langs=all option:
    $ publican update_po --langs=all

    Remove unused POT files

    Publican generates a PO file for every POT file in the pot directory, whether the POT file is based on a corresponding XML file that is used in the document or not, or whether a corresponding XML file even exists. If you transform POT files for unused or deleted XML files into PO files, you waste the time and effort of volunteer translators, and waste money if you are paying for translations.
    When you generate PO files, Publican presents you with a warning for any POT files that do not have corresponding XML files, but will generate the PO file nevertheless. However, Publican will not warn you if a POT file exists for an XML file that is not used in the document.
  5. Translate the strings contained in the PO files.
  6. If you are updating a previously published translation of this revision in the source language, use Publican's publican add_revision command to describe your changes or corrections. Publican updates the Revision_History.xml file for you.
    If the document has changed in its original language, use the publican trans_drop, publican update_pot, and publican update_po commands as described earlier in this procedure instead.
  7. Build the document in the target language, for example:
    $ publican build --formats=html,html-single,pdf --langs=is-IS,nb-NO
    or package it in the target language, for example:
    $ publican package --lang=is-IS
    You can build the document in all languages for which you have translations with the --langs=all option, but note that you must package each language individually. Refer to Section 4.7, “Building a document” for more information on building a document, and Section 4.8, “Packaging a document” on packaging a document.

4.6.1. Translation Author Group

Translation takes place after a book has been finalized. You do not need to know who will translate your book in order to give them credit. Create $translation/Author_Group.xml and add a valid DocBook authorgroup. The translator can add their details to this file and Publican will append it to $source_lang/Author_Group.xml when the book is build. This allows authors to finalize the original text without needing to know who will translate the book.

4.6.2. Translating Indexes and Glossaries

DocBook automatically collates and sorts <glossentry> elements into a book's glossary; and <primary>, <secondary>, and <tertiary> <indexterm> elements into a book's index. Entries are sorted automatically, and although this system works well for languages written with an alphabet, abugida, or syllabic script, languages written with logograms sort less well.
To manually adjust the sort order of a glossary entry or index entry, manually add DocBook's sortas attribute to the XML element. For example, to ensure that the Japanese word 暗号化 sorts correctly in an index, specify:
#. Tag: indexterm
#, no-c-format
msgid "<primary>encryption</primary>"
msgstr "<primary sortas="あんごうか">暗号化</primary>"
Similarly, to ensure that the Japanese word 暗号化 sorts correctly in a glossary, specify:
#. Tag: glossentry
#, no-c-format
msgid "<glossterm>encryption</glossterm>"
msgstr "<glossterm sortas="あんごうか">暗号化</glossterm>"

4.7. Building a document

Note — Customizing output

The parameters set in the document configuration file (by default, publican.cfg) allow you to control many aspects of the way in which a document is presented — refer to Section 4.1.1, “The publican.cfg file”.
If you maintain multiple versions of a document, you can create a configuration file for each version. When building the document, you can use the --config to specify which configuration file (and therefore which set of parameters) to use in a particular build, for example:
$ publican build --formats html,pdf --langs en-US,de-DE,hu-HU --config community.cfg
To build a document:
  1. Confirm the YEAR and HOLDER entities have been configured in the Doc_Name.ent file, as described in Section 4.1.6, “Doc_Name.ent”.
  2. Change into the root directory of the document. For example, if the document is named Test_Book and is located in the ~/books/ directory, run the following command:
    $ cd ~/books/Test_Book
  3. Run a test for any errors that would stop the book from building in your chosen language, for example:
    $ publican build --formats=test --langs=en-US
  4. Run the following command to build the book:
    $ publican build --formats=formats --langs=languages
    Replace formats with a comma-separated list of the formats that you want to build; for example, html,html-single,pdf. Replace langs with a comma-separated list of the languages that you want to build; for example, en-US,sv-SE,uk-UA,ko-KR.

Formats for the build action

html
Publican outputs the document as in multiple HTML pages, with each chapter and major section on a separate page. Publican places an index at the start of the document, and places navigational elements on each page.
Use the chunk_first and chunk_section depth parameters in the publican.cfg file to control how Publican chunks sections in this format.
html-single
Publican outputs the document as a single HTML page with the table of contents near the top of the page.
html-desktop
Publican outputs the document as a single HTML page with the table of contents located in a separate pane on the left side of the document.
man
Publican outputs the document as a manual page ("man page") for use with Linux, UNIX, and similar operating systems.
pdf
Publican outputs the document as a PDF file.
test
Publican validates the XML structure of the book, but does not transform the XML into another format.
txt
Publican outputs the document as a single text file.
epub
Publican outputs the document as an e-book in EPUB format.
eclipse
Publican outputs the document as an Eclipse help plugin. Refer to Section 4.1.1, “The publican.cfg file” for details of specifying Eclipse's id, name, and provider-name parameters with Publican's ec_id, ec_name, and ec_provider parameters.
The following examples demonstrate commonly used $ publican build commands:
$ publican build --help
List available $ publican build options for building a book.
$ publican build --formats=test --langs=languages
Check that the book can be built correctly. Build --formats=test before running any other $ publican build command, and before checking a book back into a version-controlled repository from which other contributors might download it.
$ publican build --formats=html --langs=languages
Build the book in multi-page HTML format. The HTML output will be located in the Doc_Name/tmp/language/html/ directory. Each chapter and major section is placed in a separate HTML file. You can control the depth at which Publican places subsections into separate HTML files with the chunk-section-depth parameter in the publican.cfg — refer to Section 4.1.1, “The publican.cfg file”.
$ publican build --formats=html-single --langs=languages
Build the book in single-page HTML format. The output will be a single HTML file located in the Doc_Name/tmp/language/html-single/ directory.
$ publican build --formats=pdf --langs=languages
Build the book as a PDF file. Publican relies on an external application, FOP to render PDF. Therefore, building PDF might not be available on all systems, depending on the availability of FOP. The output will be a single PDF file located in the Doc_Name/tmp/language/pdf/ directory.
$ publican build --formats=html,html-single,pdf --langs=languages
Build the book in multi-page HTML, single-page HTML, and PDF formats.

4.7.1. Building a document without validation

Publican validates your XML against the DocBook document type definition (DTD) before it builds the content. However, while a document is under development, you might sometimes want to skip validation while building, especially if the document contains cross-references (<xref>s) to sections of the document that do not yet exist. To skip validation, run $ publican build with the --novalid option. Cross-references to non-existent content appear in the built document as three question marks: ???.
Because the document has not been validated against the DTD, the quality of the output produced when you build with the --novalid option is highly suspect. Do not publish documentation that you have built with the --novalid option.

4.8. Packaging a document

Packages other than RPM packages

This section discusses packaging documents for distribution through the RPM Package Manager. However, when you use the $ publican package command, Publican generates a tarball that you can use to build a package to distribute through different package manager software. If you run publican package on a computer on which rpmbuild is not installed, Publican still generates the tarball, even though it cannot then generate an RPM package from that tarball.

Note — Customizing output

The parameters set in the document configuration file (by default, publican.cfg) allow you to control many aspects of the way in which a document is presented and packaged — refer to Section 4.1.1, “The publican.cfg file”.
If you maintain multiple versions of a document, you can create a configuration file for each version. When packaging the document, you can use the --config to specify which configuration file (and therefore which set of parameters) to use in a particular build, for example:
$ publican package --lang hi-IN --config community.cfg
Publican not only builds documentation, but it can package built content for distribution to individual workstations and to web servers as RPM packages. RPM packages are used to distribute software to computers with Linux operating systems that use the RPM Package Manager. These operating systems include Red Hat Enterprise Linux, Fedora, Mandriva Linux, SUSE Linux Enterprise, openSUSE, Turbolinux, and Yellow Dog Linux, to name just a few.

4.8.1. Types of RPM packages

Publican can produce both source RPM packages (SRPM packages) and binary RPM packages. Furthermore, both SRPM packages and binary RPM packages can be configured to deploy to workstations or web servers.

4.8.1.1. Source RPM packages and binary RPM packages

SRPM packages contain the source code used to generate software rather than the software itself. To use an SRPM package, a computer must compile the source code into software — or in this case, into documents. SRPM packages of Publican documents contain XML files and a spec file rather than finished documents in formats such as HTML and PDF. You cannot install documentation directly from SRPM packages with current versions of the RPM Package Manager.
Conversely, binary RPM packages contain software — or in this case, a document — that is ready to copy to a location in the computer's file system and use immediately. The contents of the binary RPM package do not need to be compiled by the computer onto which they are installed. Therefore, when installing documentation solely for local use the computer does not need to have Publican installed. Installing Publican-generated documentation on a webserver does requires Publican to be installed, but for reasons other than compiling the source code. Refer to Section 4.8.1.2, “Desktop packages and web packages” for a description of the differences between documentation installed for local use (desktop RPMs) and documentation installed to serve as web content (web RPMs).

4.8.1.2. Desktop packages and web packages

Publican can package documents for reading on a computer workstation (a desktop RPM package) or to install on a web server and publish on the World Wide Web (a web RPM package). The desktop RPM package of a Publican document and the web RPM package of the same document differ in that the desktop RPM package installs documentation only for local use on a computer, while the web RPM installs documentation for local use, but also to be served to the World Wide Web.
Desktop (binary) RPM packages of Publican documents contain the documentation in single-page HTML format. Documents distributed in these packages are installed in a subdirectory of /usr/share/doc/, the location specified by the Filesystem Hierarchy Standard (FHS) for ‘Miscellaneous documentation’.[3] The desktop RPM package also contains a desktop file, to be placed in /usr/share/applications/. This file enables desktop environments to add the installed document to their menus for ease of reference by users. By default, the menu item appears under SystemDocumentation on the GNOME desktop. To customize the placement of the menu item, create a documentation menu package to supply .directory and .menu files and set the dt_requires and menu_category parameters in the publican.cfg file to require this package and supply the appropriate menu category. Refer to Section 4.8.1.3, “Desktop menu entries for documents”
By default, web RPM packages of Publican documents contain the documentation in single-page HTML, multi-page HTML, EPUB, and PDF formats. The formats included vary if:
  • you publish documentation in a language in which PDF output is not currently supported. Publican relies on FOP to generate PDF output. FOP does not presently support right-to-left text (for example, Arabic, Persian, or Hebrew). Furthermore, because FOP cannot presently specify fonts on a character-by-character basis, a lack of available fonts in Indic scripts that also include Latin glyphs prevents Publican from reliably generating PDF output in Indic languages. By default, Publican does not include PDF files in web RPM packages generated in Arabic, Persian, Hebrew, or any Indic language.
  • your book or your brand contains the web_formats parameter. The value of this parameter overrides the default formats that Publican packages. For example, to publish the document only as single-page HTML, PDF, and text, set web_formats: "html-single,pdf,txt"
Built content is installed in subdirectories of /var/www/html/, a common document root for web servers. Note that the web SRPM package generates both a web binary RPM package and desktop binary RPM package.

4.8.1.3. Desktop menu entries for documents

By default, RPM packages of Publican documents for desktop use appear on the GNOME desktop under the SystemDocumentation menu. When users have large numbers of documents installed on their systems, this menu becomes very cluttered and difficult to navigate. Documentation for many different products and perhaps different languages becomes intermixed, adding to the confusion.
To group documentation for your product under a separate submenu within the GNOME SystemDocumentation menu, you must:
  • create and distribute a desktop menu package that creates the new submenu.
  • specify the menu category in the document, and optionally, have the documentation package require the desktop menu package.
Note that the Documentation menu does not group entries under a submenu until two or more documents are installed that belong on that submenu. The first document appears under SystemDocumentation.
4.8.1.3.1. Creating an desktop menu package
A desktop menu package consists of:
  • a desktop entry (.directory) file that provides metadata about the new submenu.
  • a desktop menu (.menu) file that defines the position of the new submenu within the Documentation menu.
The structure for the .directory file for Publican-generated documentation is as follows:
  • the group header [Desktop Entry]
  • the Name parameter, set to the name of the submenu that you want to place under the Documentation menu.
  • optionally, localizations of the Name parameter, in the format Name[language_code] where language_code is a language code in glibc format, not the XML format that Publican uses for language codes.
  • the Comment parameter, set to a description of the new submenu.
  • optionally, localizations of the Comment parameter, in the format Comment[language_code] where language_code is a language code in glibc format, not the XML format that Publican uses for language codes.
  • the Type parameter, set to Directory.
  • the Encoding parameter, set to UTF-8.

Example 4.5. Example .directory file

The following file, menu-example.directory illustrates the structure of a desktop entry file.
[Desktop Entry]
Name=Example
Name[fr]=Exemple
Name[it]=Esempio
Comment=Example Documentation menu
Comment[fr]=Exemple d'une menu de documentation
Comment[it]=Esempio di un menù di documentazione
Type=Directory
Encoding=UTF-8
The desktop entry file is placed in /usr/share/desktop-directories/
For a full description of how desktop entries work, refer to the Desktop Entry Specification, available from http://standards.freedesktop.org/entry-spec/latest/
A desktop menu file is an XML file that contains:
  • a document type declaration for the freedesktop.org Desktop Menu Specification:
    <!DOCTYPE Menu PUBLIC "-//freedesktop//DTD Menu 1.0//EN"
    "http://www.freedesktop.org/standards/menu-spec/1.0/menu.dtd">
  • a root element, <Menu>, that contains:
    • a <Name> element with the content Documentation
    • another <Menu> element that in turn contains:
      • a <Name> element with the content Documentation (just like the root element)
      • a <Directory> element with its content the name of the desktop entry file you created, for example:
        <Directory>menu-example.directory</Directory>
      • an <Includes> element with the content X-category_name, where category_name is an identifier for the documents that will be grouped together under this menu entry. For example:
        <Includes>X-Example-Docs</Includes>

Example 4.6. Example .menu file

The following file, menu-example.menu illustrates the structure of a desktop menu file.
<!DOCTYPE Menu PUBLIC "-//freedesktop//DTD Menu 1.0//EN"
 "http://www.freedesktop.org/standards/menu-spec/1.0/menu.dtd">
<Menu>
	<Name>Documentation</Name>
	<Menu>
		<Name>Documentation</Name>
		<Menu>
			<Name>Example</Name>
			<Directory>menu-example.directory</Directory>
			<Include>
				<Category>X-Example-Docs</Category>
			</Include>
		</Menu>
	</Menu> 
</Menu> 
The desktop menu file is placed in /etc/xdg/menus/settings-merged/
For a full description of how desktop menus work, refer to the Desktop Menu Specification, available from http://standards.freedesktop.org/desktop-menu-spec/latest/
4.8.1.3.2. Setting a desktop menu category
To place a document in a submenu of SystemDocumentation, set the menu_category parameter in its publican.cfg file to match the content of the <Includes> element in the corresponding desktop menu file. For example, consider a desktop menu file that contains the element:
<Includes>X-Example-Docs</Includes>
To place a document in the submenu defined by this desktop menu file, the document's publican.cfg file should contain:
menu_category: X-Example-Docs

Important

Publican will process the string in menu_category and replace __LANG__ with the current language. This allows menus to be customized on a per language basis.
menu_category: X-Example-Docs-__LANG__
Note that you can include this parameter in the defaults.cfg file or overrides.cfg file of a brand so that all documents built with that brand are grouped into this submenu automatically without you having to set the menu_category parameter in each document.
If you ship the desktop menu and desktop entry files in an RPM package, you can make RPM packages of documentation require the desktop menu package. With this dependency set, the desktop menu package is installed automatically on users' systems when they install a documentation package, which ensures that the documentation appears under the submenu you have created for your project. Set the dependency with the dt_requires parameter in the document's publican.cfg file. For example, if you ship a desktop menu package named foodocs-menu, set:
dt_requires: foodocs-menu
Note that you can include this parameter in the defaults.cfg file or overrides.cfg file of a brand so that all documents built with that brand require the same desktop menu package.

4.8.2. The $ publican package command

Use the $ publican package --lang=Language_Code command to package documents for distribution in the language that you specify with the --lang option. Refer to Appendix G, Language codes for more information about language codes.
If you run $ publican package with no options other than the mandatory --lang option, Publican produces a web SRPM package. The full range of options for publican package is as follows:
--lang language
specifies the language in which to package the documentation.

Incomplete translations

If translation in a particular language is not complete by the scheduled release date, consider marking the language with the ignored_translations parameter in the document's publican.cfg file. The package will be named appropriately for the language, but will contain documentation in the original language of the XML rather than a partial translation. When translation is complete, remove the ignored_translations parameter, increase the release number in the Project-Id-Version field in the Book_Info.po file for that language, and generate the package again. When you distribute the revised package, it becomes available to replace the original untranslated package.
--config filename
specifies that Publican should use a configuration file other than the default publican.cfg file.
--desktop
specifies that Publican should create a desktop RPM package rather than a web RPM package.
--brew
specifies that Publican should push the completed package to Brew. Brew is the build system used internally by Red Hat; this option is meaningless outside Red Hat.
--scratch
when used together with the --brew and --desktop options, specifies that an SRPM package should be built as a scratch build when sent to Brew. Scratch builds are used to verify that an SRPM package is structured correctly, without updating the package database to use the resulting package.
--short_sighted
specifies that Publican should build the package without including the version number of the software (version in the publican.cfg file) in the package name.

Omitting the software version number

Much software documentation is version-specific. At best, the procedures described in the documentation for one version of a product might not help you to install, configure, or use a different version of the product. At worst, the procedures described in the documentation for one version might be misleading or even harmful when applied to a different version.
If you distribute documentation as RPM packages without version numbers in the package names, the RPM Package Manager on users' computers will automatically replace any existing documentation with the documentation for the latest version; users will not have access to documentation for more than one version of the software at a time. Be certain you want this outcome.
--binary
specifies that Publican should build the package as a binary RPM package.
After you run the $ publican package command, Publican outputs completed SRPM packages to the document's tmp/rpm directory, and completed binary RPM packages to the document's tmp/rpm/noarch directory.
By default, Publican documentation packages are named:

productname-title-productnumber-[web]-language-edition-pubsnumber[.[build_target].noarch].file_extension.

Publican uses the information in the document's configuration file (by default, publican.cfg) to supply the various parameters in the file name, and then information in the Book_Info.xml file for any parameters missing from the configuration file. Refer to Section 4.1, “Files in the book directory” for details of the parameters used in these files. Additionally, note that:
  • web RPM packages include the element -web- between the product version and the language code.
  • SRPM packages have the file extension .src.rpm but binary RPM packages have the file extension .rpm
  • binary RPM packages include build_target.noarch before the file extension, where build_target represents the operating system and version that the package is built for as set by the os_ver parameter in the publican.cfg file. The noarch element specifies that the package can be installed on any system, regardless of the system architecture.
  • use of the --short_sighted option removes the -productnumber- from the package name.
  • packages of translated documents take their release numbers from the Project-Id-Version parameter in the Article_Info.po or Book_Info.po file. This release number is specific to a particular language and bears no relationship to the release numbers of the same document in the original language or any other language.

4.8.2.1. The $ publican package command — Example usage

The following examples illustrate some common options, illustrated with the Foomaster 9 Configuration Guide, edition 2, revision 6.
$ publican package --lang=cs-CZ
produces a web SRPM package named Foomaster-Configuration_Guide-9-web-cs-CZ-2-6.src.rpm that contains XML source files in Czech, together with a spec file.
$ publican package --desktop --lang=cs-CZ
produces a desktop SRPM package named Foomaster-Configuration_Guide-9-cs-CZ-2-6.src.rpm that contains XML source files in Czech, together with a spec file.
$ publican package --binary --lang=cs-CZ
produces both a web binary RPM package named Foomaster-Configuration_Guide-9-web-cs-CZ-2-6.el5.noarch.rpm and a desktop binary RPM package named Foomaster-Configuration_Guide-9-cs-CZ-2-6.el5.noarch.rpm that contain documentation in Czech, built for the Red Hat Enterprise Linux 5 operating system.
$ publican package --desktop --binary --lang=cs-CZ
produces a desktop binary RPM package named Foomaster-Configuration_Guide-9-cs-CZ-2-6.el5.noarch.rpm that contains documentation in Czech, built for the Red Hat Enterprise Linux 5 operating system.
$ publican package --desktop --short_sighted --lang=cs-CZ
produces a desktop SRPM package named Foomaster-Configuration_Guide-cs-CZ-2-6.src.rpm that contains documentation in Czech. This package will replace any Configuration Guides for previous versions of Foomaster that exists on a system. Users cannot have access to both the Foomaster 8 Configuration Guide and the Foomaster 9 Configuration Guide.

4.9. Conditional tagging

In some cases you may need to maintain multiple versions of a book; for example, a HOWTO guide for product FOO can have an upstream version and an enterprise version, with very subtle differences between them.
Publican makes it easy to manage differences between multiple versions of a book by allowing you to use a single source for all versions. Conditional tagging allows you to make sure that version-specific content only appears in the correct version; that is, you conditionalize the content.
To conditionalize content in a book, use the tag attribute $ condition. For example, let's say the book How To Use Product Foo has an "upstream", "enterprise", and "beta" version:
<para condition="upstream">
	<application>Foo</application> starts automatically when you boot the system.
</para>
	
<para condition="enterprise">
	<application>Foo</application> only starts automatically when you boot the system when installed together with <application>Bar</application>.
</para>	
	
<para condition="beta">
	<application>Foo</application> does not start automatically when you boot the system.
</para>
	
<para condition="beta,enterprise">
	To make <application>Foo</application> start automatically at boot time, edit the <filename>/etc/init.d/foo</filename> file.
</para>
To build a specific version (and thereby capture all content conditionalized for that version), add the $ condition: version parameter to the publican.cfg file and run the $ publican build command as normal. For example, if you add condition: upstream to the publican.cfg file of How To Use Product Foo and run:
$ publican build --formats=pdf --langs=en-US
Publican filters out all tags with condition attributes other than condition="upstream" and builds How To Use Product Foo in as a PDF file in American English.

Root nodes and conditional tagging

If the root node of an XML file is excluded with a conditional, your document will not build, because empty files are not valid XML. For example, if Installation_and_configuration_on_Fedora.xml contains a single chapter:

<?xml version='1.0' encoding='utf-8' ?>
<!DOCTYPE chapter PUBLIC "-//OASIS//DTD DocBook XML V4.5//EN" "http://www.oasis-open.org/docbook/xml/4.5/docbookx.dtd" [
]>
<chapter id="chap-Installation_and_configuration_on_Fedora" condition="Fedora">
<title>Installation and configuration on Fedora</title>

[text of chapter]

</chapter>

and this chapter is included in User_Guide.xml with an <xi:include> tag, the document will not build with $ condition: Ubuntu set in the publican.cfg file.
To exclude this chapter, add a condition to the <xi:include> tag in User_Guide.xml, not to the <chapter> tag in Installation_and_configuration_on_Fedora.xml.

xrefs and conditional tagging

If an <xref> points to content not included in the build due to conditional tagging, the build will fail. For example, with $ condition: upstream set in the publican.cfg file, $ publican build --formats=pdf --langs=en-US will fail if the book has the tag <xref linkend="betasection"> pointing to <section id="betasection" condition="beta">.

4.9.1. Conditional tagging and translation

Use conditional tagging with great caution

Use conditional tagging only with great caution in books that you expect to be translated, as conditional tagging creates extra difficulties for translators.
Conditional tagging creates difficulty for translators in two ways: it obscures context in the portable object (PO) files through which translators work, and it makes proofreading more difficult for translators who are not deeply familiar with your book and all the conditions that you have set.
The PO files for the document contain the full set of tags from the XML files, regardless of any conditions set. When translators open the PO file for the example from How To Use Product Foo in Section 4.9, “Conditional tagging”, they see:
#. Tag: para
#, no-c-format
msgid "<application>Foo</application> starts automatically when you boot the system."
msgstr ""

#. Tag: para
#, no-c-format
msgid "<application>Foo</application> only starts automatically when you boot the system when installed together with <application>Bar</application>."
msgstr ""

#. Tag: para
#, no-c-format
msgid "<application>Foo</application> does not start automatically when you boot the system."
msgstr ""

#. Tag: para
#, no-c-format
msgid "To make <application>Foo</application> start automatically at boot time, edit the <filename>/etc/init.d/foo</filename> file."
msgstr ""
Because PO files include do not include attributes from tags, there is nothing obvious here to show translators that these paragraphs are alternatives to each other and that the writer does not intend that meaning should flow from one paragraph to the next.
In this example, the only paragraphs where the meaning flows logically from one to the next is between paragraphs three and four. Because both of these paragraphs appear in the book for the beta version of the product, they (hopefully) make sense together. Beyond that, the use of conditionals here requires translators to translate individual small chunks of content without the ability to follow the context from one paragraph to the next. When translators must work under these conditions, the quality of the translation will suffer, or the time required — and therefore the cost of translation — will increase.
Furthermore, unless the translators who work on your book know how to configure Publican's publican.cfg file and are aware of the valid conditions for your book, they cannot proofread their work. Without that knowledge, when translators proofread a document, they will wonder why they cannot find text that they know they translated and can find easily in the PO file. If you must use conditionals in your book, you must be prepared to provide a greater degree of support to your translators than you would otherwise provide.
As an alternative to conditionals, consider maintaining separate versions of your book in separate branches of a version-controlled repository. You can still share XML files and even PO files between the various branches as necessary, and some version control systems allow you to share changes readily among branches.
If you maintain two versions of a book in the same repository, we recommend using a separate config file for each version. For example, the upstream.cfg file might contain the condition condition: upstream and the enterprise.cfg file might contain the condition condition: enterprise. You could then specify the version of the document to build or package with the --config; for example, $ publican package --lang en-US --config upstream.cfg. Using two separate config files saves you from having to edit the one config file each time you build or package a document.

4.10. Pre-release software and draft documentation

Completed documentation for pre-release software is not the same thing as draft documentation.
Drafts are unfinished versions of a book or article, and their unfinished state is unrelated to the status of the software they document.
In both circumstances, however, it is important to make the status of the software, documentation or both clear to users, developers, readers and reviewers.

4.10.1. Denoting pre-release software

Documentation for pre-release software, especially pre-release software being distributed to testers, customers and partners, should carry a clear mark denoting the beta-status of the software.
To create that mark do the following:
  1. Add the software's pre-release version number, or equivalent state information, to the <subtitle> tag in your Book_Info.xml file. Place this additional text in <remark> tags. For example:
    <subtitle>Using Red Hat Enterprise Warp Drive<remark> Version 1.1, Beta 2</remark></subtitle>
    
    
  2. add show_remarks to the publican.cfg file and set it to '1':
    show_remarks: 1
    
    
When you build your book with this <remark> tag and the show_remarks setting in place, the pre-release nature of the software is displayed clearly and unmistakably. PDF builds display the remark on their cover and title pages. HTML builds (both single-page HTML and multiple-page HTML) display the remark near the beginning of index.html.
Because this approach makes no changes to the information in Book_Info.xml used to generate RPMs, it also ensures there is no ambiguity in the RPM subsystem's operation.

Important

It is the writer's responsibility to remove the <remark> tag and its contents and remove or turn off show_remarks when documentation is updated for use with the release version of the software.

4.10.2. Denoting draft documentation

Unfinished documentation made available to others for review should be labeled clearly as such.
  • To add the draft watermark to your documentation add the status="draft" attribute to the <article>, <book> or <set> tag in your document's root node. For example:
    <book status="draft">
    
    
By default, your root node is the <book> tag in your Doc_Name.xml file.
If you are working on an article or set, the root node is the <article> or <set> tag in Doc_Name.xml.
Adding the status="draft" attribute causes each page of the document to show the draft watermark. This is by design.
Even if you change only a portion of a work before sending it out for review, marking every page as draft will encourage reviewers to report errors or typos they spot in passing. It will also ensure non-reviewers who encounter the work do not mistake a draft for a finished version.

4.10.3. Denoting draft documentation of pre-release software

To denote unfinished documentation of pre-release software properly, do both previously noted procedures.


[2] Refer to section 2.4 "Character Data and Markup" in the XML 1.0 standard, available from http://www.w3.org/TR/2008/REC-xml-20081126/.

Chapter 5. Branding

Brands are collections of files that Publican uses to apply a consistent look and style to HTML and PDF output. They provide boilerplate text that appears at the beginning of documents, images such as logos, and stylistic elements such as color schemes. Publican ships with one brand, common/. Documentation projects can produce and distribute brands to their contributors, either as a package (for example, an RPM package) or as an archive (for example, a tarball or ZIP file).

5.1. Installing a brand

Publican brands for Fedora, Genome, and oVirt documents are available as RPM packages in Fedora. Similarly, Red Hat internally distributes RPM packages containing Publican brands for GIMP, JBoss, and Red Hat documents. Providing that you have access to the relevant repositories, you can install these brands on a computer that runs Red Hat Enterprise Linux or Fedora — or an operating system derived from either — with the command yum install publican-brand or with a graphical package manager such as PackageKit.
If you use Publican on an operating system that does not use RPM packages, your documentation project might provide its brand in another format. Whatever the format in which the brand is supplied, you must place the brand files in a subdirectory of the Publican Common_Content directory. By default, this directory is located at /usr/share/publican/Common_Content on Linux operating systems and at %SystemDrive%/%ProgramFiles%/Publican/Common_Content on Windows operating systems — typically, C:/Program Files/Publican/Common_Content
Each currently available brand is distributed under a brand-specific license as follows:
To install the brand:
  1. If the brand was supplied to you in an archive of some kind, for example, a tarball or ZIP file, unpack the brand into a new directory on your system.
  2. Change into the directory in which you created or unpacked the brand:
    $ cd publican-brand
    where brand is the name of the brand.
  3. Build the brand:
    $ publican build --formats xml --langs all --publish
  4. Install the brand:
    $ sudo publican install_brand --path path
    where path is the path to the Publican Common Content files. For example, on a Linux system, run:
    $ sudo publican install_brand --path /usr/share/publican/Common_Content
    or on a Windows system, run
    $ publican install_brand --path "C:/Program Files/Publican/Common_Content"

Table 5.1. Current Brands and their packages

Brand License of Common Content files Default license for documents Package Comment
common CC0 1.0 GFDL Version 1.2 publican GPL compatible license. No options.
RedHat CC-BY-SA 3.0 CC-BY-SA 3.0 publican-redhat
Fedora CC-BY-SA 3.0 CC-BY-SA 3.0 publican-fedora
JBoss CC-BY-SA 3.0 CC-BY-SA 3.0 publican-jboss No Options.
oVirt OPL 1.0 OPL 1.0 publican-ovirt No Options.
GIMP GFDL Version 1.2 GFDL Version 1.2 publican-gimp Matches the license for existing GIMP documentation.
Genome OPL 1.0 OPL 1.0 publican-genome No Options.
Note the difference in licensing between the common content files provided in the common brand (CC0) and the default license set for books generated with the common brand (GFDL). The CC0 license allows you to redistribute and relicense the files that make up the common brand (including the CSS and image files) to suit your project. Publican suggests the GFDL for documentation by default because Publican is developed primarily to build documentation for software. The GFDL is compatible with the GPL, which is the most commonly used license for open-source software.

5.2. Creating a brand

Use the $ create_brand action to create a new brand. When you create a new brand, you must give it a name and specify the original language for the brand's XML files. The --name option provides the name, and the --lang option specifies the language. The complete command is therefore:
$ publican create_brand --name=brand --lang=language_code
Publican creates a new subdirectory named publican-brand, where brand is the brand that you specified with the --name option.
For example, to create a brand called Acme, which will have its Common Content XML files written originally in American English, run:
$ publican create_brand --name=Acme --lang=en-US
Publican creates the brand in a subdirectory named publican-Acme.
To configure your new brand, search for the word SETUP in the default files that Publican creates and edit the files to provide the missing details. On Linux operating systems, you can search for the word SETUP in these files with the command:
$ grep -r 'SETUP' *

5.3. Files in the brand directory

Running the $ publican create_brand --name=brand --lang=language_code command creates a directory structure and the required files. The brand directory initially contains:
  • COPYING
  • defaults.cfg
  • overrides.cfg
  • publican.cfg
  • publican-brand.spec, where brand is the name of the brand.
  • README
  • a subdirectory for the brand's XML files, CSS stylesheets, and default images. The subdirectory is named with the language code of the original language of the brand (for example, en-US). These files are:
    • Feedback.xml
    • Legal_Notice.xml
    • the css subdirectory, which contains:
      • overrides.css
    • the images subdirectory, which contains 43 images in both raster (PNG) and vector (SVG) formats.

5.3.1. The publican.cfg file

The publican.cfg file in a brand serves a similar purpose to the publican.cfg file in a document — it configures a number of basic options that define your brand.
version
specifies the version number for the brand. When you create the brand with $ publican create_brand, the version number is set to 0.1. Update the version number here in the brand publican.cfg file and in the publican-brand.spec file when you prepare a new version of the brand.
Note that this parameter is unrelated to the version number of documents built with this brand. For example, the Fedora 12 Installation Guide has its version set as 12 in its publican.cfg file, but might be built with version 1.0 of the publican-fedora brand.
xml_lang
specifies the language of the source XML files for the brand's Common Content, for example, en-US, as set by the --lang option for $ publican create_brand.
release
specifies the release number for the brand. When you create the brand with $ publican create_brand, the release number is set to 0. Update the version number here in the brand publican.cfg file and in the publican-brand.spec file when you prepare a new release of an existing version of the brand.
type
when set to type: brand, this parameter identifies the contents of this directory as a brand, rather than a book, article, or set.
brand
specifies the name of the brand, as set by the --name option for $ publican create_brand.
web_cfg
the full path for the Publican site configuration file for non standard RPM websites.
web_dir
the full path to where files will be installed. You must also set wwwdir in publican-brand.spec.
web_req
the name of the RPM package that will supply the Publican site config file.

5.3.2. The defaults.cfg file and overrides.cfg file

Every document built in Publican has a publican.cfg file in its root directory, which configures build options for the document. Refer to Section 4.1.1, “The publican.cfg file” for a full description of these options. The defaults.cfg file and overrides.cfg file in a brand supply default values for any of the parameters that you can otherwise set with a document's publican.cfg file.
When you build a document with a particular brand, Publican first applies the values in the brand's defaults.cfg file before it applies the values in the document's publican.cfg file. Values in the document's publican.cfg file therefore override those in the brand's defaults.cfg file.
Publican next applies the values in the brand's overrides.cfg file, which therefore override any values in the brand's defaults.cfg file and the document's publican.cfg file.
Use the defaults.cfg file to set values that you routinely apply to your brand but want to allow writers to change in particular books; use the overrides.cfg file for values that you do not want to allow writers to change.
You can add a list of banned tags or attributes using banned_tags and banned_attrs respectively to either defaults.cfg or overrides.cfg. These will be listed by the Publican action print_banned.

5.3.3. publican-brand.spec file

Some Linux operating systems use the RPM Package Manager to distribute software, in the form of RPM packages. In general terms, an RPM package contains software files compressed into an archive, accompanied by a spec file that tells the RPM Package Manager how and where to install those files.
When you create a brand, Publican generates the outline of an RPM spec file for the brand. The automatically generated spec file provides you with a starting point from which to create an RPM package to distribute your brand. Refer to Section 5.4, “Packaging a brand” to learn how to configure the spec file and use it to produce an RPM package.

5.3.4. README

The README file contains a brief description of the brand package.

5.3.5. COPYING

The COPYING file contains details of the copyright license for the package and perhaps the text of the license itself.

5.3.6. Common Content for the brand

Inside the brand directory is a subdirectory named after the default XML language for brand, as set with the --lang option when you created the brand. This subdirectory contains XML and image files that override the default Common Content provided with Publican. Customizing these files provides your brand with its distinctive appearance, including its color scheme and logos.

5.3.6.1. Feedback.xml

The Feedback.xml file is included by default in the preface of every book produced in Publican. It invites readers to leave feedback about the document. Customize this file with the contact details of your project. If your project uses a bug tracking system such as Bugzilla, JIRA, or Trac, you could include this information here.

5.3.6.2. Legal_Notice.xml

The Legal_Notice.xml file contains the legal notice that appears at the beginning of every document produced by Publican. Insert the details of your chosen copyright license into this file. Typically, this might include the name of the license, a short summary of the license, and a link to the full details of the license.

5.3.7. The css subdirectory

The css subdirectory contains a single file: overrides.css.

5.3.7.1. overrides.css

The overrides.css file sets the visual style for your brand. Values in this file override those in Publican's Common_Content/common/xml_lang/css/common.css file.

5.3.8. The images subdirectory

The images subdirectory contains 43 images in both portable network graphics (PNG) and scalable vector graphics (SVG) format. These images are placeholders for various navigation icons, admonition graphics, and brand logos. They include:
image_left
is a logo for the product to which this document applies. It appears at the top left corner of HTML pages, where it contains a hyperlink to a web page for the product, as defined by prod_url in the publican.cfg file for the document. Consider setting prod_url in the brand's defaults.cfg or overrides.cfg file.
image_right
is a logo for the team that produced this documentation. It appears at the top right corner of HTML pages, where it contains a hyperlink to a web page for the documentation team, as defined by doc_url in the publican.cfg file for the document. If all the documentation for this brand is produced by the same team, consider setting doc_url in the brand's defaults.cfg or overrides.cfg file.
title_logo
is a larger version of your product logo, which appears on the title page of PDF documents and at the start of HTML documents.
note, important, warning
are icons that accompany the XML admonitions <note>, <important>, and <warning>.
dot, dot2
are bullets used for <listitem>s in <itemizedlist>s.
stock-go-back, stock-go-forward, stock-go-up, stock-home
are navigation icons for HTML pages.
h1-bg
is a background for the heading that contains the name of your product, as it appears at the very beginning of a HTML document.
watermark_draft
is a watermark that appears on pages of draft documentation. Refer to Section 4.10.2, “Denoting draft documentation”.

5.3.9. The brand_dir option

The Publican build option brand_dir allows you to specify the location of brand files. These files do not have to be part of an installed brand.
You can ship custom XSL in a folder named xsl in your brand: it sits at the same level as the various language files for your brand. Publican uses any XSL that it finds in that directory to override the XSL templates that we ship in the common brand (which in turn override the XSL templates that the DocBook project ships).

Important

Brands with custom XSLT need to change the relative path of referencing XSL templates to a URI.

5.4. Packaging a brand

Packages other than RPM packages

This section discusses packaging documents for distribution through the RPM Package Manager. However, when you use the $ publican package command, Publican generates a tarball that you can use to build a package to distribute through different package manager software. If you run publican package on a computer on which rpmbuild is not installed, Publican still generates the tarball, even though it cannot then generate an RPM package from that tarball.
After you create a brand (as described in Section 5.2, “Creating a brand”), Publican can help you to distribute the brand to members of your documentation project as RPM packages. RPM packages are used to distribute software to computers with Linux operating systems that use the RPM Package Manager. These operating systems include Red Hat Enterprise Linux, Fedora, Mandriva Linux, SUSE Linux Enterprise, openSUSE, Turbolinux, and Yellow Dog Linux, to name just a few.
Publican can produce both source RPM packages (SRPM packages) and binary RPM packages. As part of this process, it also creates the spec file — the file that contains the details of how a package is configured and installed.
SRPM packages contain the source code used to generate software rather than the software itself. To use an SRPM package, a computer must compile the source code into software. SRPM packages of Publican brands contain the configuration files, XML files, and image files that define the brand in its original language, plus the PO files that generate the Common Content files in translated languages. You cannot install documentation directly from SRPM packages with current versions of the RPM Package Manager.
Conversely, binary RPM packages contain software — in this case, a Publican brand — that is ready to copy to a location in the computer's file system and use immediately. The contents of the binary RPM package do not need to be compiled by the computer onto which they are installed, and therefore, the computer does not need to have Publican installed.
To package a brand, use the $ publican package command in the brand directory. When used without any further options, Publican produces an SRPM package. The options for packaging a brand are as follows:
--binary
specifies that Publican should build the package as a binary RPM package.
--brew
specifies that Publican should push the completed package to Brew. Brew is the build system used internally by Red Hat; this option is meaningless outside Red Hat.
--scratch
when used together with the --brew option, specifies that a SRPM package should be built as a scratch build when sent to Brew. Scratch builds are used to verify that a SRPM package is structured correctly, without updating the package database to use the resulting package.
The --lang, --desktop and --short_sighted options that apply when you package books (described in Section 4.8, “Packaging a document”) are meaningless when you package brands. In particular, note that although the --lang option is mandatory when you package a book, you do not need to use it when you package a brand.
By default, Publican brand packages are named:
publican-brand-version-release.build_target.noarch.file_extension.
Publican uses the information in the publican.cfg file to supply the various parameters in the file name. Refer to Section 5.3.1, “The publican.cfg file” for details of configuring this file. Additionally:
  • SRPM packages have the file extension .src.rpm but binary RPM packages have the file extension .rpm
  • binary RPM packages include build_target.noarch before the file extension, where [build_target] represents the operating system and version that the package is built for as set by the os_ver parameter in the publican.cfg file. The noarch element specifies that the package can be installed on any system, regardless of the system architecture.

Chapter 6. Using sets

A set is a collection of books, published as a single output. The Services Plan for example is a set comprised of many books such as the Developer Guide, Engineering Content Services Guide and the Engineering Operations Guide to name just a few. The $ create_book command creates a template for a set by setting the type parameter to Set.
There are two types of set:
  • stand-alone sets
  • distributed sets

6.1. Stand-alone sets

A stand-alone set contains the XML files for each book, all of which are located inside the directory of the set. Stand-alone sets are always built as a set; you cannot build the individual books on their own without modification.
The procedure that follows will guide you through the process of creating a stand-alone set named My Set located in a directory called books/My_Set/. The set will contain Book A and Book B both of which will be manually created inside the books/My_Set/en-US directory.

Procedure 6.1. Creating a stand-alone set

  1. Run the following command in a shell in the books/ directory to create a set named My_Set branded in the Red Hat style and in which the XML will be written in American English.
    publican create --type=Set --name=My_Set --brand=RedHat --lang=en-US
    
    
  2. $ cd into the My_Set/en-US directory and create two directories (not books) called Book_A and Book_B.
    $ cd My_Set/en-US
    $ mkdir Book_A Book_B
  3. $ cd into the books/My_Set/en-US/Book_A directory. Create and edit the Book_A.xml, Book_Info.xml, and any other xml files required for your book such as those required for individual chapters. Ensure that Book_A.xml contains the correct xi:include references to all of your xml files in the directory. For example, if Book A contained Book_Info.xml and Chapter_1.xml, the Book_A.xml file would look like this:
    <?xml version='1.0'?>
    <!DOCTYPE book PUBLIC "-//OASIS//DTD DocBook XML V4.5//EN" 
    "http://www.oasis-open.org/docbook/xml/4.5/docbookx.dtd" [
    ]>
    	  
    <book>
    	  <xi:include href="Book_Info.xml" xmlns:xi="http://www.w3.org/2001/XInclude"></xi:include>
    	  <xi:include href="Chapter_1.xml" xmlns:xi="http://www.w3.org/2001/XInclude"></xi:include>
    </book>
    
    
  4. Use the same process for Book_B, located in the books/My_Set/en-US/Book_B directory, as per the step above.
  5. Open the books/My_Set/en-US/My_Set.xml file in an editor. For each book in the set, add an xi:include reference to the primary xml file from the book. The primary xml file for Book A will be Book_A.xml and for Book B, Book_B.xml. The My_Set.xml file should now look like this:
    <?xml version="1.0"?>
    <!DOCTYPE set PUBLIC "-//OASIS//DTD DocBook XML V4.5//EN" 
    "http://www.oasis-open.org/docbook/xml/4.5/docbookx.dtd" [
    ]>
    
    <set>
    	<xi:include href="Set_Info.xml" xmlns:xi="http://www.w3.org/2001/XInclude" />
    	<xi:include href="Preface.xml" xmlns:xi="http://www.w3.org/2001/XInclude" />
    	<xi:include href="Book_A/Book_A.xml" xmlns:xi="http://www.w3.org/2001/XInclude" />
    	<xi:include href="Book_B/Book_B.xml" xmlns:xi="http://www.w3.org/2001/XInclude" />
    	<xi:include href="Revision_History.xml" xmlns:xi="http://www.w3.org/2001/XInclude" />
    </set>


  6. To make your set XML valid, you will need to change the following:
    1. In My_Set.xml, comment out the following lines:
      
      <remark>NOTE: the href does not contain a language! This is CORRECT!</remark>
      <remark><xi:include href="My_Other_Book/My_Other_Book.xml" xmlns:xi="http://www.w3.org/2001/XInclude"></remark>
      <setindex></setindex>
      
    2. In the Preface.xml and Book_Info.xml for each book you are using, add ../../ to the front of every Common_Content string you see. For example:
      
      <xi:include href="Common_Content/Conventions.xml" xmlns:xi="http://www.w3.org/2001/XInclude" />
      
      This will need to become:
      
      <xi:include href="../../Common_Content/Conventions.xml" xmlns:xi="http://www.w3.org/2001/XInclude" />
      
      This is because in a standalone set, the Common Content folder is two directories further away from where Publican usually looks for it, so it has to be told manually. To build your book individually, without building the entire set, undo this step.
  7. Test your set by running the publican build --formats=test --langs=en-US command.
If you are using pre-existing books, you will need to rearrange them so the XML files are at the level of the set and all images are inside the images directory at the same level. For example:
   -- My_Set
    |-- en-US
    |   |-- Author_Group.xml
    |   |-- Book_A.ent
    |   |-- Book_A.xml
    |   |-- Book_B.ent
    |   |-- Book_B.xml
    |   |-- Book_Info_A.xml
    |   |-- Book_Info_B.xml
    |   |-- chapter_A.xml
    |   |-- chapter_B.xml
    |   |-- images
    |   |   |-- icon.svg
    |   |   `-- image1.png
    |   |-- My_Set.ent
    |   |-- My_Set.xml
    |   |-- Preface.xml
    |   |-- Revision_History.xml
    |   `-- Set_Info.xml
    `-- publican.cfg

The XML files can also be within sub-folders to keep them separate. This is true within the images directory, as well. For example:
   -- My_Set
    |-- en-US
    |   |-- Author_Group.xml
    |   |-- Book_A
    |   |   |-- Book_A.ent
    |   |   |-- Book_A.xml
    |   |   |-- Book_Info.xml
    |   |   `-- chapter.xml
    |   |-- Book_B
    |   |   |-- Book_B.ent
    |   |   |-- Book_B.xml
    |   |   |-- Book_Info.xml
    |   |   `-- chapter.xml
    |   |-- images
    |   |   |-- icon.svg
    |   |   `-- image1.png
    |   |-- My_Set.ent
    |   |-- My_Set.xml
    |   |-- Preface.xml
    |   |-- Revision_History.xml
    |   `-- Set_Info.xml
    `-- publican.cfg

6.2. Distributed sets

A distributed set contains books that are located in a version-controlled repository. Although several version control systems exist, this version of Publican supports only one: Subversion (SVN). By setting the repository location and titles of the included books in the publican.cfg file, each book can be exported to build the entire set. The procedure that follows will guide you through the process of creating a set named My Set containing Book A and Book B.

Important

The following procedure assumes that Book A and Book B already exist and are available in your SVN repository. Currently Publican only supports SVN.

Procedure 6.2. Creating a set

  1. Run the following command in a shell to create a set named My_Set branded in the Red Hat style and in which the XML will be written in American English.
    $ publican create --type=Set --name=My_Set --brand=RedHat  --lang=en-US
    
    
  2. Add the following lines to the publican.cfg file:
    books: Book_A Book_B
    repo: http://PATH-TO-YOUR-SVN-REPOSITORY
    scm: SVN
    
    
    Your repository path should end in the directory before the book you need.
  3. Open the My_Set.xml file in an editor. For each book in the set, add an xi:include reference to the primary XML file from the book. The primary XML file for Book A will be Book_A.xml and for Book B, Book_B.xml. The My_Set.xml file should now look like this:
    <?xml version="1.0"?>
    <!DOCTYPE set PUBLIC "-//OASIS//DTD DocBook XML V4.5//EN" 
    "http://www.oasis-open.org/docbook/xml/4.5/docbookx.dtd" [
    ]>
    
    <set>
    	<xi:include href="Set_Info.xml" xmlns:xi="http://www.w3.org/2001/XInclude" />
    	<xi:include href="Preface.xml" xmlns:xi="http://www.w3.org/2001/XInclude" />
    	<xi:include href="Book_A/Book_A.xml" xmlns:xi="http://www.w3.org/2001/XInclude" />
    	<xi:include href="Book_B/Book_B.xml" xmlns:xi="http://www.w3.org/2001/XInclude" />
    	<xi:include href="Revision_History.xml" xmlns:xi="http://www.w3.org/2001/XInclude" />
    </set>


  4. To make your set XML valid, you will need to comment out the following lines in My_Set.xml
    
    <remark>NOTE: the href does not contain a language! This is CORRECT!</remark>
    <remark><xi:include href="My_Other_Book/My_Other_Book.xml" xmlns:xi="http://www.w3.org/2001/XInclude"></remark>
    <setindex></setindex>
    
  5. Test your set by running the publican build --formats=test --langs=en-US command.

    Important

    When building a set, the publican clean_ids command will be run over each book because of the constraint that IDs must be unique across all books. Be careful of creating IDs that rely on content that may not be available when building books independently of the set.

Chapter 7. Building a website with Publican

Publican not only builds documents for publication but can build and manage a documentation website as well. For a suite of documents that you maintain by yourself, you can use Publican to build a site on your local system; you can then upload the site to a webserver by whatever means you choose. This approach does not scale well, however, so for team-based documentation projects, Publican can generate RPM packages of documentation to install on the webserver. To install Publican-generated RPM packages on a webserver, Publican (version 2.1 or higher) and rpm must be installed on the server. If you build and maintain the website on a workstation and upload it to a webserver for publication, Publican and rpm do not need to be installed on the webserver.
The websites that Publican creates consist of four parts: the website structure, a home page, product and version description pages, and the documents published on the site. The website structure itself consists of:
  • a configuration file.
  • an SQLite database file.
  • a subdirectory for the published documents, which contains:
    • index.html — an index page that redirects to localized versions of a home page for the site.
    • interactive.css — a CSS stylesheet that contains styles for the navigation menu.
    • opds.xml — an Open Publication Distribution System (OPDS) catalog to allow compliant eBook readers to find EPUB documents on your site easily.
    • Sitemap — A Sitemap is a list of the URLs from your website and metadata about them, like update history, change frequency, and importance relative to other URLs in the site. A Sitemap can be supplied to many major search engines, where it is used to help their crawlers index your site more intelligently. A Sitemap does not guarantee that your site will be ranked higher in search results. However, it does help search engines to return the most relevant results from your website in response to user queries. For more information on Sitemaps, visit sitemaps.org.
    • site_overrides.css — a CSS stylesheet that overrides the styles contained in interactive.css to provide site-specific styles. This file is not created by the site creation process, but must be added manually later, or supplied by the site home page.
    • default.js — a JavaScript script that directs visitors to localized content based on the locale set in their browser and which controls the presentation of the navigation menu.
    • subdirectories for each language in which you publish. Initially, this contains opds.xml and toc.html. Later it also contains opds-product.xml:
      • opds.xml — an OPDS catalog of EPUB documents in this language.
      • opds-product.xml — an OPDS catalog of EPUB documents for each product for which you publish documentation in this language. Within each product catalog, documentation is divided into <category>s for different versions of the same product.
      • toc.html — the table of contents for that language, initially without links to any documents.
      • A subdirectory for each product for which you publish documentation in this language.
Optionally, the site structure might also include a dump file — an XML file that provides complete site content details for delivery of other services, such as web feeds or customised search pages. The site structure might also contain a zipped version of the dump file. Refer to Section 7.1.1, “Creating the website structure” and Section 7.1.1, “Creating the website structure” for details of creating a dump file, and to Appendix E, Contents of the website dump file for a description of the dump file contents.

7.1. Building a website manually

7.1.1. Creating the website structure

To build the website structure:
  1. On your workstation, create a new directory and change into it. For example, on a Linux system, run:
    $ mkdir ~/docsite
    $ cd ~/docsite
  2. Run $ publican create_site, specifying the following parameters:
    • --site_config — the name of the configuration file for your site, with the filename extension .cfg
    • --db_file — the name of the SQLite database file for your site, with the filename extension .db
    • --toc_path — the path to the directory in which you will place your documents
    On a computer with an operating system other than Linux, also set:
    • --tmpl_path — the path to the templates/ directory of your Publican installation. On computers with Windows operating systems, this is typically %SystemDrive%\%ProgramFiles%\Publican\templates.
    For example:
    $ publican create_site --site_config foomaster.cfg --db_file foomaster.db --toc_path html/docs
    You might give names to the site configuration file and database file that help you to recognize the site to which they belong. For example, for the FooMaster documentation site, you might call these files foomaster.cfg and foomaster.db. You can set --toc_path to whatever you choose.
  3. Edit the site configuration file to specify the name of the site, the web host, and optionally, search parameters, default language, dump file settings, and update settings for the site:
    1. Specify the title with the title parameter, for example:
      title: "Foomaster Documentation"
      Normally, visitors to your website do not see this title because the site's JavaScript redirects them to a homepage. However, this title is likely to be found and indexed by search engines.
    2. Specify the web host with the host parameter as a full URL, including the protocol (for example, http://). For example:
      host: http://docs.example.com
      Publican uses the value set for host to construct the URLs in the XML Sitemap that it creates for search engine crawlers, and to limit searches submitted through the search box in the navigation menu to results on your site only.
    3. Optionally, construct a search engine query to use with the search box in the navigation menu and specify the entire content of a HTML <form> with the search parameter. If you do not specify a custom web search, Publican creates a Google search limited to the host that you specified in the host parameter.
      For example, to construct a Yahoo! search limited to docs.example.com, set:
      search: '<form target="_top" method="get" action="http://search.yahoo.com/search"> <div class="search"> <input type="text" name="p" value="" /> <input type="hidden" name="vs" value="docs.example.com" /> <input type="submit" value="###Search###" /> </div> </form>'
      Refer to the documentation of your chosen search engine for details of how to construct custom searches.
      If you set value="###Search###" in the code for a submit button, Publican uses the word Search on the button, localized into any language that Publican supports.

      Important — the search parameter is not validated

      Publican does not validate the search parameter, but builds the value of this parameter into the navigation menu exactly as you specify it. Be especially careful when you use this feature.
    4. Optionally, set the default language of the website. Publican creates a separate, translatable navigation menu for each language in which you publish documentation. However, if a document is not available in a particular language, Publican links visitors to the untranslated version of that document. To specify the default, untranslated language for the site, set def_lang with a language code. For example:
      def_lang: fr-FR
      With def_lang set to fr-FR, visitors viewing the navigation menu in (for example) Spanish are presented with a link to the original French version of the document if the document has not yet been translated into Spanish.
    5. Optionally, configure a dump file for the website. Publican can output an XML file that provides complete site content details for delivery of other services, such as web feeds or customised search pages. The file is updated whenever a book is installed or removed from the site, or the $ publican update_site command is run. Configure the dump, dump_file, and zip_dump parameters as follows:
      dump
      Set dump: 1 to enable the dump file function. This parameter defaults to 0 (off).
      dump_file
      Set dump_file: name to specify the name of the dump file and the directory in which Publican stores it. This parameter defaults to /var/www/html/DUMP.xml.
      zip_dump
      Set zip_dump: 1 to specify that Publican should create a zipped version of the XML file together with the XML version. This parameter defaults to 0 (off).
      Refer to Appendix E, Contents of the website dump file for a description of the contents of the dump file.
    6. Optionally, specify that the site tables of contents will be updated manually with the manual_toc_update parameter, for example:
      manual_toc_update: 1
      Normally, Publican updates the site's tables of contents every time a documentation package is added or removed. On a site with a large number of documents on it (more than a few hundred), or where documents are updated very frequently (dozens of updates per week), this process is very demanding on a server. On a large or busy site, we recommend that you set this parameter and then periodically update the tables of contents with the $ publican update_site command.
    7. Optionally, override the default JavaScript for the site with the toc_js parameter, for example:
      toc_js: "mybrand/scripts/megafoo.js"
      This file will be symlinked as toc_path/toc.js with the $ publican update_site command. This path should be relative to the toc_path parameter.
  4. Create an empty file named site_overrides.css in the directory that you specified with doc_path (the directory that contains interactive.css and the various language directories). If you want to use site-specific styles to override those provided by interactive.css, you can add a site_overrides.css to the document that provides the site home page — refer to Section 7.1.2, “Creating, installing, and updating the home page”. If you do not want to use site-specific styles, the empty file you add here will prevent 404 errors on your server. On a Linux system, change into the directory that you specified with doc_path and run:
    $ touch site_overrides.css
  5. Build and install each brand, including the Publican common brand.
    1. Change into the directory that holds the source for the brand.
      $ cd brandsrc_dir
    2. Build the brand.
      $ publican build --formats=xml --langs=all --publish
    3. Install the brand on your website.
      $ publican install_brand --web --path=path_to_site_root_dir
      Perform these steps for all brands.
  6. Update the site.
    $ publican update_site
To make Publican refresh the site structure at any time, run:
$ publican update_site --site_config path_to_site_configuration_file.cfg

7.1.2. Creating, installing, and updating the home page

The Publican-generated home page is the localizable page to which visitors are directed by the site JavaScript and which provides the style for the website structure. The home page is structured as a DocBook <article> with an extra web_type: home parameter in its publican.cfg file. In its structure and its presentation, the home page is the same as any other article that you produce with Publican. To create the home page:
  1. Change into a convenient directory and run the following $ publican create command:
    $ publican create --type Article --name page_name
    For example:
    $ publican create --type Article --name Home_Page
    Most brands (including the common brand) present the name of the document in large, coloured letters close to the top of the page, underneath the banner that contains the product name (the --name option sets the <title> tag). Therefore, by default, the value that you set with the --name option is presented prominently to visitors to your site; in the above example, visitors are greeted with the words Home Page underneath the product banner.
  2. Change into the article directory:
    $ cd page_name
    For example:
    $ cd Home_Page
  3. Unlink the Article_Info.xml file from your root XML file.
    Little of the content of the Article_Info.xml file is likely to be useful for the home page of your website. Therefore, edit the root XML file of your home page to remove the <xi:include> tag that links to Article_Info.xml. Publican still uses the information in Article_Info.xml for packaging, but does not include it on the page itself.
  4. Edit the publican.cfg file.
    At the very least, you must add the web_type parameter and set it to home:
    web_type: home
    The web_type: home parameter instructs Publican to process this document differently from product documentation. This is the only mandatory change to the publican.cfg file. Other optional changes to the publican.cfg file that are frequently useful for Publican-generated websites include:
    brand
    To style your home page to match your documents, add:
    brand: name_of_brand
    docname, product
    If the <title> or the <product> that you set in the Article_Info file included anything other than basic, unaccented Latin characters, set the docname and product as necessary.
  5. Edit the content of the page_name.xml file (for example, Home_Page.xml) as you would any other DocBook document.
    If you remove the <xi:include> that links to Article_Info.xml, specify a title for your page in the following format:
    <title role="producttitle">FooMaster Documentation</title>
  6. If you publish documentation in more than one language, create a set of POT files and a set of PO files for each language with the $ publican update_pot and publican update_po commands.
  7. To customize the logo at the top of the navigation menu that provides a link back to the home page, create a PNG image 290 px × 100 px and name it web_logo.png. Place this image in the images/ directory in the document's XML directory, for example en-US/images/.
  8. To specify site-specific styles to override the styles set in the website's interactive.css file, add styles to a file named site_overrides.css and place it in the root of your document source (the same directory that contains publican.cfg and the language directories).
  9. Build the home page in single-page HTML format with the --embedtoc option and install it in your website structure. For example:
    $ publican build --publish --formats html-single --embedtoc --langs all 
    $ publican install_book --site_config ~/docsite/foomaster.cfg --lang Language_Code
    Note that you can build all languages at the same time, but must install the home page for each language with a separate $ publican install_book command.

7.1.3. Creating, installing, and updating product pages and version pages

Publican-generated product pages and version pages are the localizable pages that provide a general overview of a product or version respectively. Visitors access these pages by clicking on a product or version in the navigation menu. The pages are structured as DocBook <article>s with an extra web_type: product or web_type: version parameter in their publican.cfg files. In their structure and presentation, product pages and version pages are the same as any other article that you produce with Publican. To create a product page or version page:
  1. Change into a convenient directory and run the following $ publican create command:
    $ publican create --type Article --name page_name
    For example, a product page might be:
    $ publican create --type Article --name FooMaster
    or a version page might be:
    $ publican create --type Article --name FooMaster_3
  2. Change into the article directory:
    $ cd page_name
    For example:
    $ cd FooMaster
  3. Unlink the Article_Info.xml file from your root XML file.
    Little of the content of the Article_Info.xml file is likely to be useful for product pages or version pages. Therefore, edit the root XML file of your page to remove the <xi:include> tag that links to Article_Info.xml. Publican still uses the information in Article_Info.xml for packaging, but does not include it on the page itself.
  4. Edit the publican.cfg file.
    At the very least, you must add the web_type parameter and set it to product or version:
    web_type: product
    or
    web_type: version
    The web_type parameter instructs Publican to process this document differently from product documentation. This is the only mandatory change to the publican.cfg file. Other optional changes to the publican.cfg file that are frequently useful for product pages or version pages include:
    brand
    To style your home page to match your documents, add:
    brand: name_of_brand
    docname, product
    If the <title> or the <product> that you set in the Article_Info file included anything other than basic, unaccented Latin characters, set the docname and product as necessary.
  5. Edit the content of the page_name.xml file (for example, FooMaster.xml) as you would any other DocBook document.
    If you remove the <xi:include> that links to Article_Info.xml, specify a title for your page in the following format:
    <title role="producttitle">FooMaster Documentation</title>
  6. If you publish documentation in more than one language, create a set of POT files and a set of PO files for each language with the $ publican update_pot and publican update_po commands.
  7. Build the product page or version page in single-page HTML format with the --embedtoc option and install it in your website structure. For example:
    $ publican build --publish --formats html-single --embedtoc --langs all 
    $ publican install_book --site_config ~/docsite/foomaster.cfg --lang Language_Code
    Note that you can build all languages at the same time, but must install the product page or version page for each language with a separate $ publican install_book command.

7.1.4. Installing, updating, and removing documents

To install a document on a website that you are building manually, change into the directory that contains the source for the document and run:
$ publican build --embedtoc --formats=list_of_formats --langs=language_codes --publish 
$ publican install_book --site_config path_to_site_configuration_file.cfg --lang language_code
Note that you can run a single $ publican build command for all languages that you want to publish, but must run a separate publican install_book for each language. You must include html as one of the formats in the publican build command; optionally, include any or all of the following formats in a comma-separated list: html-single, pdf, and epub.
To update a document, change into the directory that contains the updated source for the document and run the same commands as if you were installing the document for the first time. Publican replaces the old version with the new version.
To remove a document, change into the directory that contains the source for the document and run:
$ publican remove_book --site_config path_to_site_configuration_file.cfg --lang language_code
When you have installed the documents, the website is ready to upload to your webserver by whatever process you usually use, for example scp, rsync, or an FTP client.

7.2. Building a website using RPM packages

7.2.1. Creating the website structure

Warning — This procedure replaces files

When you create the website structure, Publican places files in the /var/www/html/docs directory. Existing files in this directory might be overwritten by this procedure.
Perform the following steps on your webserver. You must have an account with root privileges.
  1. Log into the webserver.
  2. Become root:
    $ su -
  3. Install Publican. For example, on a webserver with a Fedora operating system, run:
    # yum install publican-web publican-$brand-web
  4. Edit the /etc/publican-website.cfg file to specify the name of the site, the web host, and optionally, search parameters, default language, and dump file settings for the site:
    1. Specify the title with the title parameter, for example:
      title: "Foomaster Documentation"
      Normally, visitors to your website do not see this title because the site's JavaScript redirects them to a homepage. However, this title is likely to be found and indexed by search engines.
    2. Specify the web host with the host parameter as a full URL, including the protocol (for example, http://). For example:
      host: http://docs.example.com
      Publican uses the value set for host to construct the URLs in the XML Sitemap that it creates for search engine crawlers, and to limit searches submitted through the search box in the navigation menu to results on your site only.
    3. Optionally, construct a search engine query to use with the search box in the navigation menu and specify the entire content of a HTML <form> with the search parameter. If you do not specify a custom web search, Publican creates a Google search limited to the host that you specified in the host parameter.
      For example, to construct a Yahoo! search limited to docs.example.com, set:
      search: '<form target="_top" method="get" action="http://search.yahoo.com/search"> <div class="search"> <input type="text" name="p" value="" /> <input type="hidden" name="vs" value="docs.example.com" /> <input type="submit" value="###Search###" /> </div> </form>'
      Refer to the documentation of your chosen search engine for details of how to construct custom searches.
      If you set value="###Search###" in the code for a submit button, Publican uses the word Search on the button, localized into any language that Publican supports.

      Important — the search parameter is not validated

      Publican does not validate the search parameter, but builds the value of this parameter into the navigation menu exactly as you specify it. Be especially careful when you use this feature.
    4. Optionally, set the default language of the website. Publican creates a separate, translatable navigation menu for each language in which you publish documentation. However, if a document is not available in a particular language, Publican links visitors to the untranslated version of that document. To specify the default, untranslated language for the site, set def_lang with a language code. For example:
      def_lang: fr-FR
      With def_lang set to fr-FR, visitors viewing the navigation menu in (for example) Spanish are presented with a link to the original French version of the document if the document has not yet been translated into Spanish.
    5. Optionally, configure a dump file for the website. Publican can output an XML file that provides complete site content details for delivery of other services, such as web feeds or customised search pages. The file is updated whenever a book is installed or removed from the site, or the $ publican update_site command is run. Configure the dump, dump_file, and zip_dump parameters as follows:
      dump
      Set dump: 1 to enable the dump file function. This parameter defaults to 0 (off).
      dump_file
      Set dump_file: name to specify the name of the dump file and the directory in which Publican stores it. This parameter defaults to /var/www/html/DUMP.xml.
      zip_dump
      Set zip_dump: 1 to specify that Publican should create a zipped version of the XML file together with the XML version. This parameter defaults to 0 (off).
      Refer to Appendix E, Contents of the website dump file for a description of the contents of the dump file.
  5. Create an empty file named site_overrides.css. If you want to use site-specific styles to override those provided by interactive.css, you can add a site_overrides.css to the document that provides the site home page — refer to Section 7.1.2, “Creating, installing, and updating the home page”. If you do not want to use site-specific styles, the empty file you add here will prevent 404 errors on your server. On a Linux system, run:
    # touch /var/www/html/docs/site_overrides.css
To make Publican refresh the site structure at any time, run:
$ publican update_site

7.2.2. Creating, installing, and updating the home page

The Publican-generated home page is the localizable page to which visitors are directed by the site JavaScript and which provides the style for the website structure. The home page is structured as a DocBook <article> with an extra web_type: home parameter in its publican.cfg file. In its structure and its presentation, the home page is the same as any other article that you produce with Publican and is packaged the same way.
  1. On a workstation, create a home page using the procedure described in Section 7.1.2, “Creating, installing, and updating the home page”.
  2. In the directory in which you created the home page, run:
    $ publican package --binary
    Publican builds an RPM package and places it in the /tmp/rpms/noarch/ directory of the home page. By default, Publican builds the RPM package for the operating system within which you are running Publican. To build an RPM package to install on a server that runs a different operating system, set the os_ver parameter in the home page's publican.cfg file.
  3. Either upload the home page package to the webserver and install it with the rpm -i or yum localinstall command, or place the package in a repository and configure the webserver to install from that repository when you run yum install.
To update the home page, build a new package with a higher <edition> number or <pubsnumber> in the Article_Info.xml. Publican uses these values to set the version and release numbers for the RPM package. When you install this package on your webserver, yum can replace the old version with the new when you run yum localinstall for a local package, or yum update for a package fetched from a repository.

7.2.3. Creating, installing, and updating product pages and version pages

Publican-generated product pages and version pages are the localizable pages that provide a general overview of a product or version respectively. Visitors access these pages by clicking on a product or version in the navigation menu. The pages are structured as DocBook <article>s with an extra web_type: product or web_type: version parameter in their publican.cfg files. In their structure and presentation, product pages and version pages are the same as any other article that you produce with Publican and are packaged the same way.
  1. On a workstation, create a product or version page using the procedure described in Section 7.1.3, “Creating, installing, and updating product pages and version pages”.
  2. In the directory in which you created the product page or version page, run:
    $ publican package --binary
    Publican builds an RPM package and places it in the /tmp/rpms/noarch/ directory of the product page or version page. By default, Publican builds the RPM package for the operating system within which you are running Publican. To build an RPM package to install on a server that runs a different operating system, set the os_ver parameter in the publican.cfg file of the product page or version page.
  3. Either upload the package to the webserver and install it with the rpm -i or yum localinstall command, or place the package in a repository and configure the webserver to install from that repository when you run yum install.
To update the product page or version page, build a new package with a higher <edition> number or <pubsnumber> in the Article_Info.xml. Publican uses these values to set the version and release numbers for the RPM package. When you install this package on your webserver, yum can replace the old version with the new when you run yum localinstall for a local package, or yum update for a package fetched from a repository.

7.2.4. Installing, updating and removing documents

On your workstation, change into the directory that contains the source for the document and run:
$ publican package --binary --lang language_code
Publican builds an RPM package and places it in the /tmp/rpms/noarch/ directory of the document. By default, Publican builds the RPM package for the operating system within which you are running Publican. To build an RPM package to install on a server that runs a different operating system, set the os_ver parameter in the document's publican.cfg file.
Either upload the document packages to the webserver and install them with the rpm -i or yum localinstall command, or place the packages in a repository and configure the webserver to install from that repository when you run yum install.
To update a document, build a new package with a higher <edition> number or <pubsnumber> in the Book_Info.xml or Article_Info.xml. Publican uses these values to set the version and release numbers for the RPM package. When you install this package on your webserver, yum can replace the old version with the new when you run yum localinstall for a local package, or yum update for a package fetched from a repository.
Remove a document from the webserver with the rpm -e or yum erase command.
On large or busy sites, we recommend that you set the manual_toc_update parameter in the site's configuration file. With this parameter set, you must run the $ publican update_site command after installing, updating, or removing documents. Refer to Section 7.1.1, “Creating the website structure” for more information.

7.3. Submitting Your Sitemap to Search Engines

A Publican website includes an XML Sitemap file. The Sitemap can be submitted to many major search engines, in order to help them index your website more intelligently and thoroughly. Each search engine has its own submission procedure. This section includes documentation on how to submit a Sitemap to Google and Bing.

7.3.1. Submitting Your Sitemap to Google.

Procedure 7.1. To Submit Your Sitemap to Google:

  1. Sign up for a Google account at Google Webmaster Tools. If you already have a Google account, you can use it.
  2. Sign in to your Google Webmaster Tools account at this URL: http://www.google.com/webmasters/tools/home.
  3. First you must verify you are the owner of your Publican site. Click the Add A Site button.
  4. A dialog box is displayed for you to Add a site with. Enter the URL of your Publican site in the text entry field and click Continue.
  5. Follow the instructions that display and upload the HTML file that Google provides to the document root of your website.
  6. When you have confirmed that the provided HTML file has been uploaded to the required location by accessing it in a web browser, click the Verify button.
  7. When you have successfully verified the ownership of your Publican website to Google, return to the Webmaster Tools home page. Your Publican site is listed. Click on it.
  8. You are taken to the Webmaster Tools configuration page for your Publican site. On the left side of the page there is a menu. Click on the Site configuration menu entry to expand it. Its expanded contents includes a Sitemaps entry. Click it.
  9. You are taken to a Sitemap submission page. Click the Submit a Sitemap button.
  10. A text entry field displays, including the base URL of your Publican site, with room to enter the URL of your Sitemap XML file. Enter its location and click the Submit Sitemap button. The details of the Sitemap are displayed in a table.
Result
The Sitemap for your Publican site has been successfully submitted to Google.

7.3.2. Submitting Your Sitemap to Bing.

Procedure 7.2. To Submit Your Sitemap to Bing:

  1. Sign up for a Bing Webmaster Tools account at Bing Webmaster Tools. If you already have a Windows LiveID account, you can use it.
  2. Sign in to your Bing Webmaster Tools account at this URL: http://www.bing.com/toolbox/webmaster/.
  3. Click the Add Site button.
  4. The Add Site dialog box is displayed. Enter the URL of your Publican site in the text entry field and click Submit.
  5. The Verify Ownership dialog displays, with three options. Follow the instructions given when the Option 1: Place an XML file on your web server has been expanded. Upload the BingSiteAuth.xml file that Bing provides to the document root of your website.
  6. When you have confirmed that the provided BingSiteAuth.xml file has been uploaded to the required location by accessing it in a web browser, click the Verify button.
  7. When you have successfully verified your ownership of your Publican website to Bing, return to the Bing Webmaster Tools home page. Your Publican site is listed. Click on it.
  8. Select the Crawl tab.
  9. Select Sitemaps and then Add Feed.
  10. The Add Feed dialog displays. Enter the URL of your Sitemap file and click Submit. The details of the Sitemap are displayed.
Result:
The Sitemap for your Publican site has been successfully submitted to Bing.

Chapter 8. Import book into Drupal

Publican 3.1 has a new functionality which allow user to create and import a book into Drupal. All xml files in a book are transformed into a single CSV file which will later be used to import into Drupal.

8.1. How to build a CSV file for Drupal import

The CSV File consists of information that tells Drupal how to import the book. Each row in the CSV file represents a html page.
Use the $ publican build command to create the CSV file for Drupal import. Before running the command, use the cd command to change into the directory where your book is located. For example, if you have a book call "User_Guide" in your home directory, then run the following command.
$ cd User_Guide/
$ publican build --langs en-US --formats=drupal-book
After running the command, you will see CSV file is created in the tmp/en-US/drupal-book/ directory.
Publican stores all the output files in /tmp/en-US/drupal-book/ directory. This directory contains the following files:
  • CSV file - The naming convention of the file is $product-$version-$docname-$lang-$edition.csv
  • en-US directory - contains all the html images.
  • tar.gz file - the archive of both CSV file and en-US directory.

Important — Use version control system

After running the $ publican build --langs en-US --formats=drupal-book command, you will notice that the xml files in the en-US directory had been changed. This is because Publican added a 'Conformance' attribute for every xml tag that has id. This attribute contains a number which is unique across xml files in the book. If you are using a version control system like git for your xml files, then you need to commit the changes so that the number won't get reset when other users run it. These unique numbers are very important, because they are use as the url path in drupal. Besides, Publican also created a database file name max_unique_id.db in the en-US directory. This database file is use to track the current maximum unique number in the book, so that Publican can know where you are up to and add a new unique number for your newly created Chapter or Section. Therefore, it is very important to add the database file to the version control and commit it if there is any change. If you add a new section in the xml, don't set the 'Comformance' attribute yourself as that will make the database outdated. Just leave it for publican to set it.

8.2. The publican.cfg file

Below are some parameters that can be configure in the publican.cfg file for Drupal import:
drupal_author
specfies the author who should be shown in drupal book page. The name must be a valid Drupal username. 'Redhat' is the default author. Set this parameter in the publican.cfg file to override it.

Important — Setting Author

The author must have permission to manage (create, update, delete) nodes in Drupal. If the default author is used, make sure you had created an account with username 'Redhat' in Drupal.
drupal_menu_title
override the bookname that will be shown in the Drupal menu. If nothing is set, publican will use the default value which is "$product $version $docname". For example, Publican 3.1 User_Guide.
drupal_menu_block
specfies which menu block the book should show in Drupal. The default value is "user-guide".

Important — Setting menu block

The menu block must exist in Drupal. For more information about adding a menu block in Drupal. Please refer to Section 8.3.1, “How to add a menu block”.
drupal_image_path
specfies the directory where the images should be stored in drupal server. The default value is "sites/default/files/".

8.3. Drupal Import Guide

Before you can import a book, you need to install a module call 'Node Import' in Drupal. This module allows Drupal to import and update content from CSV or TSV files. To install this module, simply go to drupal site and follow the instructions on the website to download it. Once this is done, then you need to copy the downloaded module to the 'modules' directory on the Drupal server. For example if your Drupal is located in /var/www/html/drupal/ directory, then you should copy the module to /var/www/html/drupal/sites/all/modules/ directory. To enable the installed module, login to the Drupal site and go to Administer -> Site building -> Modules . In the Development section, tick the checkbox and click Save configuration button to activate the Node Import Module.
testing longdesc

Important — Enable Drupal Core Modules

You also need to enable the following Drupal core modules:
  • Book
  • Menu
  • Path

Permission to install Module

Please consult your web adminstrator if you don't have permission to install module in drupal.

8.3.1. How to add a menu block

You can specify which menu the book should be showing in Drupal. If the specified menu block doesn't exist, Drupal will throw all the imported contents in the primary link. Therefore, if you wish to list your book in a menu block, make sure you create one before importing the book. To add a new menu block, simply login to your Drupal site and go to Administer -> Menus -> Add menu .
  • Menu name - The unique name for the menu. This is the value that you should set for the 
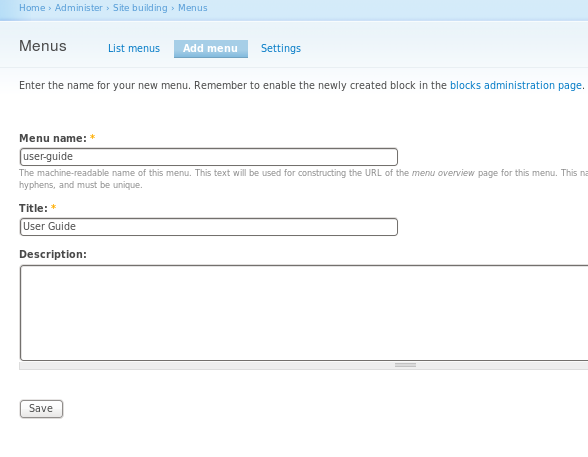
drupal_menu_block parameter in publican.cfg.
  • Title - The title of the menu. It will be displayed on top of the menu block.

8.3.2. Setting up Node import

  • Import directory - Where the CSV files to be imported are stored. The default path is sites/default/files/imports/ .
  • FTP settings
    • Allow FTP uploads - Make sure the checkbox is checked, so that the new CSV file can be auto-detected when it is uploaded into the import directory.
    • File owner - The CSV file that you uploaded to the import directory will be assigned ownership to this user.

      Important — File Ownership

      Users will only be allowed to use files they have uploaded themselves and files owned by anonymous. If you leave this field blank, all files uploaded by FTP will be owned by anonymous and so all users will see those files as being available for them. If you enter a username here, files that are uploaded using FTP will be owned by that user and only that user will be able to see those uploaded files. It is recommended to leave this field blank.
  • Allowed extensions - The allowed import file's extension. Other extensions will be ignore by the module.
  • Default settings
    • Content type - The default content type that will be used for quick import. Make sure the Book Page content type is checked.
    • First row contains column names - This tells the node import module that the first row of the csv file is the headers.

8.3.3. How to import book

Procedure 8.1. To import book into Drupal:

  1. Upload the CSV file to import Directory in the Drupal Server
  2. Upload en-US directory to the "sites/default/files/" directory in the Drupal server. This value can be overriden in the publican.cfg. For more details, please read Section 8.2, “The publican.cfg file”
  3. Login to the Drupal website, and go to Administer -> Content management -> Import content. You will see the CSV file that you just uploaded is showing in the 'Pending Tasks" table and it is ready to import.
  4. Click Import now to start importing book. You will be redirect to the next page which is showing the import progress. When the progress bar hit 100%, that means the import is done!
  5. The book link should be showing in the specified menu block now.

8.3.4. How to update book

Simply repeat the steps in Section 8.3.3, “How to import book” to update the book.

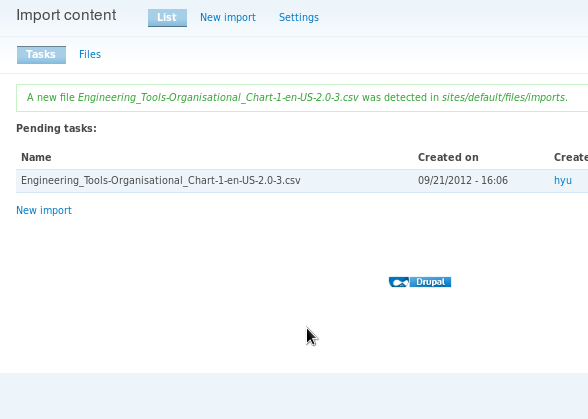
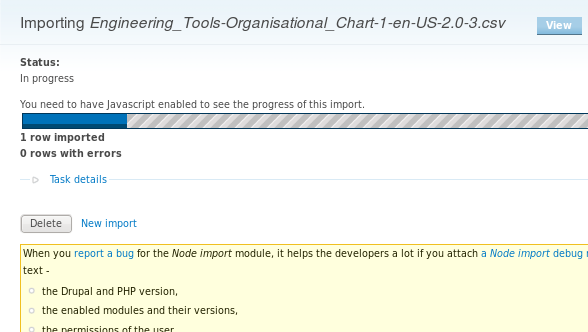
Warning — Section Chunking

If you update the book with smaller chunks, than the missing chunks will be deleted by Drupal and the URL path for the deleted chunks will be deleted as well.

Chapter 9. Frequently Asked Questions

Q: How do I add a language to my book?
Q: What if I do not want to use the country code? For example, can I run $ publican update_po --langs=es,de,fr?
Q: How do I update all po files?
Q: Where can I get a complete list of Publican's build options?
Q: Where can I get a complete list of parameters that can be set in the publican.cfg?
Q: Where are the Publican common files located?
Q: Is it possible to include arbitrary files in tarballs and RPM packages?
Q: Why does Publican give me warnings about unknown tags?
Q: I can build HTML documents fine, but when I try to build PDF documents, I get errors like java.lang.NullPointerException and no PDF file is produced. What is wrong?
Q: I get an error saying Batik is not in the classpath but Batik is installed! What is wrong?
Q: I get an error Exception in thread "main" java.lang.OutOfMemoryError: Java heap space when trying to build PDF. What is wrong?
Q: Previous versions of Publican removed empty <para> tags. Does Publican still do this?
Q: What happened to the spell check?
Q: Why don't <segmentedlist>s work when I build PDFs?
Q: What happened to the colors in my images in this PDF?
Q: When I build my document, I get an error about an ‘undefined language’ — what's wrong?
Q: How do I enable bash command-line completion for Publican?
Q: Why am I having trouble building my large book?
Q: Why does Jeff call Isaac ‘Ivan’?
Q:
How do I add a language to my book?
A:
Run $ publican update_po --langs=language, where language is the code for the new language that you want to add. You can add more than one language at a time, with the language codes separated by commas. For example, publican update_po --langs=ja-JP creates the Japanese language directory and Japanese PO files, and publican update_po --langs=ja-JP,ko-KR creates directories and PO files for both Japanese and Korean.
Q:
What if I do not want to use the country code? For example, can I run $ publican update_po --langs=es,de,fr?
A:
Yes — this command works. However, if you omit the country code, the output might be unpredictable when Publican or a brand has definitions for more than one regional variety of a language — for example, zh-CN (Simplified Chinese as used in the People's Republic of China) and zh-TW (Traditional Chinese as used in the Republic of China, on Taiwan). Even when only one variety is currently defined, it is always safest to include the country code so that, for example, a future update of Publican does not suddenly cause your German (de-DE) documents to switch to Schweizerdeutsch (Swiss German, de-CH) Common Content and headings.
Q:
How do I update all po files?
A:
Run the $ publican update_po --langs=all command.
Q:
Where can I get a complete list of Publican's build options?
A:
Run the $ publican build --help command.
Q:
Where can I get a complete list of parameters that can be set in the publican.cfg?
A:
Run the $ publican help_config command in a directory that holds any Publican document.
Q:
Where are the Publican common files located?
A:
By default, they are in /usr/share/publican/ on Linux operating systems and in %SystemDrive%/%ProgramFiles%/publican/Common_Content on Windows operating systems — typically, C:/Program Files/publican/Common_Content.
Q:
Is it possible to include arbitrary files in tarballs and RPM packages?
A:
Yes. If you make a directory named files in your source language directory it will be included in any tarballs or SRPM packages that Publican creates.

Important

The files directory will not be available during the validation process so you can not xi:include or otherwise embed any files in this directory in your XML.
Q:
Why does Publican give me warnings about unknown tags?
A:
This warning informs you that you are using a tag whose output has not been tested for attractiveness, XHTML 1.0 Strict compliance, or Section 508 (Accessibility) compliance.
Q:
I can build HTML documents fine, but when I try to build PDF documents, I get errors like java.lang.NullPointerException and no PDF file is produced. What is wrong?
A:
Try building a PDF version of a different document — perhaps a fresh one that you create with the $ publican create command. If the problem is not just with one particular document, you probably have a mismatch between the Java Runtime Environment (JRE) and the Java Development Kit (JDK) in use on your system. If you have a JDK installed, FOP requires that the JDK is of the same version as the JRE. Furthermore, FOP cannot use the GNU Compiler for Java (GCJ).
Run alternatives --config java and alternatives --config javac to determine which JRE and JDK are in use, then select versions that match and which do not have gcj in their name. For example, the following Java configuration shows a matching JRE and JDK that allow PDFs to build:
$ alternatives --config java

There are 3 programs which provide 'java'.

  Selection    Command
-----------------------------------------------
   1           /usr/lib/jvm/jre-1.5.0-gcj/bin/java
*  2           /usr/lib/jvm/jre-1.6.0-openjdk/bin/java
 + 3           /usr/lib/jvm/jre-1.6.0-openjdk.x86_64/bin/java

Enter to keep the current selection[+], or type selection number:
$ alternatives --config javac

There are 3 programs which provide 'javac'.

  Selection    Command
-----------------------------------------------
*+ 1           /usr/lib/jvm/java-1.6.0-openjdk.x86_64/bin/javac
   2           /usr/lib/jvm/java-1.6.0-openjdk/bin/javac
   3           /usr/lib/jvm/java-1.5.0-gcj/bin/javac

Enter to keep the current selection[+], or type selection number:
You might need to install an extra JDK if you do not have a JDK on your system that matches any of the JREs.
Some Java installations do not set up the alternatives environment correctly. No fix has been determined for this situation.
Q:
I get an error saying Batik is not in the classpath but Batik is installed! What is wrong?
A:
We believe this is due to classpath issues caused by having different JRE and JDK versions in use. Refer to the previous question in this FAQ about java.lang.NullPointerException errors and using the alternatives command to ensure that the JRE and JDK match.
Q:
I get an error Exception in thread "main" java.lang.OutOfMemoryError: Java heap space when trying to build PDF. What is wrong?
A:
The default memory allocated for Java is not big enough to build your PDF. You need to increase the memory allocated to FOP. Before running $ publican build run echo "FOP_OPTS='-Xms50m -Xmx700m'" > ~/.foprc. This sets the initial heap space to 50 MB and allows it to grow to a maximum of 700 MB.
Q:
Previous versions of Publican removed empty <para> tags. Does Publican still do this?
A:
No. Publican previously removed empty <para> tags while it transformed XML because empty <para> tags broke earlier translation toolchains used within Red Hat and the Fedora Project. Empty <para> tags are valid DocBook XML, and Publican no longer removes them.
Q:
What happened to the spell check?
A:
Early versions of Publican (up to and including 0.45) ran a spell check while transforming a document's XML. Due to negative feedback from users, this feature was dropped.
Run the following bash script in the root directory of your document to check spellings in your XML files with the aspell command-line spell checker.
#!/bin/sh
# Jeff Fearn 2010

ASPELL_EXCLUDES=programlisting,userinput,screen,filename,command,computeroutput,abbrev,accel,orgname,surname,foreignphrase,acronym,hardware

for file in `find en-US -wholename '*/extras/*' -prune -o -name \*.xml -print`; do
	echo "Processing $file";
	aspell --list --lang=en-US --mode=sgml --add-sgml-skip={$ASPELL_EXCLUDES} < $file  | sort -u;
	echo;
done


Q:
Why don't <segmentedlist>s work when I build PDFs?
A:
Check the number of columns in your <segmentedlist>s. When <segmentedlist>s are formatted as tables, the DocBook XSL limits the number of columns to two, and Publican formats <segmentedlist>s as tables.
Q:
What happened to the colors in my images in this PDF?
A:
This is the result of a bug in FOP that distorts colors in 24-bit PNG images. Convert your images to 32-bit PNG images to work around the problem.
Q:
When I build my document, I get an error about an ‘undefined language’ — what's wrong?
A:
Code highlighting in Publican is generated with the Syntax::Highlight::Engine::Kate Perl module. If you specify a language in a <programlisting> tag that Syntax::Highlight::Engine::Kate does not recognize, you receive an error when you build your book. The first lines of the error message are similar to:
undefined language: JAVA at /usr/lib/perl5/vendor_perl/5.10.0/Syntax/Highlight/Engine/Kate.pm
line 615.
cannot create plugin for language 'JAVA'
Note that Syntax::Highlight::Engine::Kate is very strict about names of languages and is case sensitive. Therefore, <programlisting language="Java"> works, but <programlisting language="java"> and <programlisting language="JAVA"> do not. The error message that you receive identifies the problematic language attribute.
Refer to http://search.cpan.org/dist/Syntax-Highlight-Engine-Kate/lib/Syntax/Highlight/Engine/Kate.pm#PLUGINS for the full list of languages that Syntax::Highlight::Engine::Kate supports, including their expected capitalization and punctuation.
Q:
How do I enable bash command-line completion for Publican?
A:
Support for bash command-line completion is a new feature in Publican 2.2. To enable this feature:
  1. Install the package or packages that provide bash completion for your operating system. For example, on Fedora, run sudo yum install bash-completion.
  2. Add the following to your ~/.bashrc file:
    
    # Use bash-completion, if available
    if [ -f /etc/bash_completion ]; then
            . /etc/bash_completion
    fi
    
  3. Restart your terminal or run source ~/.bashrc.
Q:
Why am I having trouble building my large book?
A:
Probably because the kernel can deal with only a certain number of file handles at a time, and you have exceeded that number. On some linuxes you can run ulimit -n 8192 to change the limit for the current shell.
To make this permanent, open /etc/security/limits.conf and add these two lines:
*                 soft    nofile          8192
*                 hard    nofile          8192
Then save, and log in again for the changes to take effect.
Q:
Why does Jeff call Isaac ‘Ivan’?
A:
Because Jeff's memory is pants!

Appendix A. Disallowed elements and attributes

Supported, unsupported, and disallowed

Not every element (tag) and attribute that works with Publican is supported. Specifically, not every tag has been tested with regards its effect on the presentation of a document once it has been built in HTML or PDF.
Publican works with almost all DocBook 4.5 elements and their attributes, and most of these elements are supported. Supported elements and attributes are those whose presentation in Publican HTML and PDF output has been tested and is of an acceptable quality.
Other elements and attributes that are not known to be harmful or redundant but which have not been tested for quality are unsupported. If material within a particular DocBook tag does not look correct when you build a document in HTML or PDF, the problem could be that the transformation logic for that tag has not yet been tested. Build the document again and examine Publican's output as the document builds. Publican presents warnings about unsupported tags that it encounters in your XML files.
Finally, a small group of elements and attributes are disallowed. These elements and attributes are set out below, each accompanied by rationale explaining why it is disallowed.
Use the command $ publican print_known to print a list of tags that Publican supports, and the command publican print_banned to print a list of tags that are banned in Publican.

A.1. Disallowed elements

<caution>, <tip>
DocBook XML supports five admonitions of varying severity: <tip>, <note>, <important>, <caution>, and <warning>. Taken together, these represent a very fine-grained set of distinctions. It is unlikely that these fine distinctions can be applied consistently within a document, especially when more than one person writes or maintains the document. Moreover, this level of granularity is meaningless to readers. By design, Publican disallows the <tip> and <caution> elements, these elements being the two most redundant in the set.
Use <note> instead of <tip>, and use either <important> or <warning> instead of <caution>. Some criteria by which you might select a suitable level of severity are presented in the ‘Document Conventions’ section of the preface of books produced with Publican's default brand.
<entrytbl>
Publican depends on an external application, FOP, to render PDF documents. At present, FOP does not support nested tables, so attempts to build PDF files from Publican documents that contain nested tables fail.
Nested tables are therefore disallowed at least until they are supported in FOP. If you planned to include a nested table in your document, reconsider your data structure.
<glossdiv>, <glosslist>
This tag set presents terms in glossaries in alphabetical order; however, the terms are sorted according to the original language of the XML, regardless of how these terms are translated into any other language. For example, a glossary produced with <glossdiv>s that looks like this in English:
A
Apple — an apple is…
G
Grapesgrapes are…
O
Orange — an orange is…
P
Peach — a peach is…
looks like this in Spanish:
A
Manzana — la manzana es…
G
Uva — la uva es…
O
Naranja — la naranja es…
P
Melocotonero — el melocotonero es…
In a translated language that does not share the same writing system with the original language in which the XML was written, the result is even more nonsensical.
<inlinegraphic>
This element presents information as a graphic rather than as text and does not provide an option to present a text alternative to the graphic. This tag therefore hides information from people with visual impairments. In jurisdictions that have legal requirements for electronic content to be accessible to people with visual impairments, documents that use this tag will not satisfy those requirements. Section 508 of the Rehabilitation Act of 1973[4] is an example of such a requirement for federal agencies in the United States.
Note that <inlinegraphic> is not valid in DocBook version 5.
<link>
The <link> tag provides a general-purpose hyperlink and therefore offers nothing that the <xref> and <ulink> tags do not, for internal and external hyperlinks respectively. The <link> tag is disallowed due to its redundancy.
<olink>
The <olink> tag provides cross-references between XML documents. For <olink>s to work outside of documents that are all hosted within the same library of XML files, you must provide a URL for the document to which you are linking. In environments that use <olink>s, these URLs can be supplied either as an XML entity or with a server-side script. Publican produces documents intended for wide dissemination in which URLs are always necessary for cross-references. Therefore, the <olink> tag offers no advantage over the <ulink> tag, and is disallowed due to its redundancy.

A.2. Disallowed attributes

<[element] xreflabel="[any_string_here]">
The presence of an <xreflabel> attribute reduces the usability of printed versions of a book. As well, attribute values are not seen by translators and, consequently, cannot be translated.
For example, if you have the following:

<chapter id="ch03" xreflabel="Chapter Three">
	<title>The Secret to Eternal Life</title>
	<para>The secret to eternal life is…</para>
</chapter>

[more deathless prose here]     

…see <xref linkend="ch03"> for details.

when your XML is built to HTML, the <xref> tag becomes an HTML anchor tag as follows:

…see <a href="#ch03">Chapter Three</a> for details.

The text contained by the anchor tag is the same as the data in the <xreflabel> attribute. In this case, it means that readers of printed copies have less information available to them.
You could work around this if you make the value of the <xreflabel> attribute the same as the text within the <title></title> element tags. However, this duplication increases the risk of typo-level errors and otherwise offers no underlying improvement. And it still reduces the amount of information presented to readers of printed copies.
The following XML:

<chapter id="ch03" xreflabel="The Secret to Eternal Life">
	<title>The Secret to Eternal Life</title>
	<para>The secret to eternal life is…</para>
</chapter>

[more deathless prose here]     

…see >xref linkend="ch03"> for details.

Will result in an HTML anchor tag as follows:

…see <a href="#ch03">The Secret to Eternal Life</a> for details.

This isn't as informative as the text presented to a reader if you do not use an <xreflabel> attribute. The following:

<chapter id="ch03">
	<title>The Secret to Eternal Life</title>
	<para>The secret to eternal life is…</para>
</chapter>

[more deathless prose here]		

…see <xref linkend="ch03"> for details.

transforms the <xref> element as follows when built to HTML:

…see <a href="#ch03">Chapter 3: The Secret to Eternal Life</a> for details.

More important, however, are the translation problems that <xreflabel> tags cause. Attribute values are not seen by translators. Consequently, they are not translated. Consider the second example above again:

<chapter id="ch03" xreflabel="The Secret to Eternal Life">
	<title>The Secret to Eternal Life</title>
	<para>The secret to eternal life is…</para>
</chapter>

[more deathless prose here]		

…see <xref linkend="ch03"> for details.

In English, the <xref> is still transformed into an anchor tag as follows:

…see <a href="#ch03">The Secret to Eternal Life</a> for details.

Someone reading the German version, however, will have this as their underlying HTML:

…Sehen Sie <a href="#ch03">The Secret to Eternal Life</a> für Details.

If the <xreflabel> attribute is not used, the title and chapter indicator, both properly translated, appear to the reader. That is, the following:

<chapter id="ch03">
	<title>The Secret to Eternal Life</title>
	<para>The secret to eternal life is…</para>
</chapter>

[more deathless prose here]		

…see <xref linkend="ch03"> for details.

will, after translation, present thus to a German-speaking reader:

…Sehen Sie <a href="#ch03">Kapitel 3: Das Geheimnis des ewigen Lebens</a> für Details.

This is, not surprisingly, what we want.
The xreflabel attribute is therefore disallowed.
<[element] endterm="[any_string_here]">
The endterm attribute allows you to present hyperlinked text other than the name of the section or chapter to which the hyperlink points. As such, it decreases the usability of printed versions of documents, and causes difficulty for translators.
The text presented in an element (such as an <xref>) that contains the endterm attribute is taken from a <titleabbrev> tag in the target chapter or section. Although the content of the <titleabbrev> tag is available to translators in the document's PO files, it is removed from the context of the <xref>. The absence of this context makes reliable translation impossible in languages that mark prepositions or articles for grammatical number and grammatical gender.
For example, if you have the following:

<chapter id="The_Secret">
	<title>The Secret to Eternal Life</title>
	<titleabbrev id="final">the final chapter</titleabbrev>

	<para>The secret to eternal life is…</para>
</chapter>

[more deathless prose here]     

The solution is in <xref linkend="The_Secret" endterm="final"/>.

The text surrounding the <xref> presents in the English version of the document as:
The solution is in the final chapter.
A translator sees the <titleabbrev> in a PO file as:
#. Tag: titleabbrev
#, no-c-format
msgid "the final chapter"
msgstr ""

and sees the text that contains the <xref> elsewhere in the PO file (or, more likely, in a completely different PO file) as:
#. Tag: para
#, no-c-format
msgid "The solution is in <xref linkend="The_Secret" endterm="final"/>."
msgstr ""

The translator has no way of telling what will be substituted for <xref linkend="The_Secret" endterm="final"/> when the document builds, so a translation in Italian might read:
#. Tag: para
#, no-c-format
msgid "The solution is in <xref linkend="The_Secret" endterm="final"/>."
msgstr "La soluzione è in <xref linkend="The_Secret" endterm="final"/>."

Note the preposition in.
If the translator rendered the final chapter in Italian as l'ultimo capitolo, the result when the document builds will read:
La soluzione è in l'ultimo capitolo.
This result is comprehensible, but inelegant, because Italian combines some of its prepositions with its definite articles. More elegant Italian would be:
La soluzione è nell'ultimo capitolo.
Without knowing what text will appear in place of <xref linkend="The_Secret" endterm="final"/>, the translator into Italian cannot know whether to leave the preposition in to stand by itself, or which of seven different possible combinations with the definite article to use: nel, nei, nello, nell', negli, nella, or nelle.
Furthermore, note that the combined preposition and article also poses a problem with regard to whether this word should be placed in the text surrounding the <xref>, or in the <titleabbrev>. Whichever of these two solutions the translator selects will cause problems when the endterm appears in other grammatical contexts, because not all Italian prepositions can combine with the definite article in this way.
Due to the problems that endterm presents for translation, Publican disallows this attribute.

Appendix B. Command summary

Command options

$ publican --help
displays help
$ publican --man
displays the manual page
$ publican --help_actions
displays a list of actions
$ publican --v
displays the Publican version number.
--config file
specifies a config file for a document, in place of the default publican.cfg.
--nocolours
disables ANSI colors in Publican logging.
--quiet
disables all logging.

Actions

$ publican add_revision
adds an entry in Revision_History.xml. Options:
--lang=LANG
the language the XML will be written in.
--revnumber=REVNUMBER
revision number to use for a revision.
--date=DATE
date to use for a revision.
--member=MEMBER
an entry to be added to the revision. Can be specified multiple times.
--firstname=FIRSTNAME
firstname to use for a revision.
--surname=SURNAME
surname to use for a revision.
--email=EMAIL
email to use for a revision.
$ publican build
transforms XML into a document. Options:
--help
display help message.
--config=s
use a nonstandard config file.
--common_config=s
override path to Common_Config directory.
--common_content=s
override path to Common_Content directory.
--nocolours
disable ANSI colorization of logging.
--quiet
disable all logging.
--brand_dir=s
directory to source brand files from.
--formats=FORMATS
comma-separated list of formats to build. For example: html,pdf,html-single,html-desktop,txt,epub (mandatory).
--langs=LANGS
comma-separated list of languages to build. For example: en-US,de-DE,all (mandatory).
--publish
sets up built content for publishing.
--embedtoc
embeds a table of contents into HTML output.
--novalid
skips DTD validation when building a document.
--src_dir=SRC_DIR
specifies the directory to source Publican files from.
--pdftool=s
Override the tool to use when creating PDFs. Valid options are wkhtmltopdf and fop.
--pub_dir=PUB_DIR
Override the directory to publish files to. Defaults to 'publish'.
$ publican clean
removes the temporary directories from a document directory.
$ publican clean_ids
indents XML files neatly, and rebuilds element IDs.
$ publican clean_set
removes local copies of remote books that are part of a set.
$ publican create
creates a new book, article, or set. Options:
--name
the name of the document (mandatory).
--product
the documented product.
--version
the version of the documented product.
--edition
the edition of the document.
--brand
the brand for the document.
--lang
the language in which the XML will be authored.
--type
the type of document — article, book, or set.
$ publican create_brand
creates a new brand. Options:
--name
the name of the document (mandatory).
--lang
the language in which the XML will be authored.
publican create_site
creates a documentation website. Options:
--site_config
name of the site configuration file to create (mandatory).
--db_file
name of the site database file to create (mandatory).
--toc_path
path to the directory in which to create the top-level toc.html file (mandatory).
--tmpl_path
path to the template directory (by default, /usr/share/publican/templates).
$ publican help_config
displays a list of parameters for the publican.cfg file.
publican install_book
installs a document on a documentation website.
--site_config
name of the site configuration file (mandatory).
--lang
the language of the document to install (mandatory).
$ publican install_brand
configures a brand for installation. Option:
--path
path to the Publican Common Content files. By default, /usr/share/publican/Common_Content on Linux operating systems and at %SystemDrive%/%ProgramFiles%/Publican/Common_Content on Windows operating systems — typically, C:/Program Files/Publican/Common_Content
$ publican copy_web_brand
copy a brand's installed web content to another site. Options:
--brand
the brand to copy.
--old_site_config=site_config
website configuration file to copy brand web content from.
--site_config=site_config
website configuration file to copy brand web content to.
$ publican lang_stats
generates a translation report for a language.
--langs
a comma-separated list of languages for which the report will be generated.
$ publican migrate_site
migrates a website database from Publican 2.x to Publican 3. Options:
--site_config=site_config
website configuration file to use or create.
$ publican package
packages a document or brand for distribution. Options:
--lang
the language to package (mandatory for documents, meaningless for brands).
--desktop
specifies that a document RPM package should be built for desktop use (meaningless for brands).
--brew
pushes a package to the Brew build system (meaningless outside Red Hat).
--scratch
used in conjunction with --brew to specify a scratch build (meaningless outside Red Hat).
--short_sighted
builds the package without the product version number in the package name.
--binary
builds the package as a binary RPM package rather than a source RPM package.
publican print_banned
prints a list of DocBook tags banned by Publican.
publican print_known
prints a list of DocBook tags supported by Publican.
$ publican print_tree
displays a tree of the XML files included in a document.
publican print_unused
prints a list of the XML files not included with the <xi:include> tag in a book, article, or set.
publican print_unused_images
prints a list of the image files not referenced by an <imagedata> tag in a book, article, or set.
publican remove_book
removes a document from a documentation website.
--site_config
name of the site configuration file (mandatory).
--lang
the language of the document to remove (mandatory).
$ publican rename
renames a document. Options:
--name
the new title for the document.
--product
the new product to which the document applies.
--version
the new product version to which the document applies.
publican site_stats --site_config=name_of_site_config_file
generates a site report for a documentation website. Option:
--site_config
name of the site configuration file (mandatory).
$ publican update_pot
updates the POT files in a document.
$ publican update_po
updates the PO files in a document.
--langs
comma-separated list of languages to update, or ‘all’ to update all (mandatory).
--msgmerge
use gettext's msgmerge for POT/PO merging.
publican update_site --site_config=name_of_site_config_file.cfg
regenerates the templated content of a documentation website. Option:
--site_config
name of the site configuration file (mandatory).

B.1. Internal commands

Publican uses the commands documented in this section internally. There is normally no need to run them manually.
publican update_db --add
Adds entries to the database of a Publican-generated website, with the following options:
--site_config
name of the site configuration file.
--lang
the language in which the document is published.
--formats
a comma-separated list of the formats in which the document is published, for example, pdf,html-single
--name
the title of the document.
--name_label
the title of the document, as it should appear in the site's tables of contents.
--product
the product that the document describes.
--product_label
the product that the document describes, as it should appear in the site's tables of contents.
--version
the version of the product that the document describes.
--version_label
the version of the product that the document describes, as it should appear in the site's tables of contents.
--subtitle
the subtitle of the document.
--abstract
the abstract of the document.
For example:
publican update_db --add --lang en-US --formats html,pdf --name Foo \
--name_label "foo is good" --version 0.1 --version_label UNUSED \
--product Bar --product_label "To the bar" \
--subtitle "A guide to Bar Foo" \
--abstract "There once was a Foo from Bar ..." \
--site_config /usr/share/bar/foo.cfg
publican update_db --del
removes entries from the database of a Publican-generated website, with the following options:
--site_config
name of the site configuration file.
--lang
the language in which the document is published.
--name
the title of the document.
--product
the product that the document describes.
--version
the version of the product that the document describes.
For example:
publican update_db --del --lang en-US --name Foo --version 0.1 --product Bar \
--site_config /usr/share/bar/foo.cfg

Appendix C. publican.cfg parameters

Every book, article, document set, or brand has a publican.cfg file in its root directory. Parameters that can be set in the publican.cfg file are:
docname
the document name, set by the --name option.
version
the product version, set by the --version option.
xml_lang
the language of the source XML files, set by the --lang option.
edition
the edition number for this documentation, set by the --edition option.
type
the type of document — a DocBook <article>, DocBook <book>, or DocBook <set>, set by the --type option.
brand
the brand of the document, set by the --brand option.
product
the product to which this documentation applies, set by the --product option.
arch
the computer architecture for this document.
books
a space-separated list of books used in a remote set.
brew_dist
the build target to use for building the desktop RPM package in Brew. (Default: docs-5E)
bridgehead_in_toc
whether bridgeheads should be included in tables of contents. (Default: 0bridgeheads are not included in tables of contents).
chunk_first
whether the first section should appear on the same page as its parent when rendered in HTML. (Default: 0 — the first section starts a new HTML page).
chunk_section_depth
the point at which Publican no longer splits sub-subsections onto a new page when rendering HTML. (Default: 4)
classpath
the path to the jar files for FOP. (Default for Linux operating systems: /usr/share/java/ant/ant-trax-1.7.0.jar:/usr/share/java/xmlgraphics-commons.jar:/usr/share/java/batik-all.jar:/usr/share/java/xml-commons-apis.jar:/usr/share/java/xml-commons-apis-ext.jar)
common_config
the path to the Publican installation. (Default for Linux operating systems: /usr/share/publican, default for Windows operating systems: %SystemDrive%/%ProgramFiles%/publican — most usually C:/Program Files/publican)
common_content
the path to the Publican's Common Content files. (Default for Linux operating systems: /usr/share/publican/Common_Content, default for Windows operating systems: %SystemDrive%/%ProgramFiles%/publican/Common_Content — most usually C:/Program Files/publican/Common_Content)
condition
conditions on which to prune XML before transformation.
confidential
marks a document as confidential. (Default: 0 — not confidential).
confidential_text
sets the text with which to mark a document as confidential. (Default: CONFIDENTIAL).
debug
whether Publican should display debugging messages as it works. (Default: 0 — suppress messages)
def_lang
the default language for a Publican-managed website. Tables of contents for languages other than the default language will link to documents in the default language when translations are not available. (Default: en-US — American English)
doc_url
URL for the documentation team for this package. (Default: https://fedorahosted.org/publican)
dt_obsoletes
a package that a desktop package obsoletes.
dt_requires
a package that the desktop package requires, for example, a documentation menu package. Refer to Section 4.8.1.3, “Desktop menu entries for documents”.
dtdver
the version of the DocBook XML Document Type Definition (DTD) on which this project is based. (Default: 4.5)
dtd_type
Override Type for DocType. Must be a complete string.

Note

This parameter is only permitted in a brand.
dtd_uri
Override URI for DocType. Must be a complete string.

Note

This parameter is only permitted in a brand.
ec_id
the ID for an Eclipse help plugin (Default: product.docname)
ec_name
the name of an Eclipse help plugin (Default: product docname)
ec_provider
the provider name for an Eclipse help plugin (Default: Publican-Publican version)
extras_dir
the directory Publican will process extra files from. (Default: extras)
generate_section_toc_level
the section depth at which Publican generates a table of contents. (Default: 0 — no tables of contents in sections)
ignored_translations
translations to ignore.
img_dir
the directory Publican will process images from. (Default: images)
info_file
override the default Info file. Use the full filename without the path.
license
the license this package uses. (Default: GNU Free Documentation License).
mainfile
the name of the XML file in your document that contains the root XML node <article>, <book>, or <set>, and the name of the corresponding .ent file that contains the document's entities. For example, if you set mainfile: master, Publican looks for the root XML node in master.xml and the document entities in master.ent.
If mainfile is not set, Publican looks for the root XML node in a file that matches the <title> of the document set in the Article_Info.xml, Book_Info.xml, or Set_Info.xml file, and looks for the document entities in a file with a corresponding name.
max_image_width
the maximum width allowable for images in the document, unless specifically overriden in the <imagedata> tag for a specific image. (Default: 444 — 444 pixels wide)

Important — 444 pixels is the maximum safe width

Do not use the max_image_width parameter if your images contain important information. Images wider than 444 pixels presented at their full size might lead to poorly presented HTML and to PDF output that it is unusable because the images have run off the page and are incomplete.
Conversely, images wider than 444 pixels that are scaled down in a web browser to fit the HTML container or in a PDF viewer to for a page lose quality.
To safeguard the quality of your images, crop them or scale them so that they are no wider than 444 pixels before you include them in a document.
menu_category
the desktop menu category (as defined by a corresponding .menu file) in which a document should appear when installed from a desktop RPM package. Refer to Section 4.8.1.3, “Desktop menu entries for documents”.
os_ver
the operating system for which to build packages.
prod_url
URL for the product to which this document applies. (Default: https://fedorahosted.org/publican)
release
the release number of this package. Defaults to the value of xml_lang, fetched from the title tag in xml_lang/TYPE_Info.xml or Project-Id-Version in lang/TYPE_Info.po.
repo
the repository from which to fetch remote books that form part of a distributed set.
rev_dir
override the default Revision History file direction. By default Publican assumes the Revision History is sorted in descending order, newest versions at teh top, if you wish to change this and have the oldest revisions at the top, then set this parameter to asc or ascending.
rev_file
override the default Revision History file. Use the full filename without the path.
scm
the version control system used in the repository in that stores the remote books in a distributed set. (Default: SVN)
show_remarks
whether to display remarks in transformed output. (Default: 0 — hide remarks)
sort_order
override the default sort weighting for books in a Publican website. Defaults to 50.
src_url
URL at which to find tarballs of source files.
tmp_dir
the directory for Publican output. (Default: tmp)
--toc_path
path to the directory in which to create the top-level toc.html file (mandatory).
toc_section_depth
the depth of sections that Publican includes in the main table of contents. (Default: 2)
--tmpl_path
path to the template directory (by default, /usr/share/publican/templates).
web_brew_dist
the brew build target to use for the web RPM package. (Defaults to docs-5E)
web_formats
a comma-separated list of formats to include in the web RPM package. Refer to Section 4.8.2, “The $ publican package command”.
web_home
specifies that the document is the home page of a documentation website, not a standard document.

Important — web_home is deprecated

In Publican 2.2, web_home is replaced by web_type: home. Support for web_home will be removed in a future version of Publican.
web_name_label
overrides the book name as it appears on the menu of a Publican-managed website.
web_obsoletes
packages that the web RPM package obsoletes.
web_product_label
overrides the product name as it appears on the menu of a Publican-managed website.
web_type
specifies that the document is descriptive content for a Publican-managed website rather than product documentation. This content includes the home page of the website (web_type: home), product description pages (web_type: product), and version description pages (web_type: version). Refer to Chapter 7, Building a website with Publican.
web_version_label
overrides the version number as it appears on the menu of a Publican-managed website.
wkhtmltopdf_opts
Extra options to pass to wkhtmltopdf. e.g. wkhtmltopdf_opts: "-O landscape -s A3"

Appendix D. Alphabetical index of publican.cfg parameters

publican.cfg parameters

arch
filters output by computer architecture. For example, if you set arch: x86_64 in the publican.cfg file, Publican will only include XML elements tagged with the equivalent attribute, such as <para arch="x86_64">.

Use with caution

As with conditional tagging more generally, arch can cause great difficulties when translating documents. Refer to Section 4.9.1, “Conditional tagging and translation” for an explanation of the issues.

arch set for root nodes

If the root node of an XML file is excluded by the arch attribute, your document will not build, because empty files are not valid XML. For example, if Installation_and_configuration-PPC.xml contains a single chapter:
<?xml version='1.0' encoding='utf-8' ?>
<!DOCTYPE chapter PUBLIC "-//OASIS//DTD DocBook XML V4.5//EN" "http://www.oasis-open.org/docbook/xml/4.5/docbookx.dtd" [
]>
<chapter id="chap-Installation_and_configuration_on_PowerPC" arch="PowerPC">
<title>Installation and configuration on PowerPC</title>

[text of chapter]

</chapter>

and this chapter is included in User_Guide.xml with an <xi:include> tag, the document will not build with $ condition: x86 set in the publican.cfg file.
To exclude this chapter, add the arch attribute to the <xi:include> tag in User_Guide.xml, not to the <chapter> tag in Installation_and_configuration-PPC.xml.

xrefs and the arch attribute

If an <xref> points to content not included in the build due to the arch attribute, the build will fail. For example, with arch: x86 set in the publican.cfg file, $ publican build --formats=pdf --langs=en-US will fail if the book has the tag <xref linkend="Itanium_installation"> pointing to <section id="Itanium_installation" arch="IA64">.
books
specifies a space-separated list of books used in a remote set. Refer to Section 6.2, “Distributed sets” for more information on distributed sets.
brand
sets the brand of the document, for example, RedHat, fedora, JBoss, oVirt or GIMP , as set by the --brand option for $ publican create. If you do not specify a brand, Publican uses its default brand. Refer to Chapter 5, Branding for more information.
brew_dist
specifies the build target to use for building the desktop RPM package in Brew, Red Hat's internal build system. This parameter defaults to docs-5E. Refer to Section 4.8.2, “The $ publican package command” and Section 5.4, “Packaging a brand” for more information on building RPM packages.
bridgehead_in_toc
specifies whether the contents of <bridgehead> elements (free-floating titles) should be included among other titles (such as section titles and chapter titles) in tables of contents. To enable this feature, set bridgehead_in_toc: 1. Otherwise, the parameter defaults to 0, and <bridgehead>s are not included in tables of contents.
chunk_first
controls whether the first section should appear on a new page when rendered in HTML. To make the first section appear on a new HTML page, set this parameter to chunk_first: 1. Otherwise, the parameter defaults to 0, and the first section appears on the same page of its chapter.
chunk_section_depth
controls the section depth at which Publican no longer splits sub-subsections onto a new page when rendering HTML. By default, this value is set to 4.

Example D.1. Controlling the section depth with chunk_section_depth

chunk_section_depth: 0
no section split. All sections with their sub-sections appear on the same page of the chapter they belong. The page succession is chapter 1, chapter 2, chapter 3, …
chunk_section_depth: 1
the split is at "level 1" section. Each level section one with its sub-sections, appear on a new page. The page succession is chapter 1, 1.2, 1.3, 1.4 … chapter 2, 2.1, 2.2, 2.3 …
chunk_section_depth: 2
the split is at "level 2" section. The page succession is chapter 1, 1.2, 1.2.2, 1.2.3, 1.2.4 … 1.3, 1.3.2, 1.3.3 …
chunk_section_depth: 3
the split is at "level 3" section. The page succession is chapter 1, 1.2, 1.2.2, 1.2.2.2, 1.2.2.3, 1.2.2.4 … 1.3, 1.3.2, 1.3.2.2, 1.3.2.3 …
chunk_section_depth: 4 (default)
the split is at "level 4" section. The page succession is chapter 1, 1.2, 1.2.2, 1.2.2.2, 1.2.2.2.2, 1.2.2.2.3, 1.2.2.2.4 … 1.2.3, 1.2.3.2, 1.2.3.2.2, 1.2.3.2.3 …
classpath
sets the path to the Java archive (jar) files for FOP. Publican relies on Apache FOP — a Java application — to render documents as PDF files. The default path for FOP's jar files on a computer with a Linux operating system is: /usr/share/java/ant/ant-trax-1.7.0.jar:/usr/share/java/xmlgraphics-commons.jar:/usr/share/java/batik-all.jar:/usr/share/java/xml-commons-apis.jar:/usr/share/java/xml-commons-apis-ext.jar
common_config
sets the path to the Publican installation. The default location on a computer with a Linux operating system is /usr/share/publican. On a computer with a Windows operating system, the default location is %SystemDrive%/%ProgramFiles%/publican — most usually C:/Program Files/publican.
common_content
sets the path to the Publican common content files. These files provide default formatting, plus some boilerplate text and generic graphics. The default location on a computer with a Linux operating system is /usr/share/publican/Common_Content. On a computer with a Windows operating system, the default location is %SystemDrive%/%ProgramFiles%/publican/Common_Content — most usually C:/Program Files/publican/Common_Content.
condition
specifies conditions on which to prune XML before transformation. Refer to Section 4.9, “Conditional tagging” for more information.

Root nodes and conditional tagging

If the root node of an XML file is excluded with a conditional, your document will not build, because empty files are not valid XML. For example, if Installation_and_configuration_on_Fedora.xml contains a single chapter:

<?xml version='1.0' encoding='utf-8' ?>
<!DOCTYPE chapter PUBLIC "-//OASIS//DTD DocBook XML V4.5//EN" "http://www.oasis-open.org/docbook/xml/4.5/docbookx.dtd" [
]>
<chapter id="chap-Installation_and_configuration_on_Fedora" condition="Fedora">
<title>Installation and configuration on Fedora</title>

[text of chapter]

</chapter>

and this chapter is included in User_Guide.xml with an <xi:include> tag, the document will not build with $ condition: Ubuntu set in the publican.cfg file.
To exclude this chapter, add a condition to the <xi:include> tag in User_Guide.xml, not to the <chapter> tag in Installation_and_configuration_on_Fedora.xml.

xrefs and conditional tagging

If an <xref> points to content not included in the build due to conditional tagging, the build will fail. For example, with $ condition: upstream set in the publican.cfg file, $ publican build --formats=pdf --langs=en-US will fail if the book has the tag <xref linkend="betasection"> pointing to <section id="betasection" condition="beta">.
confidential
marks a document as confidential. When this parameter is set to 1, Publican adds the text specified by the confidential_text parameter (by default, CONFIDENTIAL) to the foot of each HTML page and the head of every page in a PDF document. The default value is 0 (no header or footer).
confidential_text
specifies the text to use when the confidential parameter is set to 1. The default text is CONFIDENTIAL.
debug
controls whether Publican should display debugging messages as it works. When set to its default of 0, Publican does not display debugging messages. Change this value to 1 to view these messages.
def_lang
sets the default language for a Publican-managed website. Tables of contents for languages other than the default language will link to documents in the default language when translations are not available. Refer to Section 4.8, “Packaging a document”.
doc_url
provides a URL for the documentation team for this package. In HTML output, Publican links to this URL at the top right of each page, through the image_right.png image in the Common_Content/images directory for the brand. This parameter defaults to https://fedorahosted.org/publican
docname
specifies the document name. If set, this value overrides the content of the <title> tag in the Book_Info.xml file when you package a document. This value must contain only upper- and lower-case un-accented letters, digits, and the underscore and space characters (‘a–z’, ‘A–Z’, ‘0’–‘9’, and ‘_’ and ‘ ’).
dt_obsoletes
a package that a desktop package obsoletes.
dt_requires
a package that the desktop package requires, for example, a documentation menu package. Refer to Section 4.8.1.3, “Desktop menu entries for documents”.
dtdver
specifies the version of the DocBook XML Document Type Definition (DTD) on which this project is based. Publican defaults to version 4.5. The specification for DocBook XML DTD version 4.5 is available from http://www.docbook.org/specs/docbook-4.5-spec.html.

A different DTD might slow your build

When you install Publican, you also install a local copy of the DocBook XML DTD version 4.5 and accompanying Extensible Stylesheet Language (XSL). If you set a version of the DTD for which there is no local support, Publican must download the appropriate DTD and XSL from an online source every time that it builds the document. Building your document is delayed while this download takes place. The combined size of the required files is around 70 MB.
dtd_type
Override Type for DocType. Must be a complete string.

Note

This parameter is only permitted in a brand.
dtd_uri
Override URI for DocType. Must be a complete string.

Note

This parameter is only permitted in a brand.
ec_id
sets the ID for an Eclipse help plugin. Every Eclipse help plugin must have a unique ID, and these generally follow Java package naming conventions — refer to http://java.sun.com/docs/codeconv/html/CodeConventions.doc8.html. By default, Publican sets the ID to org.product.docname. The ID that you set here also determines the directory name for this plugin in the plugin directory.
ec_name
sets the name of an Eclipse help plugin. This is the human-readable name visible in the help list in Eclipse. This name does not need to be unique or to follow a special convention. By default, Publican sets the name to product docname.
ec_provider
sets the provider name for an Eclipse help plugin. This should be your name, or the name of your project or organization. This name is presented to users and does not need to be unique or follow a special convention. By default, Publican sets the provider name to Publican-Publican version.
edition
specifies the edition number for this document. If set, this value overrides the content of the <edition> tag in the Book_Info.xml file when you package a document. This value must include only digits and the period (‘0’–‘9’ and ‘.’).
extras_dir
the directory Publican will process extra files from. (Default: extras)
footer
specifies content that will be injected into the bottom of every page on the site.
generate_section_toc_level
controls the section depth at which Publican will generate a table of contents. At the default value of 0, Publican will generate tables of contents at the start of the document and in parts, chapters, and appendixes, but not in sections. If (for example) the value is set to 1, tables of contents also appear in each "level 1" section, such as sections 1.1, 1.2, 2.1, and 2.2. If set to 2, tables of contents also appear in "level 2" sections, such as sections 1.1.1, 1.1.2, and 1.2.1.

Example D.2. Setting the section depth at which tables of contents appear

generate_section_toc_level: 0 (default)
Publican will generate tables of contents at the start of the document and in parts, chapters, and appendixes, but not in sections.
generate_section_toc_level: 1
Publican will generate tables of contents also at the start of each "level 1" section, such as sections 1.1, 1.2 … 2.1, 2.2 …
generate_section_toc_level: 2
Publican will generate tables of contents also at the start of each "level 2" section, such as as sections 1.1.1, 1.1.2. 1.1.3 … 1.2.1., 1.2.2, 1.2.3 …
ignored_translations
specifies translations to ignore as comma-separated XML language codes; for example, es-ES,it-IT. If you build or package a book for a language filtered by this parameter, Publican ignores any translations that exist for this language, and builds or packages the book in the language of the original XML instead. Refer to Section 4.6, “Translating a document”, and to Appendix G, Language codes.
img_dir
the directory Publican will process images from. (Default: images)
info_file
overrides the default Info file. Specifies where Publican looks for info fields. Use the full filename without the path.
license
specifies the license this package uses. By default, Publican selects the GNU Free Documentation License (GFDL). Refer to Section 4.8, “Packaging a document”.
max_image_width
specifies the maximum width allowable for images in the document in pixels. By default, Publican scales down any images wider than 444 pixels so that they fit within this limit. Keeping images no wider than 444 pixels ensures that they present no wider than the right-hand margin of the text in HTML output and that they fit within the pages of PDF output. Refer to Section 4.2, “Adding images” for more information on using images.

Important — 444 pixels is the maximum safe width

Do not use the max_image_width parameter if your images contain important information. Images wider than 444 pixels presented at their full size might lead to poorly presented HTML and to PDF output that it is unusable because the images have run off the page and are incomplete.
Conversely, images wider than 444 pixels that are scaled down in a web browser to fit the HTML container or in a PDF viewer to for a page lose quality.
To safeguard the quality of your images, crop them or scale them so that they are no wider than 444 pixels before you include them in a document.
mainfile
specifies the name of the XML file in your document that contains the root XML node <article>, <book>, or <set>, and the name of the corresponding .ent file that contains the document's entities. For example, if you set mainfile: master, Publican looks for the root XML node in master.xml and the document entities in master.ent.
If mainfile is not set, Publican looks for the root XML node in a file that matches the <title> of the document set in the Article_Info.xml, Book_Info.xml, or Set_Info.xml file, and looks for the document entities in a file with a corresponding name.
menu_category
the desktop menu category (as defined by a corresponding .menu file) in which a document should appear when installed from a desktop RPM package. Refer to Section 4.8.1.3, “Desktop menu entries for documents”.
os_ver
specifies the operating system for which to build packages. Publican appends the value that you provide here to the RPM packages that it builds. For example, .fc15 for Fedora 15. The default value is .el5, which signifies Red Hat Enterprise Linux 5 and operating systems derived from it. Refer to Section 4.8, “Packaging a document” and Section 5.4, “Packaging a brand”.
prod_url
provides a URL for the product to which this document applies. In HTML output, Publican links to this URL at the top left of each page, through the image_left.png image in the Common_Content/images directory for the brand. This parameter defaults to https://fedorahosted.org/publican.
product
specifies the product to which this documentation applies. If set, this value overrides the content of the <productname> tag in the Book_Info.xml file when you package a document. This value must include only contain upper- and lower-case un-accented letters, digits, and the underscore and space characters (‘a–z’, ‘A–Z’, ‘0’–‘9’, and ‘_’ and ‘ ’).
release
specifies the release number of this package. If set, this value overrides the value of <pubsnumber> in the Book_Info.xml file when you package a document. This value must include only digits (‘0’–‘9’).
repo
specifies the repository from which to fetch remote books that form part of a distributed set. Refer to Section 6.2, “Distributed sets”.
rev_dir
override the default Revision History file direction. By default Publican assumes the Revision History is sorted in descending order, newest versions at teh top, if you wish to change this and have the oldest revisions at the top, then set this parameter to asc or ascending.
rev_file
override the default Revision History file. Specifies where Publican looks for revision fields. Use the full filename without the path. When combined with the Publican action add_revision, it enables you to build a book without a Revision_History.xml.
scm
specifies the version control (or source code management) system used in the repository in that stores the remote books in a distributed set. At present, Publican can use only Subversion (SVN), and therefore uses SVN as its default setting. Refer to Section 6.2, “Distributed sets”.
show_remarks
controls whether to display DocBook <remark>s in transformed output. By default, this value is set to 0, which causes Publican to hide remarks. Set this value to 1 to display remarks. In Publican's common brand, displayed remarks are highlighted in magenta.
sort_order
override the default sort weighting for books in a Publican website. Books are displayed on the website in descending sort order. For example, a book with sort order 10 appears before a book with sort order 5. By default, this value is set to 50.
src_url
specifies the URL at which to find tarballs of source files. This parameter provides the Source: field in the header of an RPM spec file. Refer to Section 4.8, “Packaging a document”.
tmp_dir
specifies the directory for Publican output. By default, this is set to tmp, which creates a directory named tmp inside the directory that holds your article or book.
tmpl_path
specifies the path to Publican templates. By default, this is set to /usr/share/publican/templates.
toc_js
allows a site to override the template used when building the embedded toc using in web_style=1 sites. The template must be in the same directory that toc.tmpl is in. The template name must be must be of the form toc_type+.tmpl
toc_type
specifies the name of a custom TOC template. By default, Publican looks for toc-$toc_type.tmpl in /usr/share/publican/templates. You can override this by setting an alternative path with tmpl_path.
toc_section_depth
controls the depth of sections that Publican includes in the main table of contents. By default, this value is set to 2. With the default setting, sections 1.1 and 1.1.1 will appear in the main table of contents, but section 1.1.1.1 will not. (Note that the first digit in these examples represents a chapter, not a section).

Example D.3. Controlling the depth of sections in the main table of contents

toc_section_depth: 0
Publican will generate a main table of contents only for chapters.
toc_section_depth: 1
Publican will generate a main table of contents only for chapters and "level 1" sections, such as 1, 1.1, 1.2, 1.3 … 9, 9.1, 9.2 … but not for sections 1.1.1, 1.1.2 …
toc_section_depth: 2 (default)
Publican will generate tables of contents for chapters and "level 1 and "level 2" sections, such as 1, 1.1, 1.1.1, … 1,2, 1.2.1, 1.2.2 … but not for deeper sections x.x.x.x .
type
specifies the type of document — a DocBook <article>, DocBook <book>, or DocBook <set>, as set by the --type option for $ publican create.
version
specifies the version number of that product to which this document applies. If set, this value overrides the content of the <productnumber> tag in the Book_Info.xml file when you package a document. This value must include only digits and the period (‘0’–‘9’ and ‘.’).
web_brew_dist
specifies the brew build target to use for building the web RPM packages. Brew is the internal build system used by Red Hat. By default, this value is set to docs-5E, representing documentation packages for Red Hat Enterprise Linux 5. Refer to Section 4.8, “Packaging a document”.
web_formats
a comma-separated list of formats to include in the web RPM package. Refer to Section 4.8.2, “The $ publican package command”.
web_home
specifies that the document is the home page of a documentation website, not a standard document. Refer to Chapter 7, Building a website with Publican.

Important — web_home is deprecated

In Publican 2.2, web_home is replaced by web_type: home. Support for web_home will be removed in a future version of Publican.
web_name_label
overrides the book name as it appears on the menu of a Publican-managed website. Refer to Chapter 7, Building a website with Publican.
web_obsoletes
specifies packages that the web RPM obsoletes. Refer to Section 4.8, “Packaging a document”.
web_product_label
overrides the product name as it appears on the menu of a Publican-managed website. Refer to Chapter 7, Building a website with Publican.
web_style
sets the web style, which determines the layout and presentation of the website. Valid values are 1 and 2. Style 1 features a navigation pane at the left side of the screen that provides access to all of the documents on the site. Style 2 offers a breadcrumb-like navigation system.
web_type
specifies that the document is descriptive content for a Publican-managed website rather than product documentation. This content includes the home page of the website (web_type: home), product description pages (web_type: product), and version description pages (web_type: version). Refer to Chapter 7, Building a website with Publican.
web_version_label
overrides the version number as it appears on the menu of a Publican-managed website. Set this value to UNUSED for general documentation that does not apply to any particular version of a product. Refer to Chapter 7, Building a website with Publican.
wkhtmltopdf_opts
Extra options to pass to wkhtmltopdf. e.g. wkhtmltopdf_opts: "-O landscape -s A3"
xml_lang
specifies the language of the source XML files, for example, en-US, as set by the --lang option for $ publican create.

Appendix E. Contents of the website dump file

The dump file for a Publican-generated website contains some basic site configuration details, together with details of every document published on the site. The site configuration details are:
<host>
The URL to the root of the documentation site, as set by the host parameter in the site configuration file.
<def_lang>
The default language of the documentation on the website, as set by the def_lang parameter in the site configuration file.
Each document, in each language, in each format has a separate record. These records contain the following data:
<name>
The title of the document, generated from the <title> tag in the Book_Info.xml, Article_Info.xml, or Set_Info.xml file unless overridden by the docname parameter in the publican.cfg file. Any spaces in the title are replaced by underscores.
<ID>
A unique ID number for this document, in this format, in this language.
<abstract>
A brief summary of the content of the document, generated from the <abstract> tag in the Book_Info.xml, Article_Info.xml, or Set_Info.xml file. Publican uses this same content to generate the %description section of the spec file when it packages a document. If the <abstract> is translated, this field contains the translated text.
<format>
The format in which the document is produced — html for multi-page html, html-single for single-page html, pdf for PDF, and epub for EPUB.
<language>
The language code for the document. Refer to Appendix G, Language codes for more information about language codes in XML.
<name_label>
The name of the document as it appears in the site table of contents. This label can be set with the web_name_label parameter in the document's publican.cfg file. Otherwise, the field is empty for a document in its original language, or uses the translated title of the document in a translated language. Any spaces in the name label are replaced by underscores.
<product>
The product that the document describes, generated from the <productname> tag in the Book_Info.xml, Article_Info.xml, or Set_Info.xml file unless overridden by the product parameter in the publican.cfg file. Any spaces in the product name are replaced by underscores.
<product_label>
The name of the product as it appears in the site table of contents. This label can be set with the web_product_label parameter in the document's publican.cfg file. Otherwise, the field is empty for a document in its original language, or uses the translated title of the document in a translated language. Any spaces in the name label are replaced by underscores.
If the product label is set to UNUSED, no heading for this product appears in the website tables of contents.
<subtitle>
A one-line description of the content of the document, generated from the <subtitle> tag in the Book_Info.xml, Article_Info.xml, or Set_Info.xml file. Publican uses this same content to generate the Summary section of the spec file when it packages a document. If the <subtitle> is translated, this field contains the translated text.
<update_date>
The date that the document was most recently installed on the site, in the format YYYY-MM-DD.
<version>
The version of the product that the document describes (not the version of the document itself), generated from the <productnumber> tag in the Book_Info.xml, Article_Info.xml, or Set_Info.xml file unless overridden by the version parameter in the publican.cfg file.
<version_label>
The version of the product as it appears in the site table of contents. This label can be set with the web_version_label parameter in the document's publican.cfg file.
If the version label is set to UNUSED, no heading for this version of the product appears in the website tables of contents.

Example E.1. Sample records from a DUMP.xml file

These two records from a DUMP.xml file show the same book, the Red Hat Enterprise Linux 5 Installation Guide, in two different formats and two different languages — an English PDF version and a French multi-page HTML version.
  <record>
    <name>Installation_Guide</name>
    <ID>22</ID>
    <abstract>This manual explains how to boot the Red Hat Enterprise Linux 5 installation program (anaconda) and to install Red Hat Enterprise Linux 5 on 32-bit and 64-bit x86 systems, 64-bit POWER systems, and IBM System z. It also covers advanced installation methods such as kickstart installations, PXE installations, and installations over VNC. Finally, it describes common post-installation tasks and explains how to troubleshoot installation problems.</abstract>
    <format>pdf</format>
    <language>en-US</language>
    <name_label>Installation_Guide</name_label>
    <product>Red_Hat_Enterprise_Linux</product>
    <product_label>Red_Hat_Enterprise_Linux</product_label>
    <subtitle>Installing Red Hat Enterprise Linux 5 for all architectures</subtitle>
    <update_date>2010-10-07</update_date>
    <version>5</version>
    <version_label></version_label>
  </record>
  <record>
    <name>Installation_Guide</name>
    <ID>149</ID>
    <abstract>Ce manuel explique comment lancer le programme d'installation Red Hat Enterprise Linux 5 et comment installer Red Hat Enterprise Linux 5 sur les systèmes x86 32-bit et 64-bit, sur les systèmes POWER 64-bit, et sur les systèmes IBM System z. Il couvre aussi des méthodes d'installation avancées telles que les installations kickstart, PXE, et les installations au moyen de VNC. Finalement, ce manuel décrit les tâches communes post-installation et explique comment résoudre les problèmes liés à une installation.</abstract>
    <format>html</format>
    <language>fr-FR</language>
    <name_label>Guide_d'installation</name_label>
    <product>Red_Hat_Enterprise_Linux</product>
    <product_label>Red_Hat_Enterprise_Linux</product_label>
    <subtitle>Installation de Red Hat Enterprise Linux 5 pour toutes les architectures</subtitle>
    <update_date>2010-10-19</update_date>
    <version>5</version>
    <version_label></version_label>
  </record>

E.1. Computing URLs from the dump file

Using the following fields, you can compute the URL of any document on the site:
  • <host>
  • <name>
  • <format>
  • <language>
  • <product>
  • <version>
muti-page HTML
<host>/<language>/<product>/<version>/<format>/<name>/index.html
For example, http://docs.fedoraproject.org/en-US/Fedora/14/html/Accessibility_Guide/index.html
single-page HTML
<host>/<language>/<product>/<version>/<format>/<name>/index.html
For example, http://docs.fedoraproject.org/en-US/Fedora/14/html-single/Accessibility_Guide/index.html
PDF
<host>/<language>/<product>/<version>/<format>/<name>/<product>-<version>-<name>-<language>.pdf
For example, http://docs.fedoraproject.org/en-US/Fedora/14/pdf/Accessibility_Guide/Fedora-14-Accessibility_Guide-en-US.pdf
EPUB
<host>/<language>/<product>/<version>/<format>/<name>/<product>-<version>-<name>-<language>.epub
For example, http://docs.fedoraproject.org/en-US/Fedora/14/pdf/Accessibility_Guide/Fedora-14-Accessibility_Guide-en-US.epub
Note that the <product_label>, <version_label>, and <name_label> fields have no significance for URLs, even when these fields are suppressed in tables of contents by the UNUSED setting.

Appendix F. Sample spec file for desktop menu package

The following spec file is an example of how you could package a desktop entry (.directory) file and a desktop menu (.menu) file in an RPM package for shipping. Refer to Section 4.8.1.3, “Desktop menu entries for documents” for the structure of these files.
This example assumes a desktop entry file named menu-example.directory, a desktop menu file named menu-example.menu, and a readme file named README are located in a directory named menu-example-0 that is archived as menu-example-0.tgz.
When built, this results in a package named menu-example.
Name:		menu-example
Version:	0
Release:	8%{?dist}.t1
Summary:	Example of how to do a documentation menu package
Group:		Development/Tools
License:	GPLv2+
URL:		http://engineering.redhat.com
Source0:	%{name}-%{version}.tgz
BuildRoot:	%{_tmppath}/%{name}-%{version}-%{release}-root-%(%{__id_u} -n)
BuildArch:      noarch

%description
Example of how to do a documentation menu package

%prep
%setup -q

%build

%install
rm -rf %{buildroot}
mkdir -p $RPM_BUILD_ROOT%{_datadir}/desktop-directories
mkdir -p $RPM_BUILD_ROOT/etc/xdg/menus/settings-merged

install -m644 menu-example.directory $RPM_BUILD_ROOT%{_datadir}/desktop-directories/menu-example.directory
install -m644 menu-example.menu $RPM_BUILD_ROOT%{_sysconfdir}/xdg/menus/settings-merged/menu-example.menu

%{_fixperms} $RPM_BUILD_ROOT/*

%clean
rm -rf %{buildroot}

%files
%defattr(-,root,root,-)
%doc README
%{_datadir}/desktop-directories/menu-example.directory
%config(noreplace) %{_sysconfdir}/xdg/menus/settings-merged/menu-example.menu

%changelog
* Tue Nov 23 2010 Jeff Fearn <jfearn@redhat.com> 0-8
- Creation

Appendix G. Language codes

Region subtags

The only part of the XML language tag that is mandatory in Publican is the language subtag. However, Publican is designed with the assumption that you will routinely include the region subtag when you identify languages. In many languages, spelling and vocabulary vary significantly from region to region. If you do not specify the regional variety of a language in which your document is authored or into which it is translated, you might obtain unexpected results when you build the document in Publican.

Other language codes

The system of codes used to identify languages in the XML standard is not the only system of languages codes in use in the world today. However, because Publican strives to comply with the XML standard, these are the only codes that Publican supports. In particular, note that the codes used in the GNU tools (identified by their use of underscores and the @ symbol to separate elements — for example, en_GB or sr_RS@latin) do not comply with the XML standard and therefore do not work with Publican.
Publican is an XML publication tool and therefore is designed to use the language codes — or tags — that the World Wide Web Consortium (W3C) designated in the XML specification.[5] These codes are defined in the Internet Engineering Task Force (IETF) document BCP 47: Tags for Identifying Languages.[6]
Language tags are built from one of more subtags, separated from one another by hyphens. In order of appearance within a language tag, these subtags are:
language-script-region-variant
BCP 47 also allows for considerable customization of language tags for special purposes through the use of extension subtags and private-use subtags. Extension subtags allow for finer-tuning of existing subtags, but must be registered with the IETF (none are currently registered). Private-use subtags are introduced by x- and do not need to be registered. Private-use subtags aside, a subtag is valid if it appears in the registry of subtags maintained by the IETF through the Internet Assigned Numbers Authority (IANA).[7] Although Publican will accept any language tag that is valid under the rules presented in BCP 47, it is designed around the assumption that language tags for documents will most usually take the form language-region. A brief description of subtags follows:
language subtag
The language subtag comprises two or more lower-case letters and is the only mandatory part of the language tag. For most widely spoken languages, the language subtag is a two-letter code identical with the language codes specified in ISO 639-1, [8] for example, zh (Chinese), hi (Hindi), es (Spanish), and en (English). Where no two-letter code exists in ISO 639-1, the language subtag is usually a three-letter code identical with the codes specified in ISO 639-2,[9] for example, bal (Balochi), apk (Kiowa Apache), and tpi (Tok Pisin). Finally, a small number of language subtags appear in the IANA registry that have no ISO 639-1 or ISO 639-2 equivalent, such as subtags for the constructed languages qya (Quenya) and tlh (Klingon), and for the occult language i-enochian (Enochian). This last example also illustrates a small number of language subtags grandfathered into the registry that do not match the two-letter or three-letter pattern of codes derived from the ISO 639 standards.

Extended language subtags

RFC 5646: Tags for Identifying Languages[10] issued in September 2009 allows for extended language subtags to follow the language subtag. Extended language subtags are three-letter codes that represent languages that share a close relationship with a language already represented by a language subtag. For example, yue represents Cantonese, but this subtag must always be used with the language subtag associated with it (Chinese), thus: zh-yue. The IETF does not yet recognize RFC 5646 as "Best Common Practice", nor are these subtags part of the XML standard yet.
script subtag
The script subtag comprises four letters — the first one in upper case, the other three in lower case — and defines a writing system. These codes are identical with the four-letter codes specified in ISO 15924.[11] The script subtag is used to identify languages that are commonly written with more than one writing system; the subtag is omitted when it adds no distinguishing value to the language tag overall. For example, sr-Latn represents Serbian written with the Latin alphabet and sr-Cyrl represents Serbian written with the Cyrillic alphabet; az-Arab represents Azerbaijani written in Arabic script and az-Cyrl represents Azerbaijani written with the Cyrillic alphabet. Conversely, French should not be represented as fr-Latn, because French is not commonly written in any script other than the Latin alphabet anywhere in the world.
region subtag
The region subtag comprises either two upper-case letters (for regions that conform to national boundaries) or three digits (for other areas, such as trans-national regions). The two-letter subtags are identical with those from ISO 3166-1[12], for example, AT (Austria), TZ (Tanzania), and VE (Venezuela). The three-digit region subtags are based on those in UN M.49, [13] for example, 015 (Northern Africa), 061 (Polynesia), and 419 (Latin America and the Caribbean).
variant subtag
Variant subtags identify well-defined, recognizable variants of a language or script and can include upper-case letters, lower-case letters, and numerals. Variant subtags that start with a letter must be at least five characters long, and those that start with a numeral must be at least four characters long. Most variant subtags can only be used in combination with specific subtags or combinations of subtags. Variant subtags do not harmonize with any other standard; they are each the result of a separate registration with the IETF by an interested person or group.
Under the present standard, dialects of several languages are designated with variant subtags, for example, nedis denotes Nadiza (also known as Natisone), a dialect of Slovenian. This tag must be used in conjunction with the language subtag for Slovenian, thus: sl-nedis. In September 2009, the IETF issued a Request for Comments (RFC) that (amongst other things) proposes that dialects be represented by language extension subtags attached to language subtags.[14]
Most variant subtags mark a particular orthography, most usually as a result of an official spelling reform or a significant work documenting the language. Examples (with their required language subtags) include: fr-1606nicot (French as documented by Jean Nicot in 1606), de-1901 (German spelling codified by the 2nd Orthographic Conference in 1901) and be-1959acad (Belarusian as codified by the Orthography Commission in 1959).
Finally, some variant subtags denote a particular variant of a system of writing or transliteration. For example, zh-Latn-wadegile is Chinese written in the Latin alphabet, according to the transliteration system developed by Thomas Wade and Herbert Giles; ja-Latn-hepburn is Japanese written in the Latin alphabet using the transliteration system of James Curtis Hepburn.
Publican includes support for the following languages:
  • ar-SA — Arabic
  • as-IN — Assamese
  • ast-ES — Asturian
  • bg-BG — Bulgarian
  • bn-IN — Bengali (India)
  • bs-BA — Bosnian
  • ca-ES — Catalan
  • cs-CZ — Czech
  • da-DK — Danish
  • de-CH — German (Switzerland)
  • de-DE — German (Germany)
  • el-GR — Greek
  • es-ES — Spanish
  • fa-IR — Persian
  • fi-FI — Finnish
  • fr-FR — French
  • gu-IN — Gujarati
  • he-IL — Hebrew
  • hi-IN — Hindi
  • hr-HR — Croatian
  • hu-HU — Hungarian
  • id-ID — Indonesian
  • is-IS — Icelandic
  • it-IT — Italian
  • ja-JP — Japanese
  • kn-IN — Kannada
  • ko-KR — Korean
  • lv-LV — Latvian
  • ml-IN — Malayalam
  • mr-IN — Marathi
  • nb-NO — Norwegian (Bokmål orthography)
  • nl-NL — Dutch
  • or-IN — Oriya
  • pa-IN — Punjabi
  • pl-PL — Polish
  • pt-BR — Portuguese (Brazil)
  • pt-PT — Portuguese (Portugal)
  • ru-RU — Russian
  • si-LK — Sinhalese
  • sk-SK — Slovak
  • sr-Cyrl-RS — Serbian (Cyrillic script)
  • sr-Latn-RS — Serbian (Latin script)
  • sv-SE — Swedish
  • ta-IN — Tamil
  • te-IN — Telugu
  • th-TH — Thai
  • uk-UA — Ukrainian
  • zh-CN — Chinese (People's Republic of China, implicitly simplified Han script)
  • zh-TW — Chinese (Republic of China, implicitly traditional Han script)

Appendix H. Revision History

Revision History
Revision 4.0-4Mon Nov 25 2013Rüdiger Landmann
Improve instructions for translation BZ#1021287
Document use of "sortas" for indexes and glossaries
Revision 4.0-3Thu Nov 14 2013Roman Joost
Clarify where relative paths are used in brand instructions - BZ#1028815
Revision 4.0-2Thu Nov 14 2013Norman Dunbar
Corrected OpenSUSE installation instructions - BZ#1000534
Revision 4.0-1Thu Nov 14 2013Svein Dowdeit
Updated Debian installation instructions - BZ#1013934
Add Docker installation instructions - BZ#1015943
Revision 3.2-1Thu Jul 11 2013Zac Dover
Added command prompts to all commands - BZ#880456
Added quotes around the web_formats list - BZ#839141
Replaced a broken link to kate plugins page on CPAN with a working link - BZ#973461
Updated web site instructions - BZ#979224
Revision 3.2-0Thu Jul 11 2013Jeff Fearn
Publican 3.2.0
Document site config option 'toc_js'
Document build option --pdftool
Document build option --pub_dir
Revision 3.1-0Tue Jan 8 2013Norman Dunbar
Add Section on Installing Publican on OpenSuse 12
Revision 3.0-0Mon Feb 20 2012Jeff Fearn
Publican 3.0
Revision 2.7-1Tue Sep 6 2011Rebecca Newton
Improve documentation of standalone <set> usage
Revision 2.6-1Mon Jul 18 2011Rüdiger Landmann
Document new manual_toc_update parameter -- BZ#719573
Document new update_db action -- BZ#661948
Document new rename action -- BZ#694698
Document new mainfile parameter -- BZ#688585
Include advice about multiple config files for conditionalised books -- BZ#657132
Fix broken command example -- BZ#663211
Incorporate proofreading fixes from Luigi Votta BZ#657576, BZ#663399
Revision 2.4-1Wed Dec 1 2010Rüdiger Landmann
Incorporate proofreading fixes from Luigi Votta BZ#657576
Document not shipping PDFs in known broken languages
Document the web_formats parameter
Document customising desktop menus
Document site_overrides.css
Revision 2.3-0Mon Oct 25 2010Rüdiger Landmann
Document website dump files
Document bump command
Update image width behaviour
Revision 2.3-0Tue Oct 5 2010Rüdiger Landmann
Update lang_stats to include multiple languages
Correct details for web_logo.png BZ#638153
Correct list of characters usable in product names and document titles
Document new web_type parameter and relocate web_host and web_search parameters to site config file
Describe OPDS catalogs
Document product and version pages
Document man page as an output format
Document bridgehead_in_toc parameter
Correction -- def_langs is a site config parameter, not a homepage config file parameter
Revision 2.2-0Thu Aug 19 2010Rüdiger Landmann
Expand on including code samples BZ#604255
Clarify clean_ids BZ#612819
Document --novalid BZ#616142
Revision 2.1-1Fri Jul 16 2010Rüdiger Landmann
Correct and clarify website instructions BZ#614259
Clarify use of Product-Version-Id for packaging
Revision 1.6-1Mon May 24 2010Rüdiger Landmann
Update Ubuntu installation instructions
Revision 1.6-0Fri May 7 2010Rüdiger Landmann
Revise action and option nomenclature
Document print_known, print_banned, and print_unused actions
Correct and expand documentation on installing a brand
Document max_image_width and confidential_text parameters
Document Eclipse help plugin format and supporting parameters
Revision 1.5-0Fri Feb 26 2010Rüdiger Landmann
Document --config option
Revision 1.4-0Wed Feb 17 2010Jeff Fearn
remove obsolete reference to path to the DocBook catalog files. BZ#565498.
document CVS options.
Revision 1.3-0Mon Dec 7 2009Rüdiger Landmann
Add an FAQ entry about code highlighting errors.
Add a section about valid formats.
Update author list.
More specific installation instructions for Ubuntu; add installation instructions for Debian. BZ#542711
Metadata in the Book_Info.xml file
Revision 1.2-0Fri Nov 27 2009Jeff Fearn
Document lang_stats action. BZ#540696.
Revision 1.1-1Thu Nov 26 2009Jeff Fearn
Fix wrong docs for condition usage. BZ#540691
Revision 1.1-0Thu Oct 22 2009Rüdiger Landmann
Fix various small inconsistencies and general clean up
Revision 1.0-0Tue Oct 13 2009Rüdiger Landmann
Updated for Publican 1.0
Revision 0.5-0Thu Dec 18 2008Jeff Fearn
Added appendix on Makefile parameters
Added entry to FAQ about java heap space.
Revision 0.4-0Tue Nov 25 2008Brian Forté
Added "Pre-release and draft documentation" section.
Revision 0.3-0Fri Oct 10 2008Don Domingo
Adding "Conditional Tagging" section.
Revision 0.2-0Fri Sep 05 2008Brian Forté
General edits and updates related to Publican 0.36 release. Also, new section added to Chapter 3.3.
Revision 0.1-1Fri Jun 06 2008Murray McAllister
Updated Branding to note addition of oVirt and GIMP brands
Revision 0.1-0Fri May 16 2008Jeff Fearn
Updated FAQ
Revision 0.0-0Thu Dec 13 2007Murray McAllister
Initial content release